How to Add an AI Agent Widget to Your Module Page
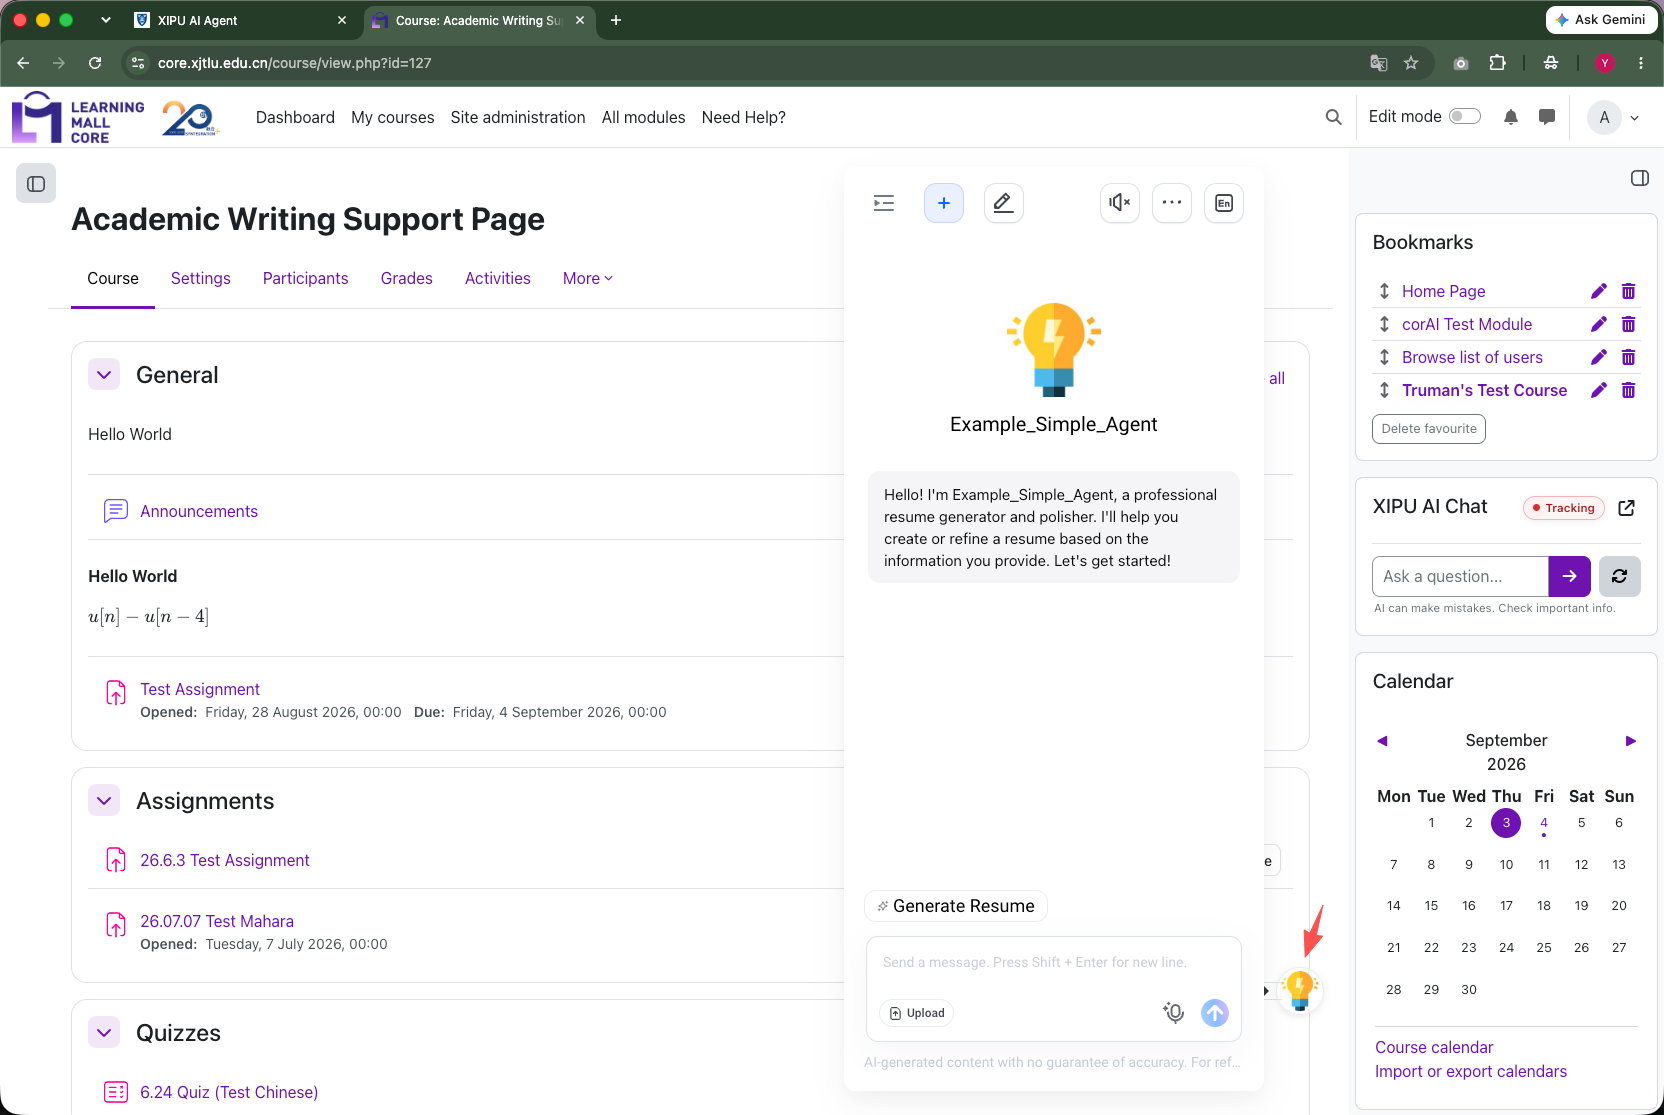
An example of AI Agent Widget
Overview:
This guide explains how to publish an AI Agent and embed it into your module page on Learning Mall Core.
Table of Contents
Part 1: Publish the Agent in XIPU AI Agent
Step 1: Publish the Agent configuration
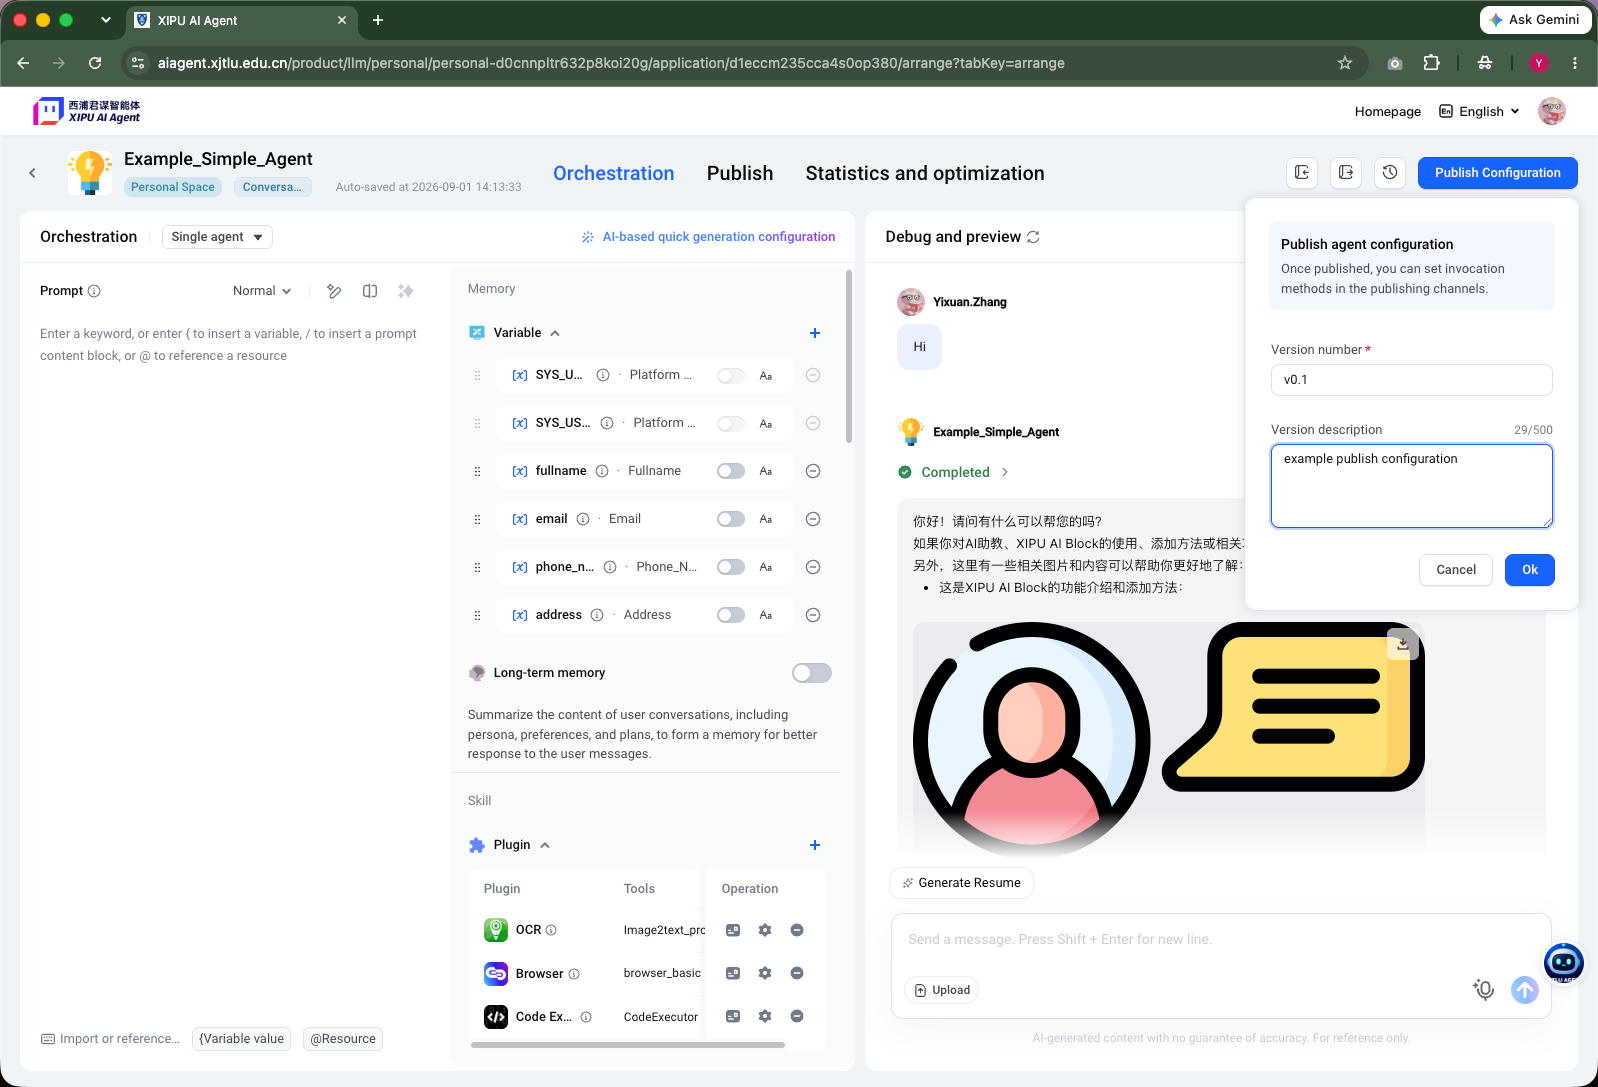
After you have finished configuring and testing your Agent, click Publish Configuration in the top-right corner.
Enter a version number and a short description, then click OK.
Step 2: Enable Web SDK
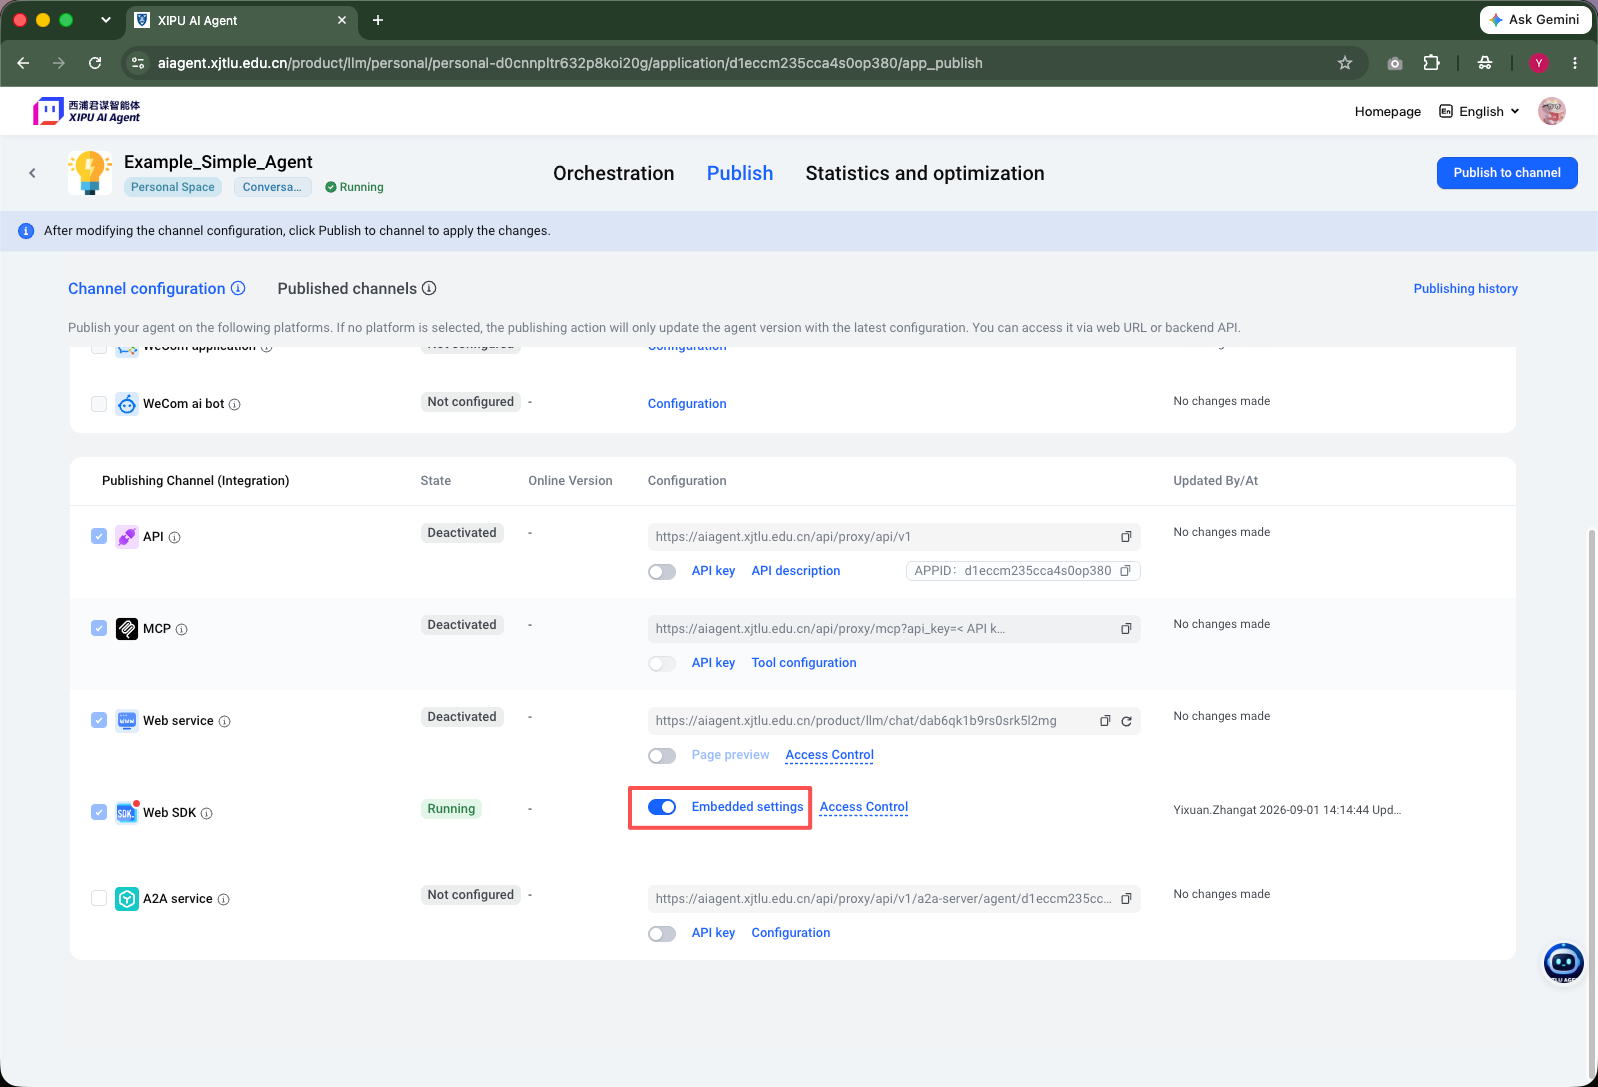
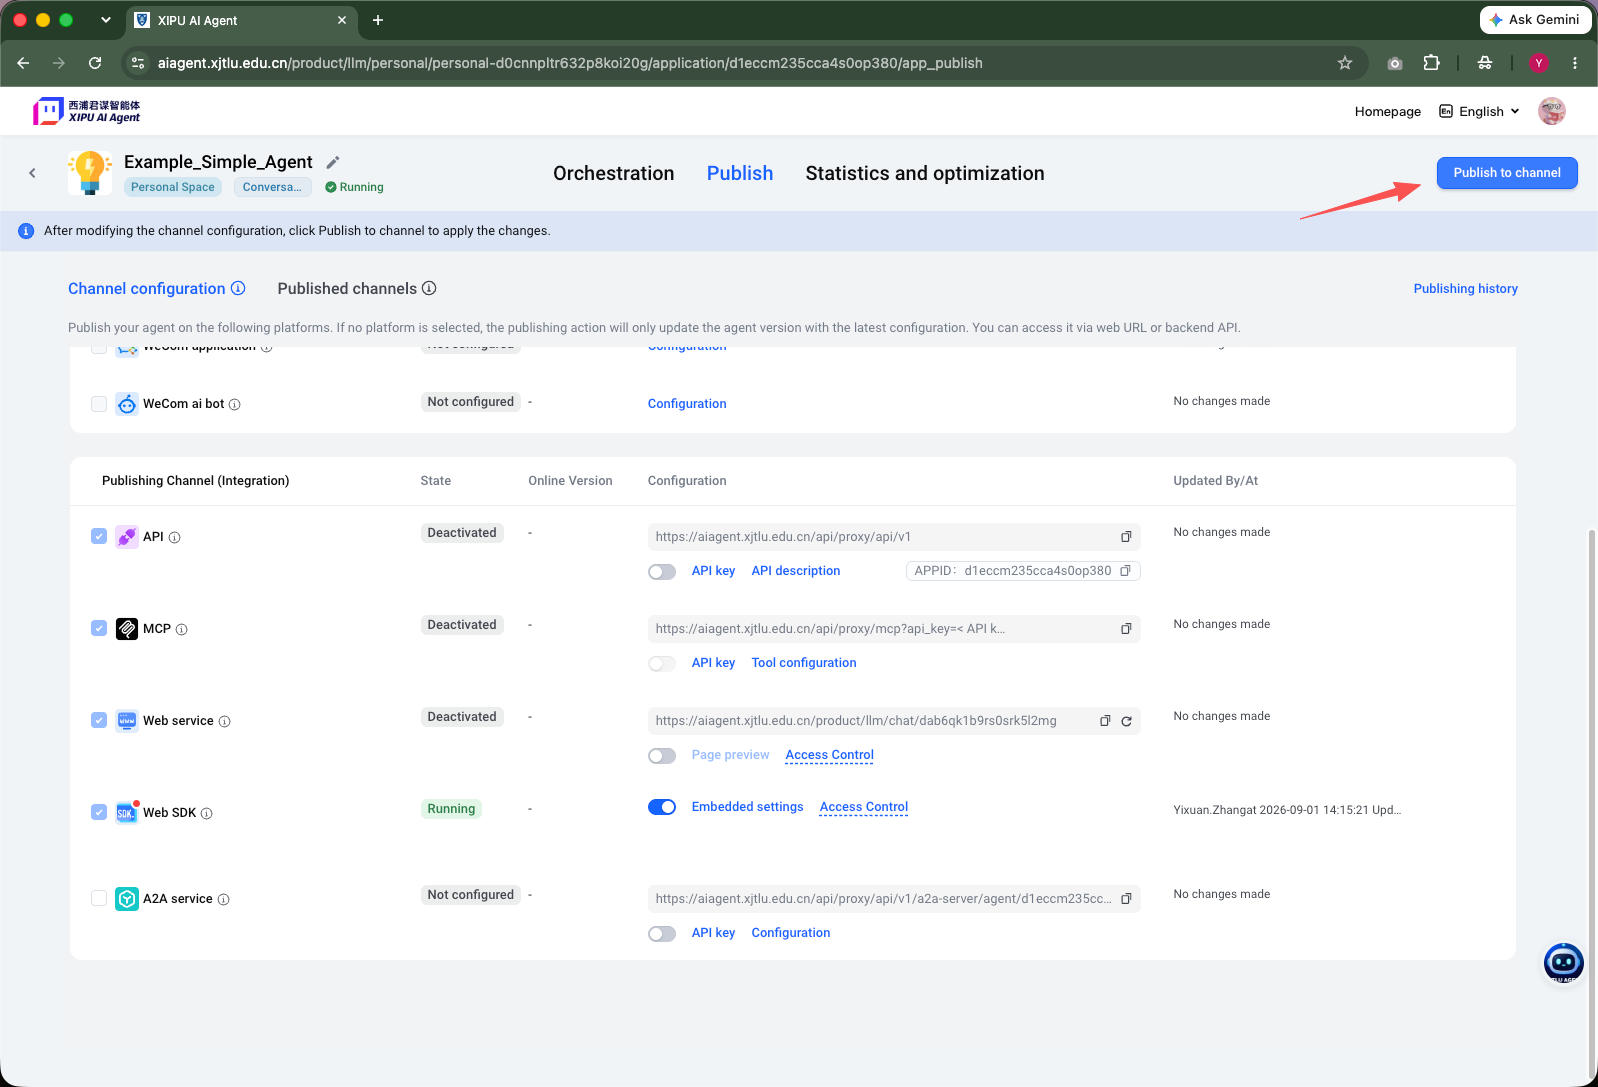
- Go to the Publish tab.
- Under Publishing Channel (Integration), locate Web SDK and enable it.
- The Web SDK is required for displaying the Agent directly inside Learning Mall.
Step 3: Configure Access Control
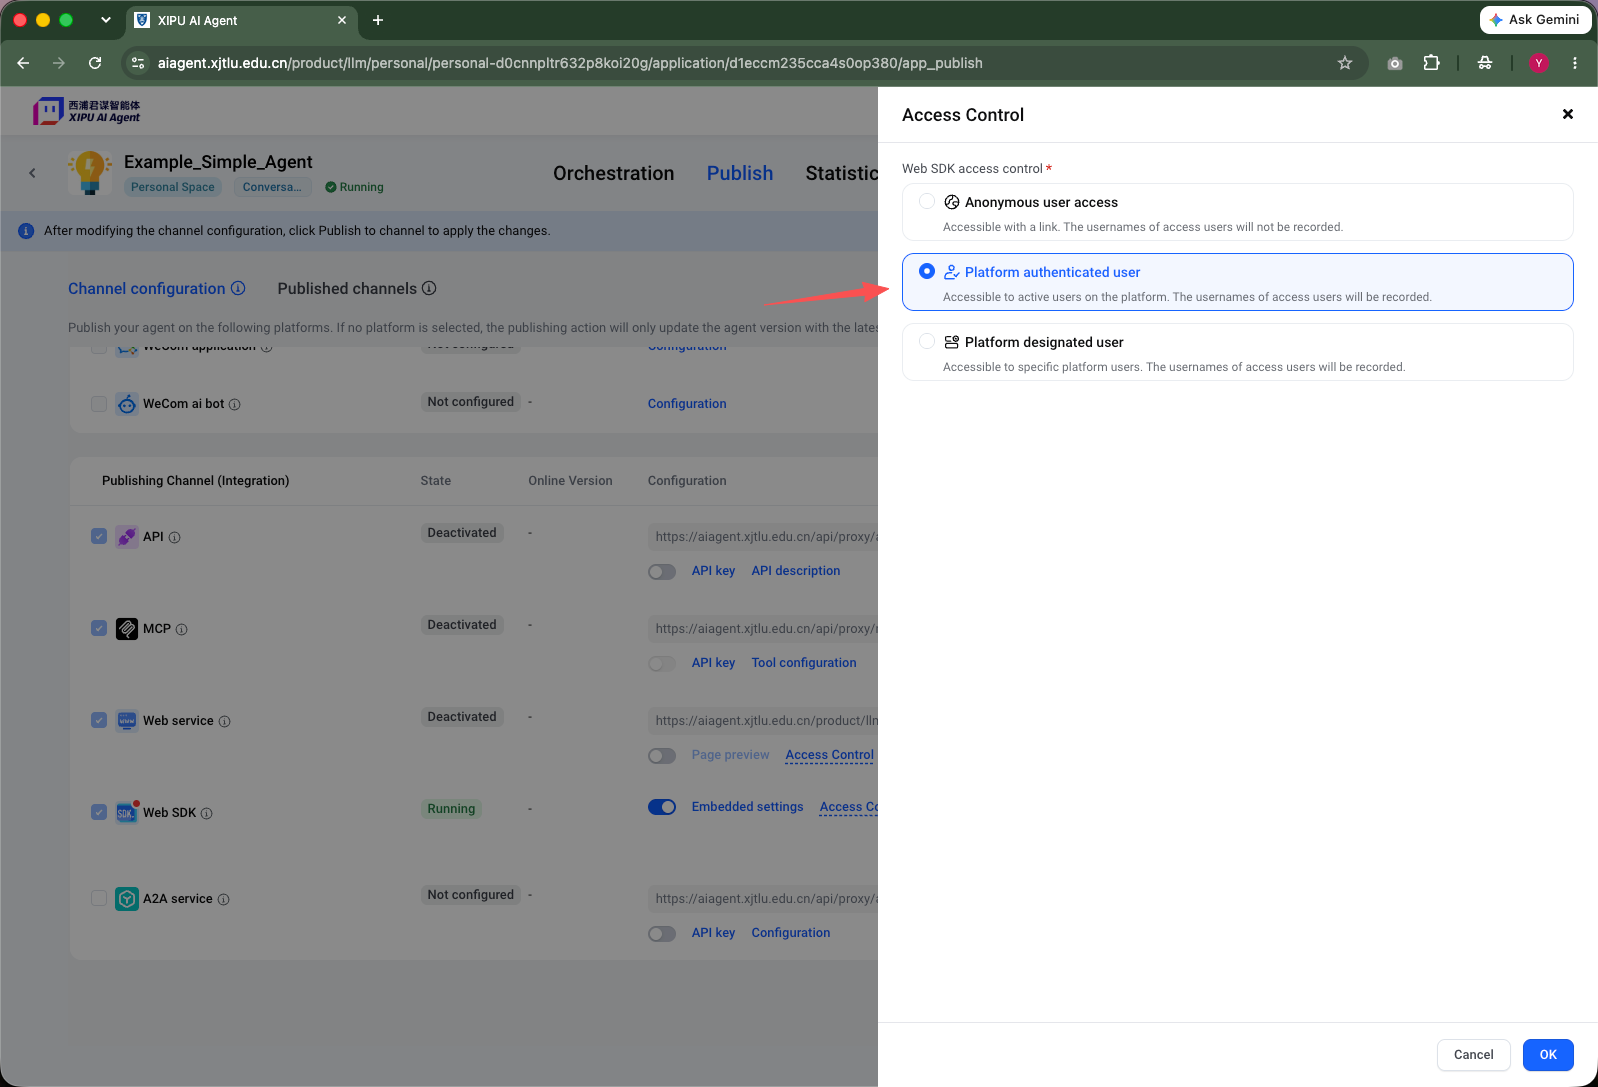
- Next to Web SDK, click Access Control.
- Select: Platform authenticated user, then click OK.
- This option allows authenticated Learning Mall users to access the Agent and enables the platform to identify the user.
Step 4: Publish to the channel
After enabling and configuring Web SDK, click Publish to channel in the upper-right corner.
The publishing request may require approval. If you see Submitted for Publishing, please wait until the publishing process has been approved and completed before continuing.
Step 5: Open Embedded Settings and Copy the appKey
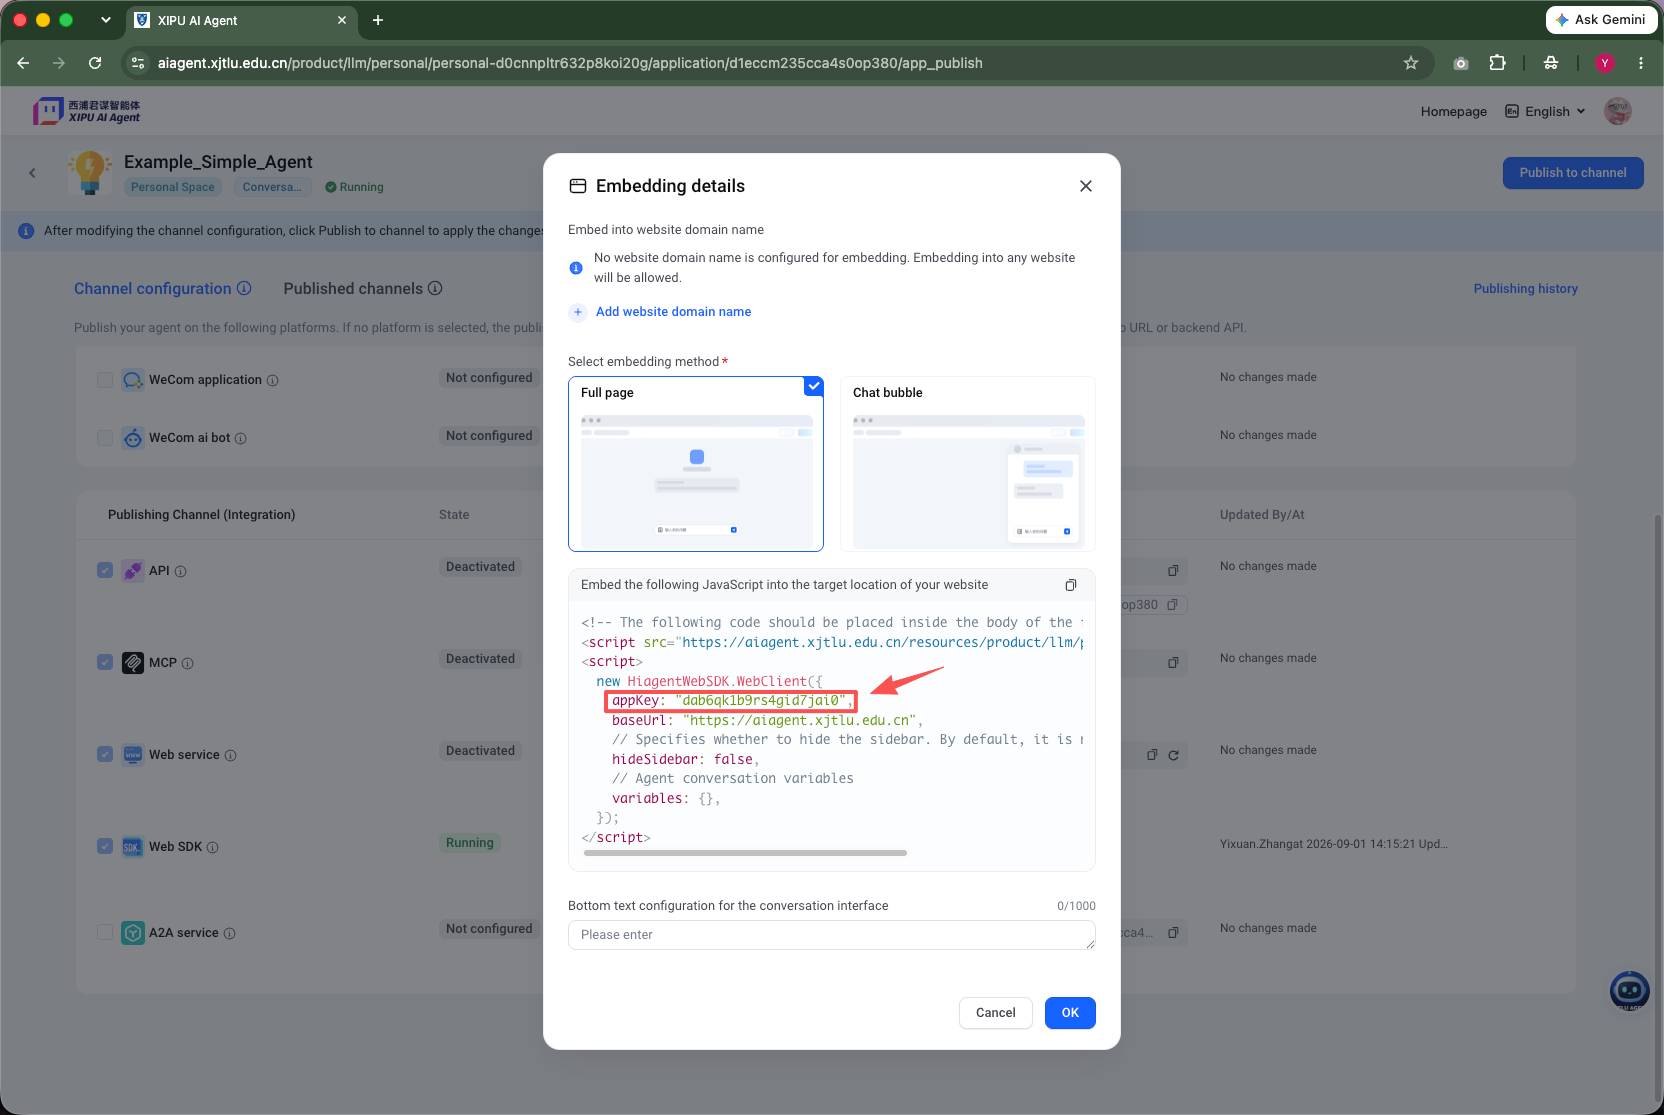
Once Web SDK is available, click Embedded settings next to Web SDK. You will see the JavaScript configuration used for embedding the Agent.
In the generated code, find:
appKey
appKey: "dab6qk1b9rs0jsk5l2mg"Copy only the App Key value.
You do not need to copy the complete JavaScript code.
Part 2. Add the Agent to your Learning Mall Module
Step 6: Turn editing on
Open your module page in Learning Mall Core.
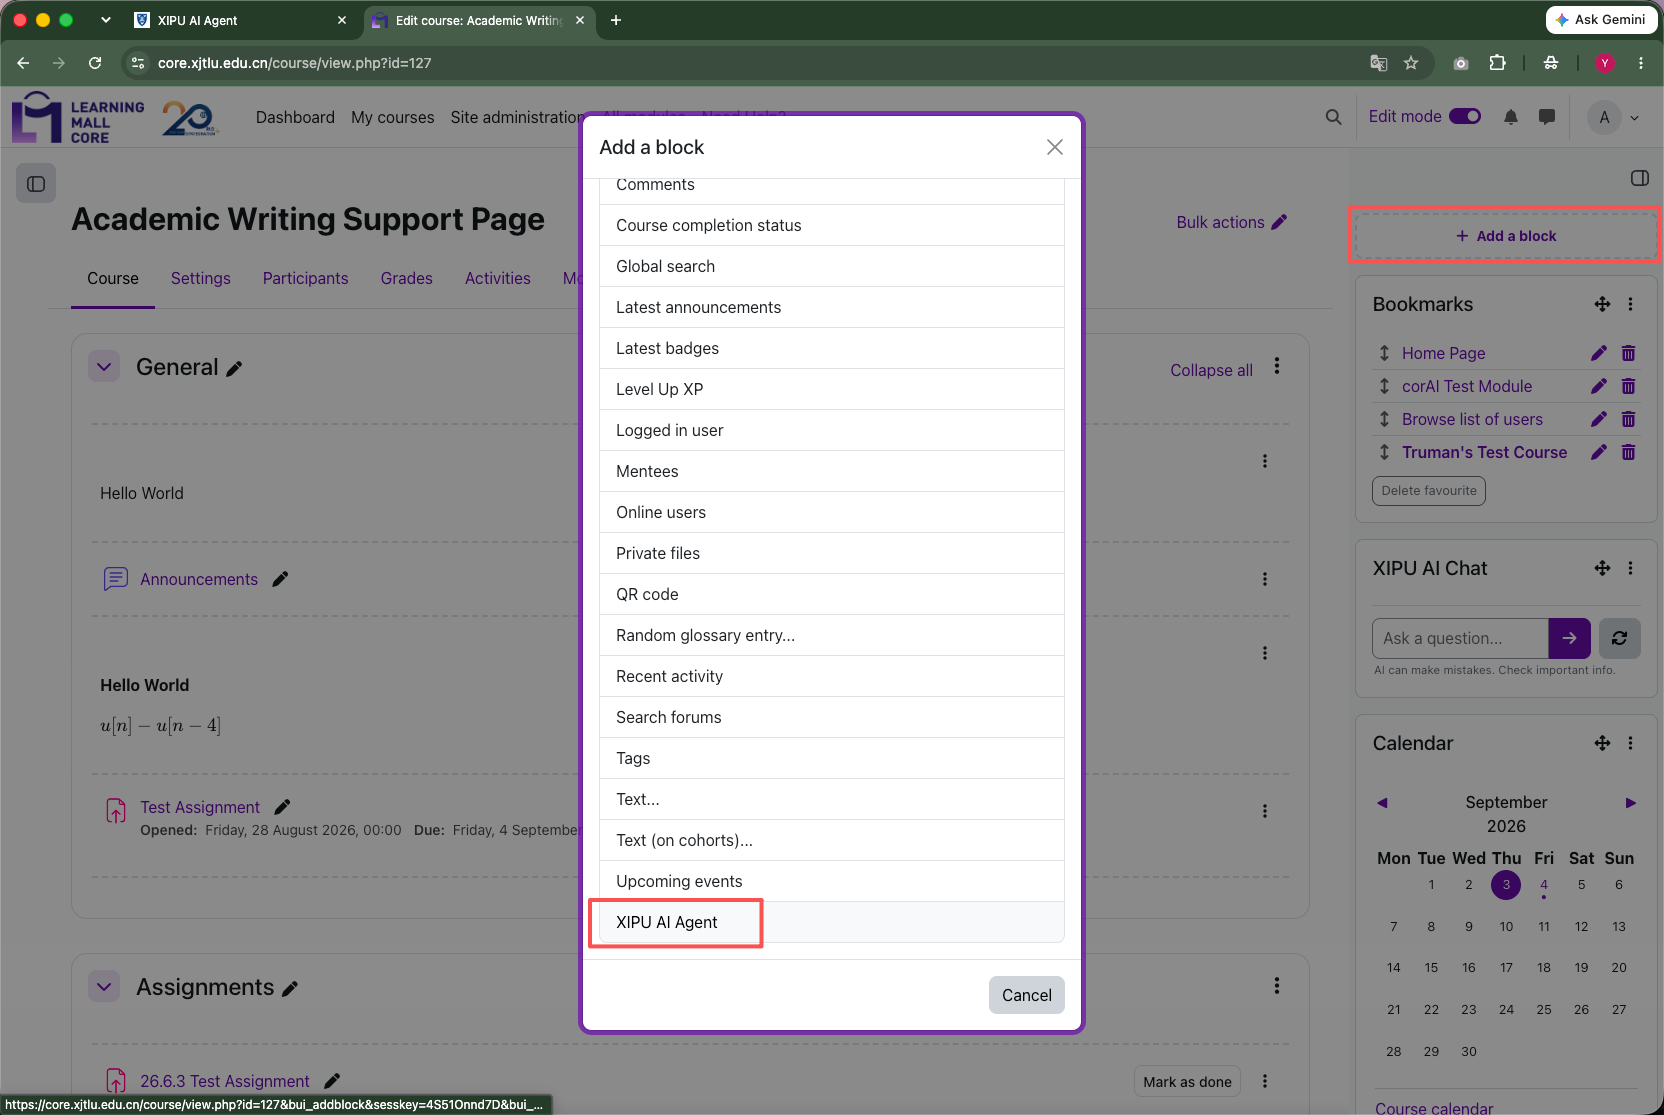
- Turn Edit mode on. In the block area on the right-hand side, click: "+ Add a block"
-
From the list of available blocks, select: XIPU AI Agent. The new Agent block will appear on the right-hand side of your module page.
Step 7: Configure the AI Agent block
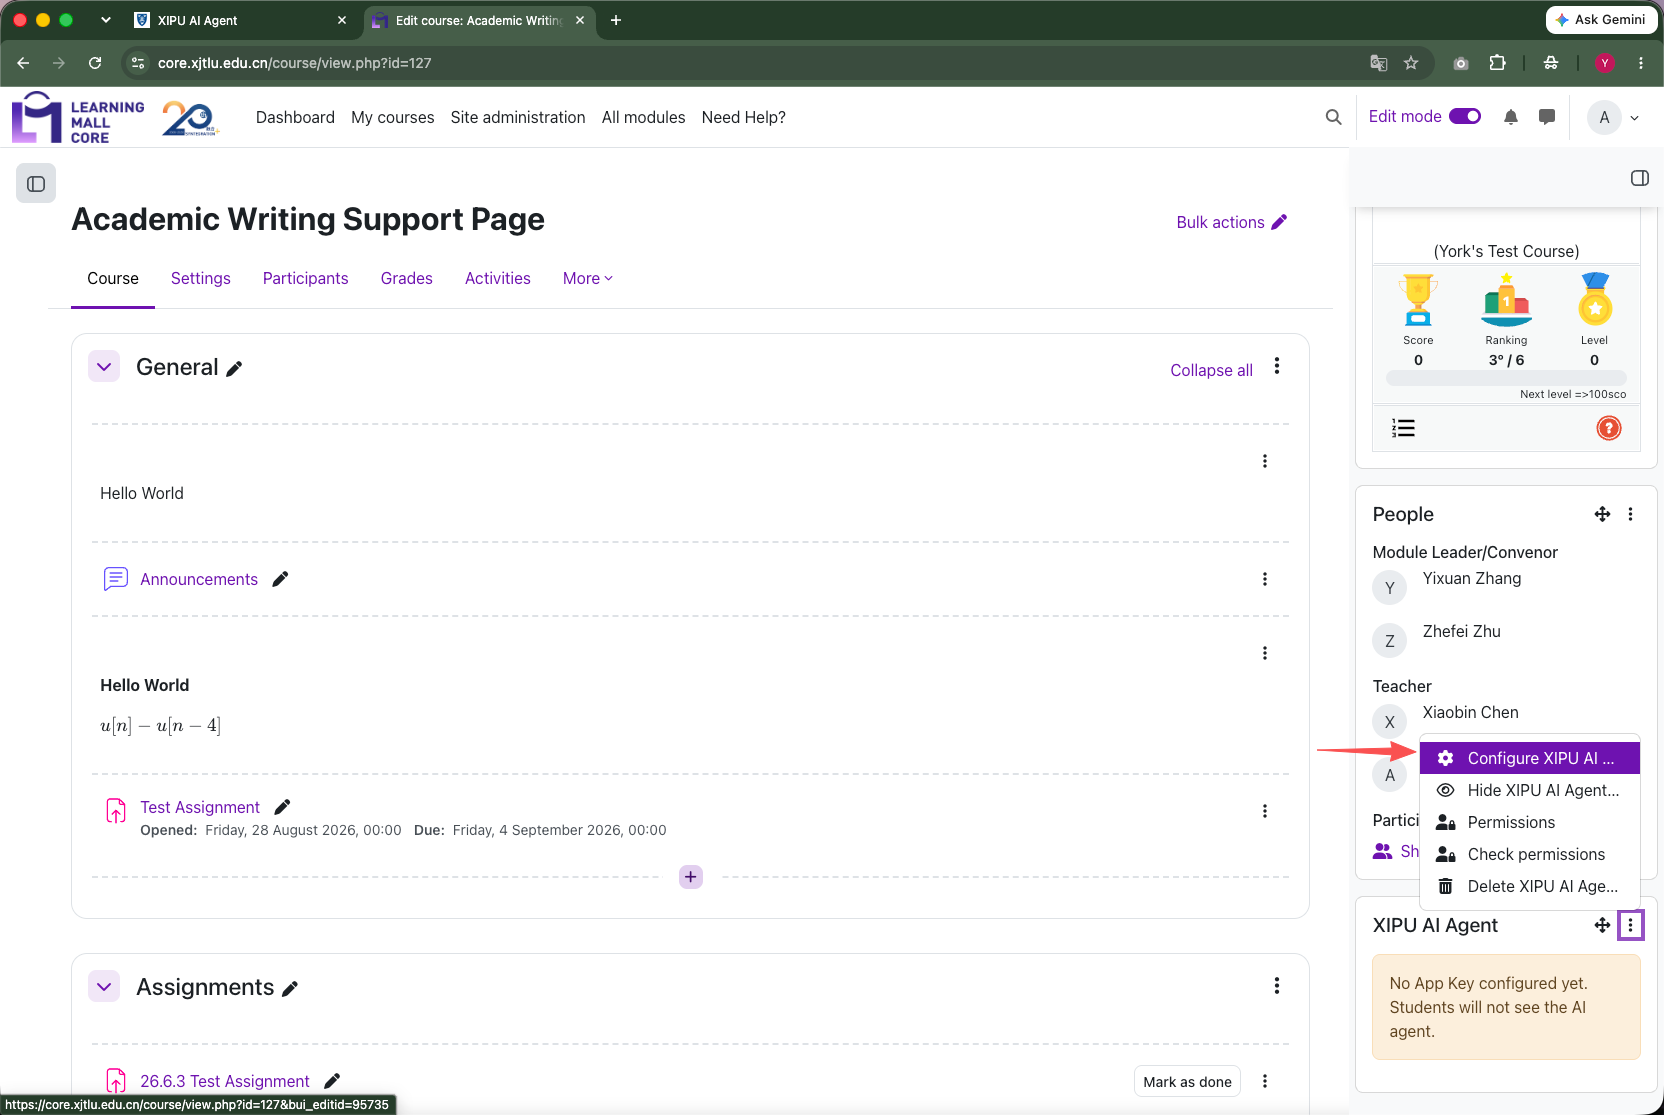
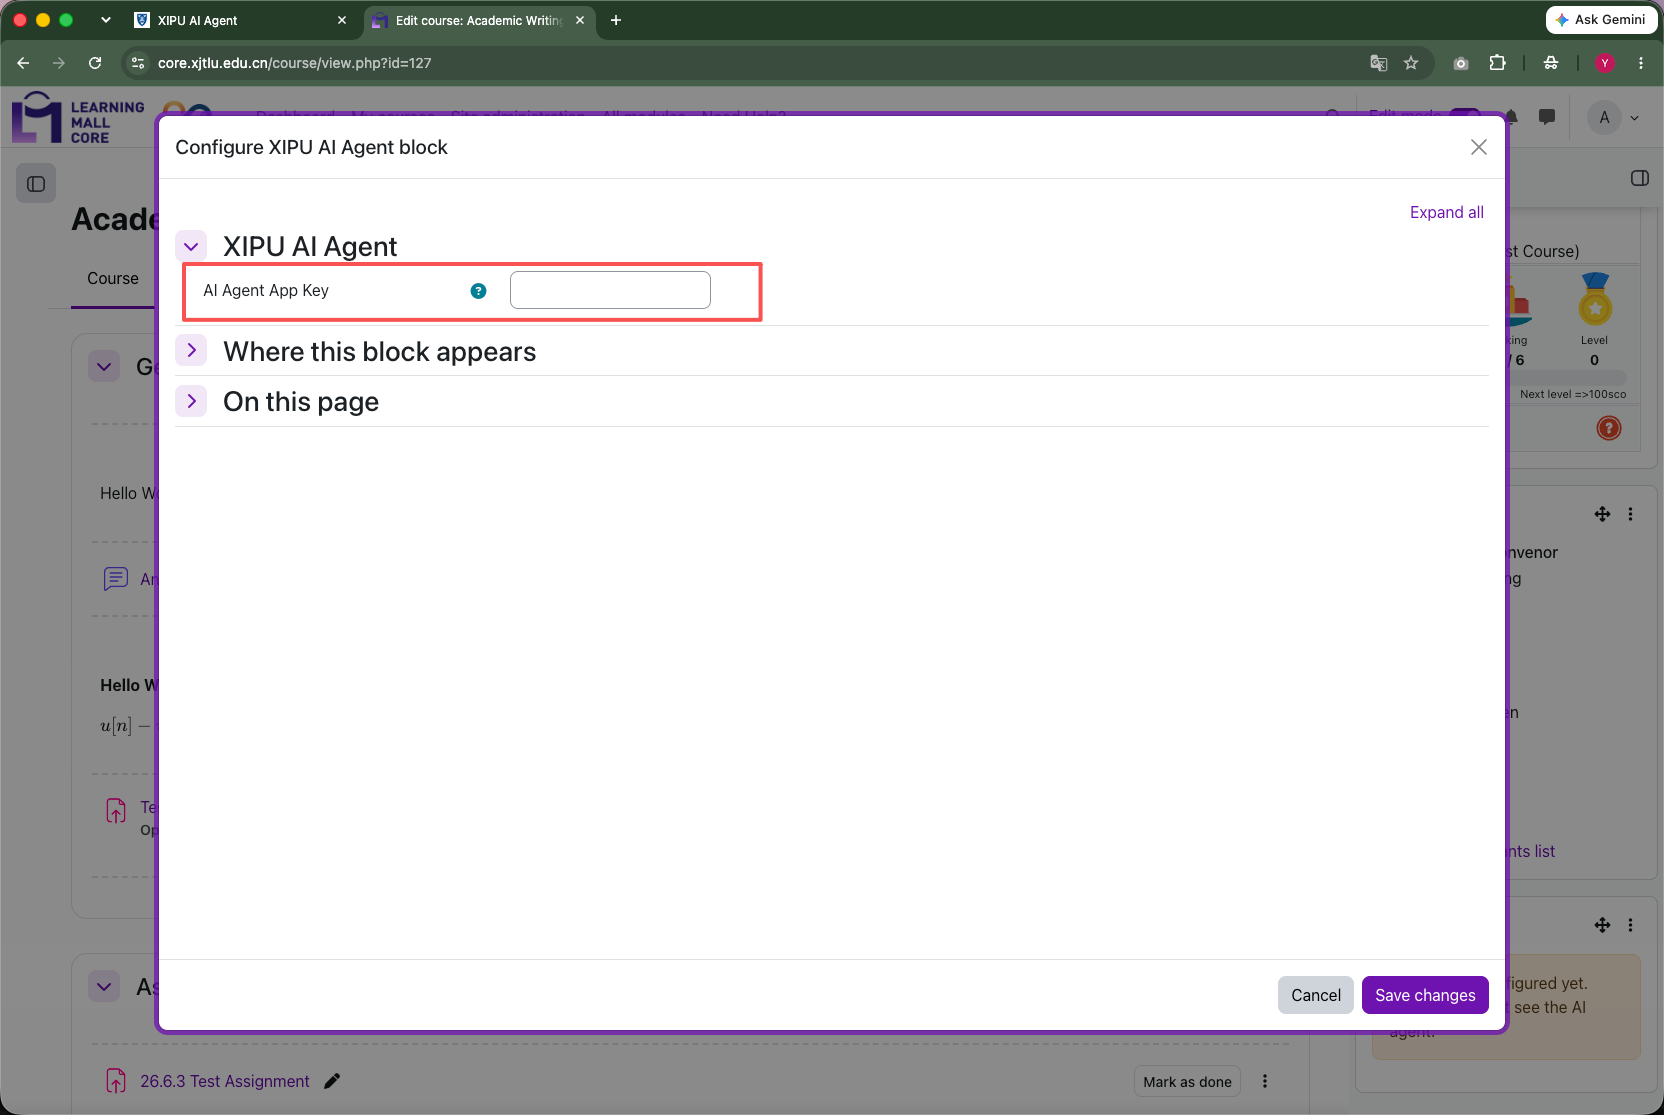
Open the action menu for the XIPU AI Agent block and select: Configure XIPU AI Agent block
Step 8: Paste the appKey
Paste the App Key copied from XIPU AI Agent into: AI Agent App Key. Then click Save changes.
Part 3: Check the Agent
After saving the configuration, turn Edit mode off. You should now see a small Agent icon on the module page and click the icon to open the Agent interface. You can send a test message to confirm that the Agent loads and responds correctly.
Important: Enable Local Network Access in Chrome
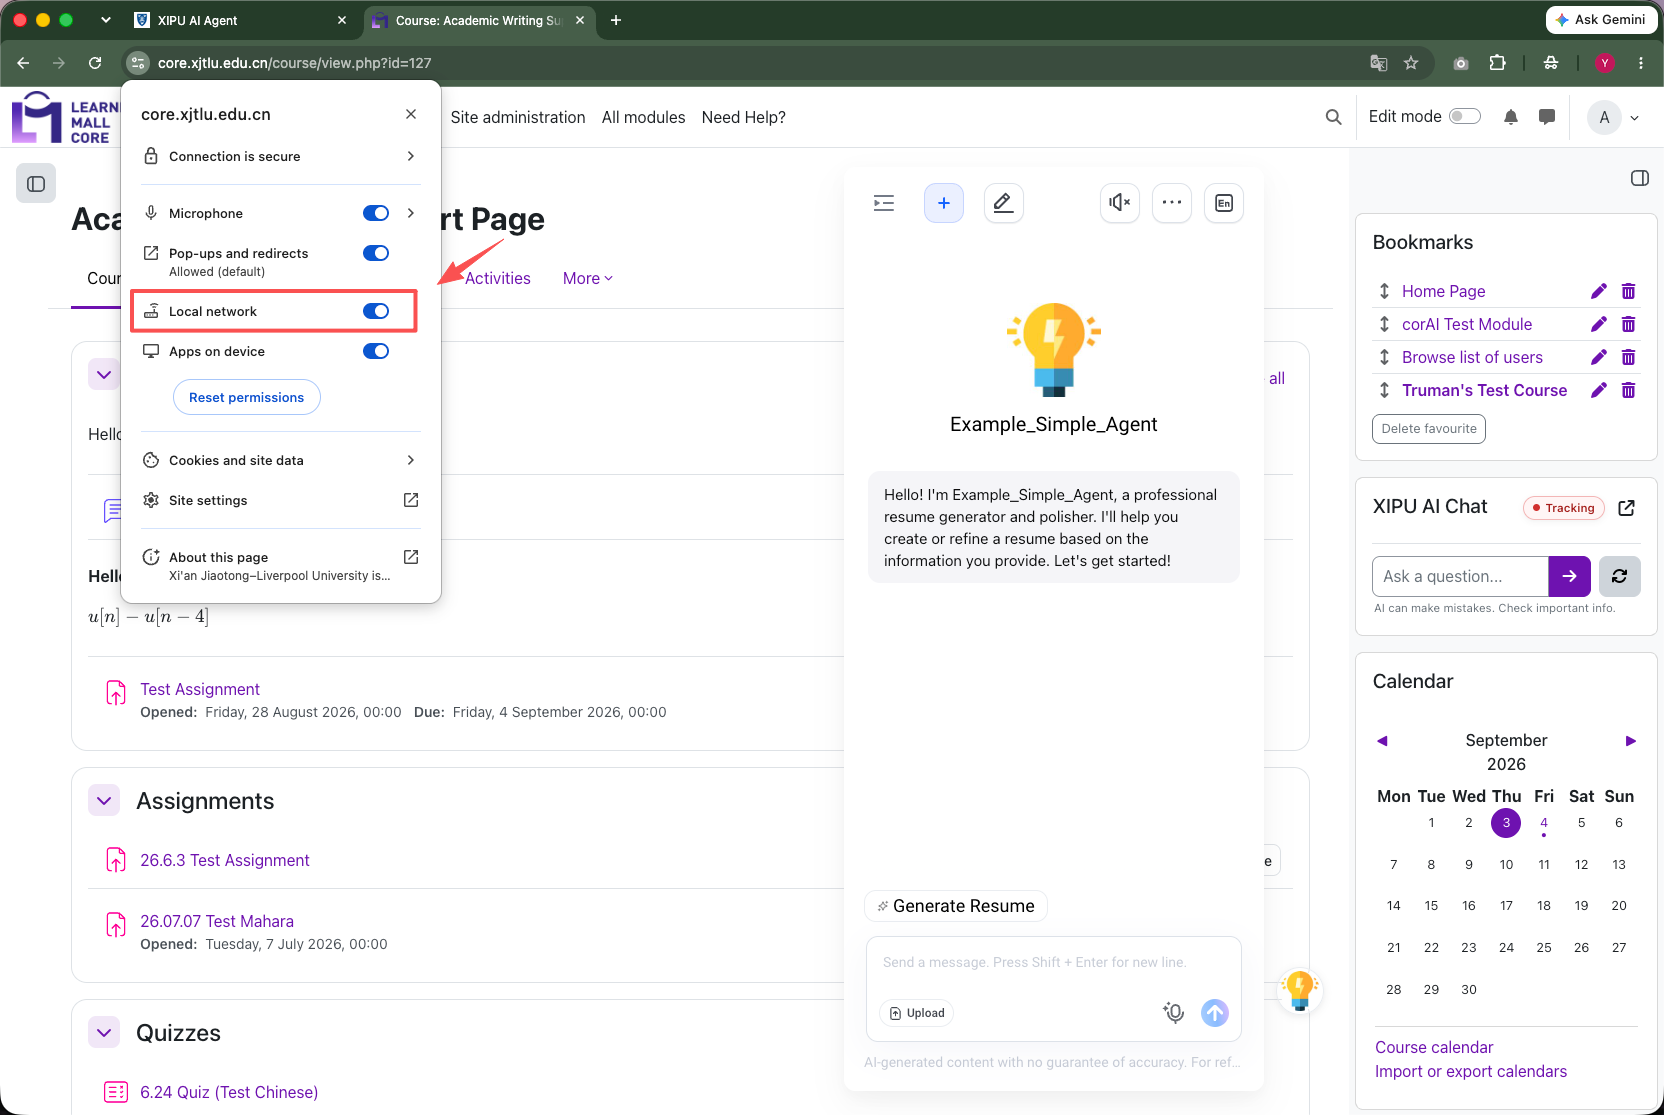
If the Agent does not load, or the Agent interface appears blank, please check the browser's site permissions.
In Chrome:
- Click the site settings icon next to the Learning Mall URL.
- Find Local network.
- Make sure it is enabled.
- Refresh the Learning Mall page.
This permission may be required for the embedded AI Agent to communicate correctly with the XIPU AI Agent service.
Article Number: 431
Author: Thu, Sep 3, 2026
Last Updated: Thu, Sep 3, 2026
Author: Knowledge Base Administrator
Online URL: https://knowledgebase.xjtlu.edu.cn/article/how-to-add-an-ai-agent-widget-to-your-module-page-431.html