2 - Use BigBlueButton for Student Presentation
Overview:
This guide will explain how you can use BigBlueButton in your module area to facilitate student online presentations. It will cover the essential settings you need to configure within the activity settings page as well as some of the matters related to the session management and organisation.This guide involves a number of prerequisites and in order to understand and follow this guide you need to know how to:
- Access a module area on Learning Mall Core
- Enable module area editing
- Add a BigBlueButton activity to your module area
For the best possible user experience please use the most up-to-date version of a modern web browser such as Firefox or Chrome and use a laptop or desktop PC. Screen sharing is not supported in Safari as well as on portable devices such as tablet sand smartphones.
Table of Contents
- Step 1: Configuring the activity setting
- Step 2: Joining a BBB session
- Step 3: Checking user status
- Step 4: Taking Presenter role
- Step 5: Adding presentation slides, sharing webcam and desktop screen
- Step 6: Managing users during presentation
- Step 7: Recording, pausing/resuming and finishing the session
- Step 8: Sharing desktop screen to deliver a PowerPoint presentation
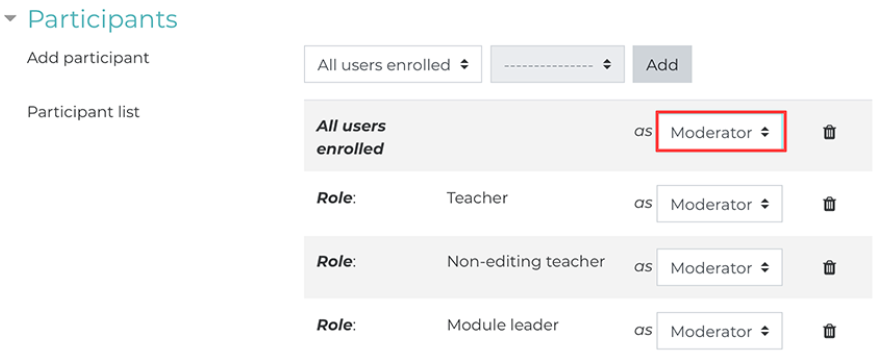
Step 1: Configuring the activity setting
In the BBB activity settings, scroll down to the ‘Participants’ tab and assign a Moderatorrole for ‘All Users enrolled’. This allows all users enrolled in your ICE module area to join the session as a moderator and therefore take the Presenterrole and upload presentation slides and share their screen.
Step 2: Joining a BBB session
Upon entering the BBB room, each user will be required to connect an audio device in order to join the session and there are two options available. Users can either connect their microphone in order to interact with others in the room or connect their headphones to only listen to the session.
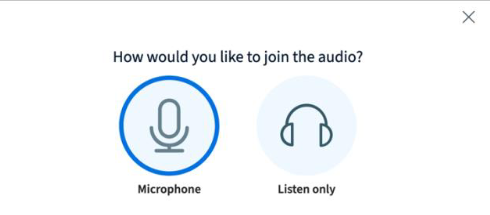
Please note that in order for students to fully participate in the presentation they need to connect their microphone.
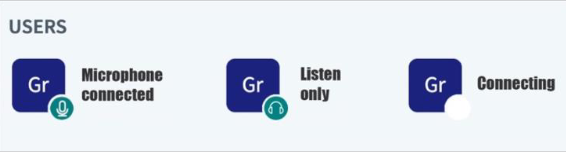
Step 3: Checking user status
All users joining the session are visible in the Users window which includes full user name and an appropriate icon. At the start of the session, you can quickly check that all the students are properly connected.
Step 4: Taking Presenter role
In order for students to upload presentation slides and share their desktop screen they need to take the Presenter role. Presenter role can be taken by students by clicking on their user icon and selecting ‘Take Presenter’ which will also change the student profile icon.Students can also use the same menu to mute/unmute their microphone if necessary.
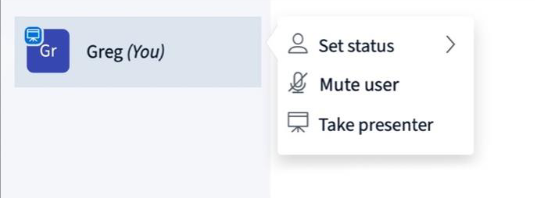
Please note that there can only be one presenter at a time and the presenter role can be taken by or given to any user present in the session.
Step 5: Adding presentation slides, sharing webcam and desktop screen
While in presenter role, students can upload presentation slides, share their webcam and desktop screenand change presentation slidesusing the icons at the bottom of the presentation window.
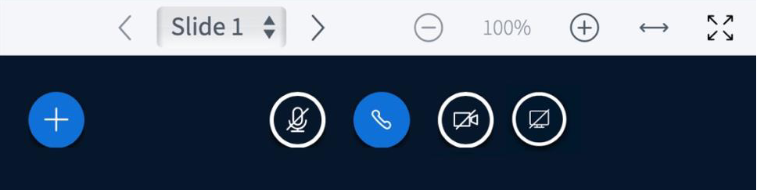
Please note that screen sharing is a very resource intensive feature which relies on reliable and fast internet connection. Therefore, this feature should only be used when it is absolutely necessary.
Step 6: Managing users during presentation
As a teacher, you can also manage users during the presentation by clicking on their profile picture. You can then:
- Start a private chat with an individual user
- Mute users if their microphone is interfering with the session audio
- Promote a user to ‘Presenter’
- Demote a user to ‘Viewer’
- Remove users if they are in the wrong room

Step 7: Recording, pausing/resuming and finishing the session
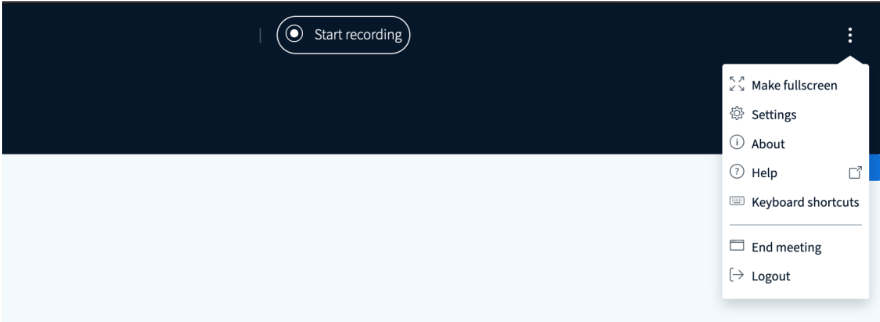
Click record on top of the presentation window to initiate session recording. You can also pause and then resume the recording if needed. Finally, to close the session, go to the menu in the upper-right corner and click ‘End Meeting’.
Step 8: Sharing desktop screen to deliver a PowerPoint presentation
Big Blue Button allows students to upload a PowerPoint presentation to be used during the session. However,the presentation slides will be converted and only text and images will be displayed during the session. If presentation slides include any animations and transitions these will NOT be displayed.
If students insist on using a PowerPoint presentation which includes transitions and animations, instead of uploading the presentation slides, they can share their desktop screen in order to run the presentation slideshow from their PC. However, students need to follow the steps below and also be able to switch between the BBB browser and the PowerPoint application windows depending on their operating system.
Step 1: While running the BBB browser window, open the PowerPoint application in a separate window.
Step 2: Navigate to the PowerPoint application window and launch the slideshow.
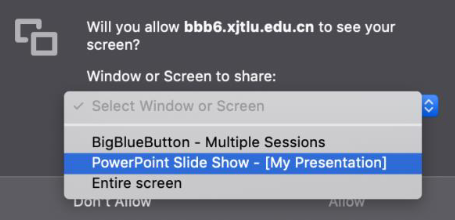
Step 3: Go back to the BBB browser window, click ‘Share Screen’ and select the ‘PowerPoint Slide Show Option’
Step 4: Navigate back to the PowerPoint slideshow and continue your presentation.
Tips:
In order to navigate between the BBB browser and the PowerPoint application windows students can use Mission Control on Mac or Task Switcher (Alt + Tab) on Windows.
Article Number: 46
Author: Mon, Aug 17, 2020
Last Updated: Mon, Aug 22, 2022
Author: Yiqun Sun
Online URL: https://knowledgebase.xjtlu.edu.cn/article/2-use-bigbluebutton-for-student-presentation-46.html