How to download and migrate ICE module area content to the Learning Mall Core

Adding files to a Learning Mall Core module area
Overview:
This guide will show you how to manually download and migrate module area content from ICE to the Learning Mall Core.
Here is the link to the ICE system: https://ice.xjtlu.edu.cn/login/index.php
What to know:
The download and migration process can be completed in a few simple steps, and will enable you to quickly get started setting up your new module area on the Learning Mall Core. Please also note that if your existing ICE module area content is very large in size, please make sure you have sufficient space on your computer to store these files temporarily prior to uploading them to the Learning Mall Core platform.
Table of Contents
- Step 1: Access Your ICE Module Area
- Step 2: Access the Download Center Link
- Step 3: Files and Folders List
- Step 4: Downloading Files and Folders
- Step 5: Locate the Downloaded ZIP File
- Step 6: Unzip the ZIP File
- Step 7: Access the Learning Mall Core
- Step 8: Uploading Files To Your Learning Mall Core Module Area
Step 1: Access Your ICE Module Area
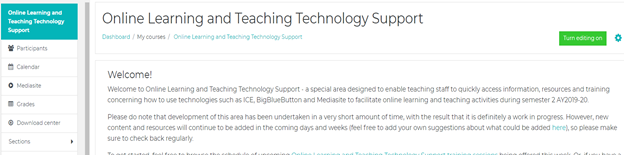
Access your ICE module area.
Step 2: Access the Download Center Link
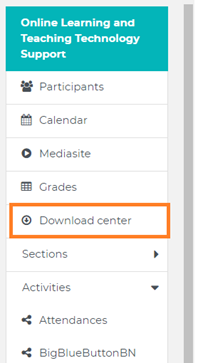
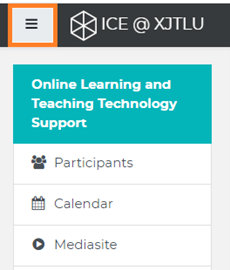
Next, locate and click on the 'Download center' link displayed within ICE's navigation drawer.
Note that if you cannot view the navigation drawer, please click on the "hamburger" button displayed in the top left-hand corner of your module area to make it visible.
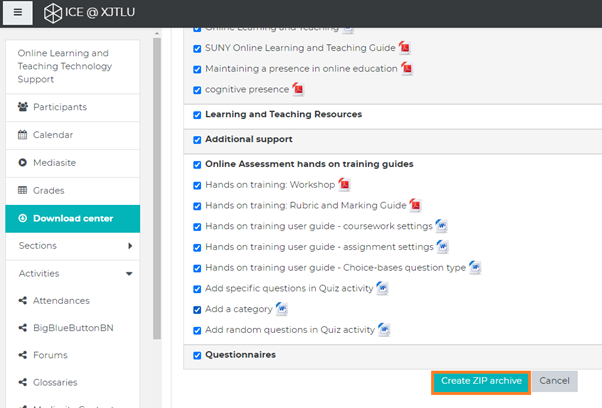
Step 3: Files and Folders List
You now should see a page listing all of the sections, files and folders present within your module, as well as corresponding check boxes.
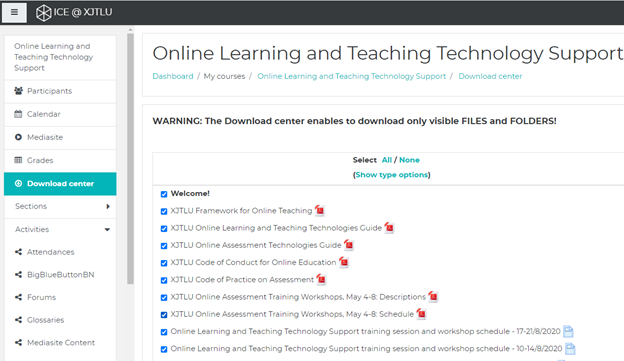
Note: Only files and folders which are set to be visible (i.e. not hidden from students) will be listed via this page and available for download. Please also note any activities e.g. Assignments, Forums, etc. present within your ICE module area will not be listed, and these will need to be recreated within your Learning Mall Core module area.
Step 4: Downloading Files and Folders
To quickly download all of the files and folders listed, click the ‘Create ZIP archive’ button displayed near the bottom of the page. Alternatively, please un-check any items listed that you do not wish to download before clicking the 'Create ZIP archive' button.
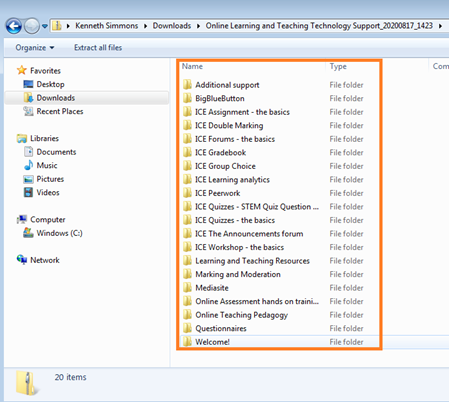
Step 5: Locate the Downloaded ZIP File
You should now find a ZIP file containing all of your selected files and folders has been saved to the Downloads folder on your computer.

Step 6: Unzip the ZIP File
After unzipping the ZIP file, will find all of your files and folders listed.
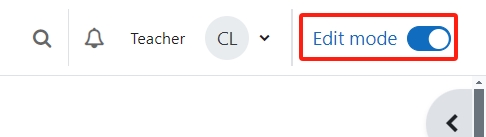
Step 7: Access the Learning Mall Core
Next, within your new Learning Mall Core module area, navigate to the top right hand-corner of the page and enable the 'Edit mode' button.
Step 8: Uploading Files To Your Learning Mall Core Module Area
You can now simply drag-and-drop the files and folders from your unzipped folder into the relevant section of your Learning Mall Core module area. Note that multiple files can be dragged and dropped simultaneously i.e. there is now need to drag-and-drop files one at a time).

Once complete, your files will be available to view within your module area.
Tips: Please note that there is an upload file size limit of 100MB and the speed of the upload may vary depending on the size of your file.
Article Number: 76
Author: Tue, Aug 18, 2020
Last Updated: Fri, Mar 15, 2024
Author: Kenneth Simmons
Online URL: https://knowledgebase.xjtlu.edu.cn/article/how-to-download-and-migrate-ice-module-area-content-to-the-learning-mall-core-76.html