How to add a Questionnaire activity
An example of the Questionnaire activity
Overview:
This guide will show you how to add a Questionnaire activity.
What to know:
The questionnaire activity allows you to construct surveys using a variety of question types, for the purpose of gathering data from users. It is also possible to construct personality tests to measure a person's social interaction skills and patterns of behaviour and display complicated charts to the participants after the tests.
Table of Contents
- Step 1: Turn on editing mode in your module area/course
- Step 2: Click ’Add an activity or resource ’ link
- Step 3: Choose the Questionnaire activity
- Step 4: Configure the general setting
- Step 5: Configure the availability settings if needed
- Step 6: Configure the response settings
- Step 7: Configure the content options
- Step 8: Save changes
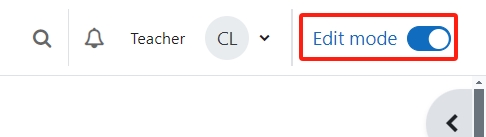
Step 1: Turn on editing mode in your module area/course
Click the ’Turn editing on’ button displayed near the upper right of the module area/course.
Step 2: Click ’Add an activity or resource ’ link
- When editing mode is turned on, navigate to the section where you want to add the Questionnaire activity.
- Next, click the ’Add an activity or resource’ button displayed at the bottom of the section.
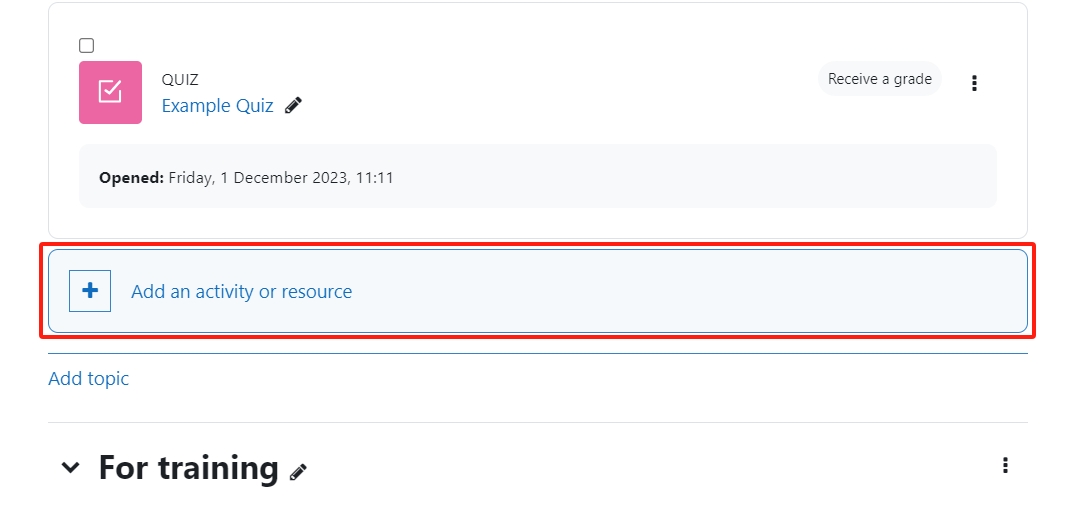
Step 3: Choose the Questionnaire activity
- From the pop-up activity chooser window, search and select the Questionnaire activity.
- Then it jumps to the setting of the activity.

Step 4: Configure the general setting
You need to put in a name for this activity (required). You can put in a description of the activity as well if preferred.

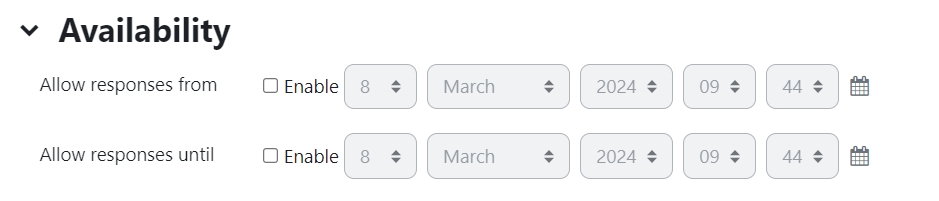
Step 5: Configure the availability settings if needed
Step 6: Configure the response settings
Type: you can control how many times your respondents can respond to the survey.
Respondent Type: you can set to display the respondent's name in the results or set it to be anonymous. Once the "anonymous" option has been set in a questionnaire, it's impossible to revert to the "fullname" option, for obvious privacy reasons. So be careful when you set your questionnaire to "anonymous". Note: If your module allows guests, they will only be allowed to respond to a questionnaire whose responses have been set to anonymous.
Students can view ALL responses: you can set if and when students can view the responses.
Send submission notifications: if you set it to "Notification only", students will receive an email confirming that a submission was made. If you set this to "Full submission", students will receive an email with the entire submission content.
Save/ Resume answers: Setting this option allows users to save their answers to a questionnaire before submitting them. Users can leave the questionnaire unfinished and resume from the save point at a later date.
Allow branching questions: the Conditional Branching feature enables the Questionnaire creator to "branch" the respondent to different pages according to their choice of response to Yes/No, Dropdown boxes or Radio button questions.
Auto numbering: if you have multiple questions or pages, you can choose to split them up and number them. You might want to disable automatic numbering for questionnaires with conditional branching. It is recommended to enable the progress bar if you have a long survey, so your respondents can see how many questions they have answered.
Submission grade: the questionnaire activity is not meant to test the student's knowledge and therefore the responses cannot/should not be graded as correct or incorrect. However, in order to encourage the students to complete a questionnaire, you may choose to award the student a grade (on a 1-100 scale) upon completion.

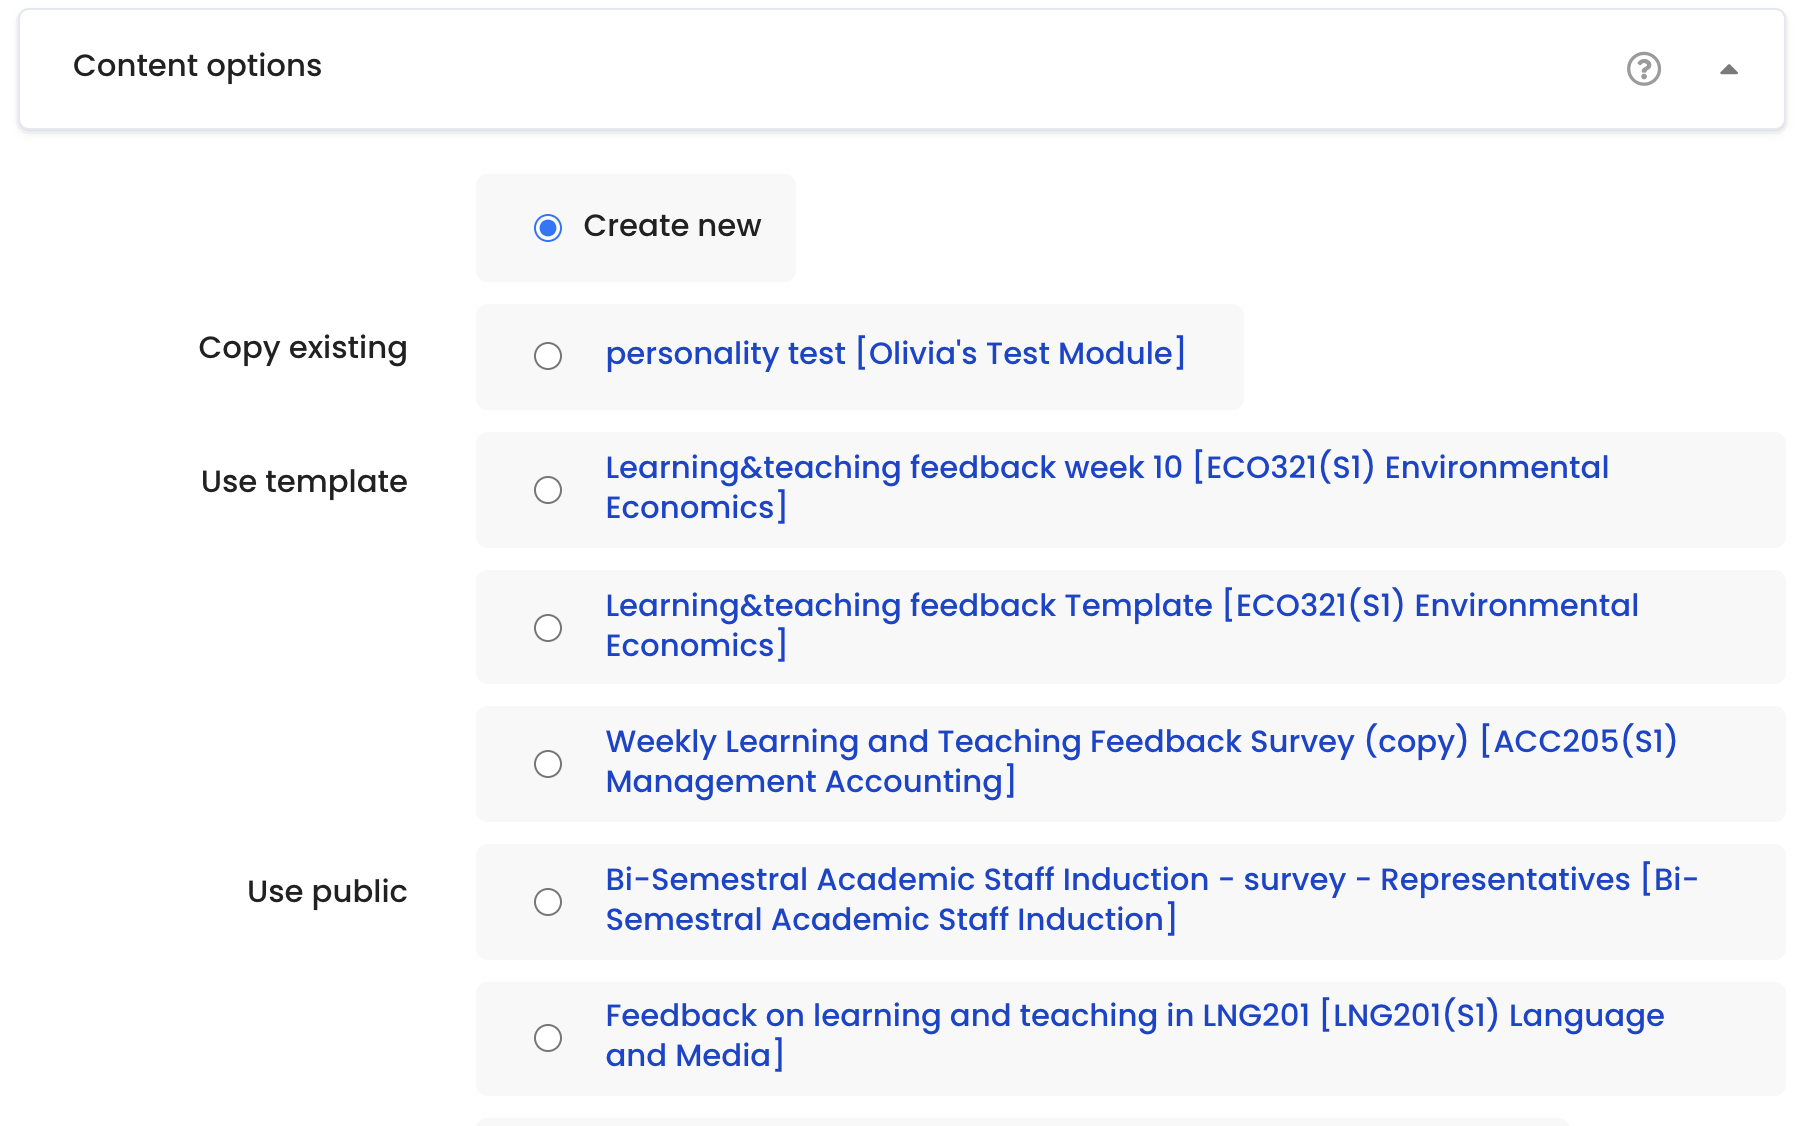
Step 7: Configure the content options
Create New: this option allows you to create a completely new questionnaire from scratch.
Copy Existing: this option copies a pre-existing questionnaire's content to a new questionnaire, pre-seeding the content. You can copy questionnaires belonging to the course, or ones specifically marked as 'template'.
Use Template: this option consists of pre-existing templates from the activity that you can copy and edit into your questionnaire.
Use Public: if a questionnaire has already been created (in another course on the same Moodle site) with the "public" setting, then you may use that "public" questionnaire in your own course(s). The number of settings available to such questionnaires is limited and you cannot edit its questions nor view the responses. Example: If a public questionnaire has been created in course A, it can be "used" in courses B, C, ... All the responses from courses A, B, C, ... are collected in the public questionnaire created in course A (the original course where it was created) and are viewable there by the person (admin or teacher) who originally created it.
Step 8: Save changes
Click "Save and return to course" or "Save changes" to finish creating the activity.
