1 - Adding and starting a BigBlueButton activity
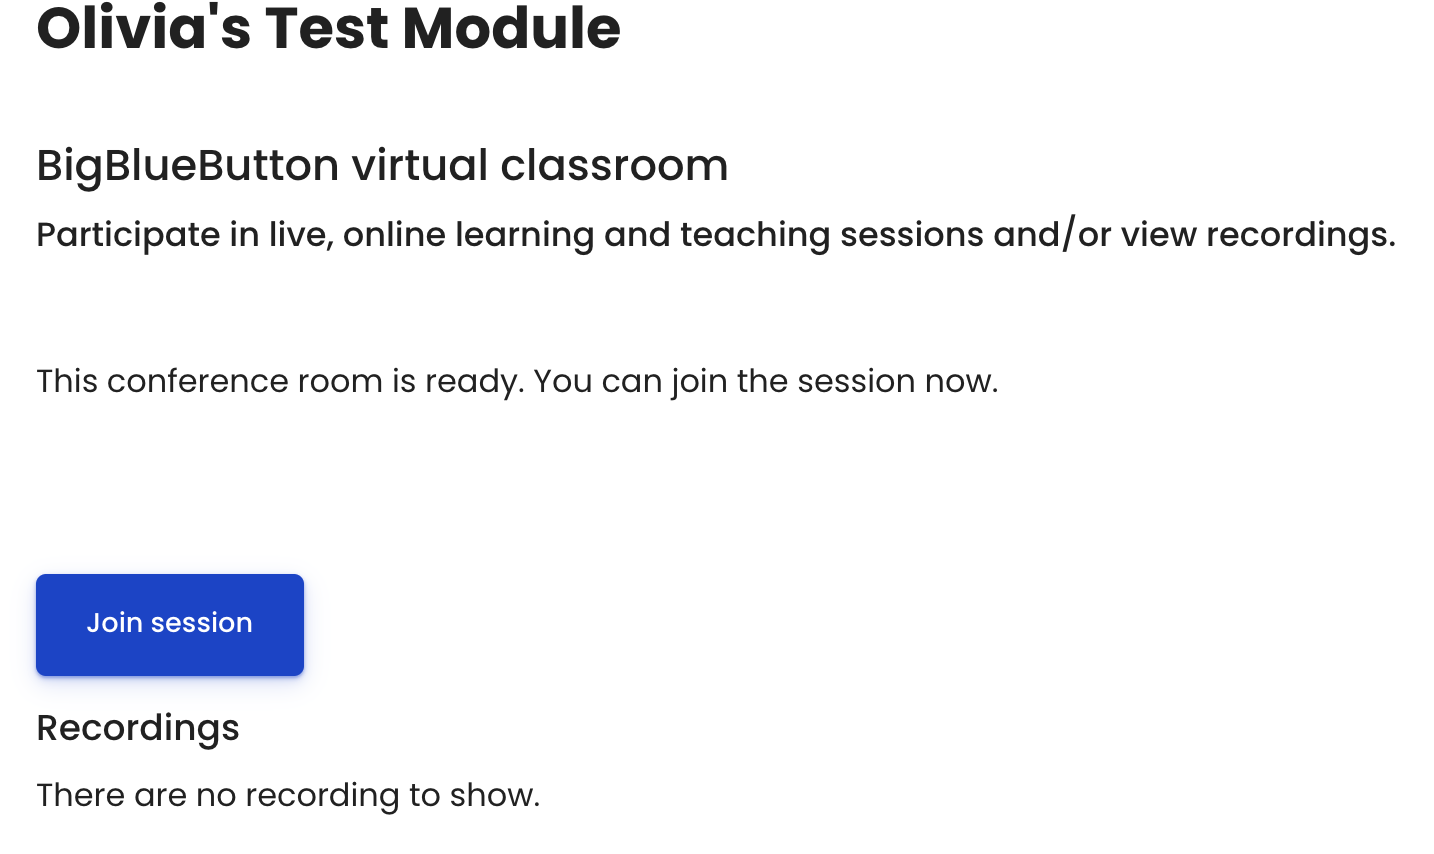
An example of the BigBlueButton activity
Overview:
This guide will show you how to create BigBlueButton links in your Learning Mall module area and how to configure the activity settings so that you can tailor the activity to your specific needs.
What to know:
BigBlueButton (BBB) is an activity on Learning Mall you can use to create a virtual classroom where you can deliver and record a scheduled video lecture. There are two types of sessions you can deliver. Interactive sessions allow students to join in and use the chat, as well as shared notes, to interact, contribute to the discussion, and ask questions. Non-interactive sessions only involve the teacher delivering the content and there is no interaction with students. Both sessions can be recorded and published on Learning Mall for students to view. Finally, access to the activity as well as recorded sessions can be restricted based on groups and groupings.
Table of Contents
- Step 1: Turn on editing mode in your module area/course
- Step 2: Click ’Add an activity or resource’ link
- Step 3: Choose the BigBlueButton activity
- Step 4: Choose the BigBlueButton activity
- Step 5: Configuring the General Settings
- Step 6: Uploading a PowerPoint presentation
- Step 7: Configuring the session schedule
- Step 8: Restricting access to your BBB session
- Step 9: Joining a BBB session
- Step 10: Rejoining a BBB session
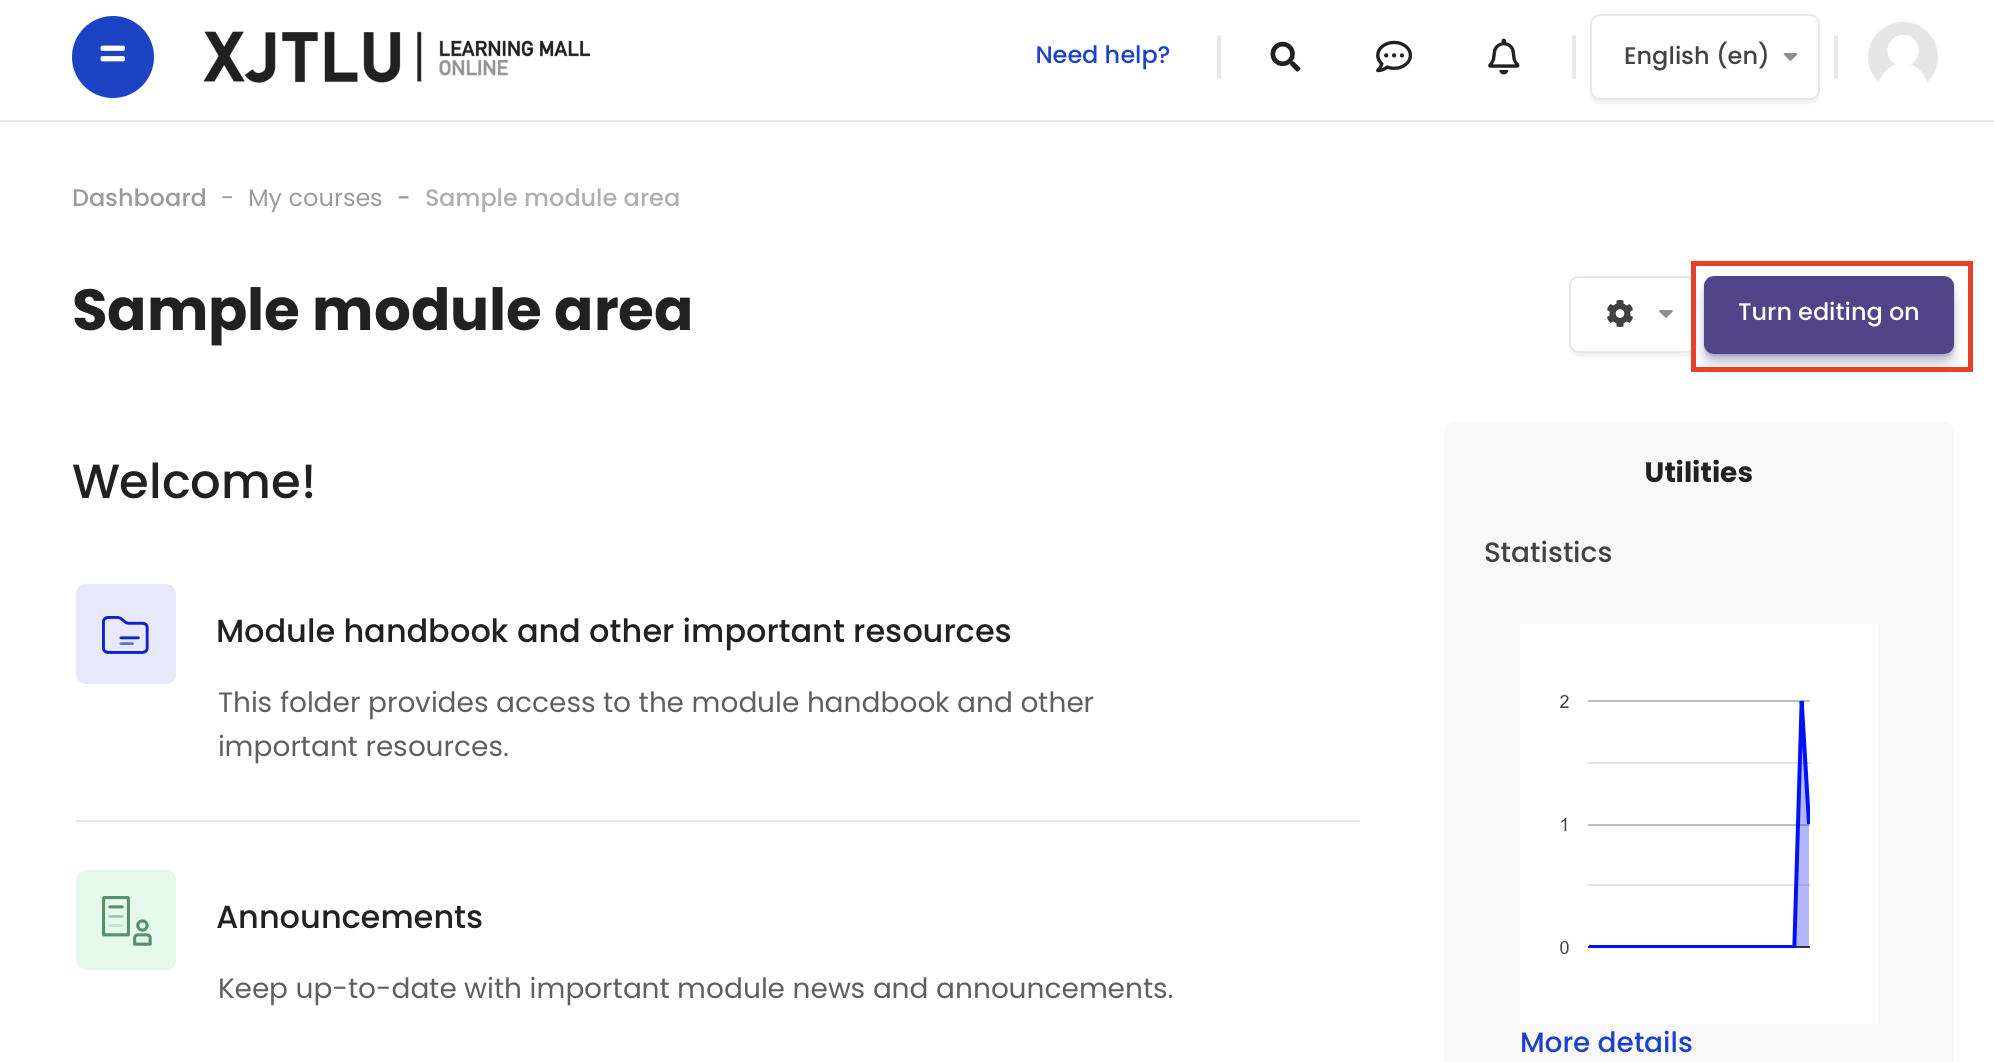
Step 1: Turn on editing mode in your module area/course
Click the ’Turn editing on’ button displayed near the upper right of the module area/course.
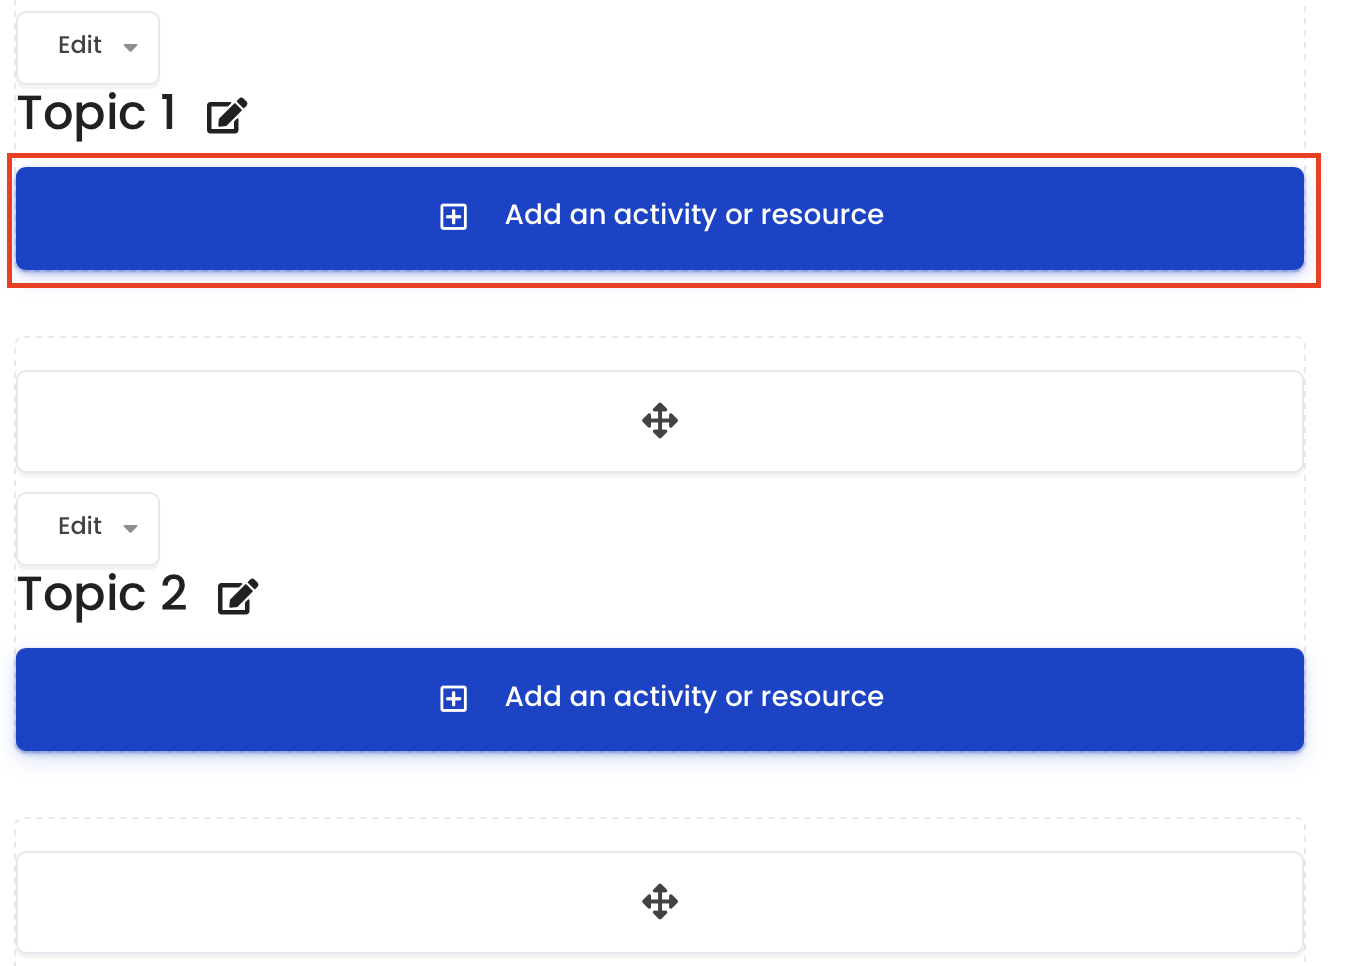
Step 2: Click ’Add an activity or resource’ link
- When editing mode is turned on, navigate to the section where you want to add the BigBlueButton activity.
- Next, click the ’Add an activity or resource’ button displayed at the bottom of the section.
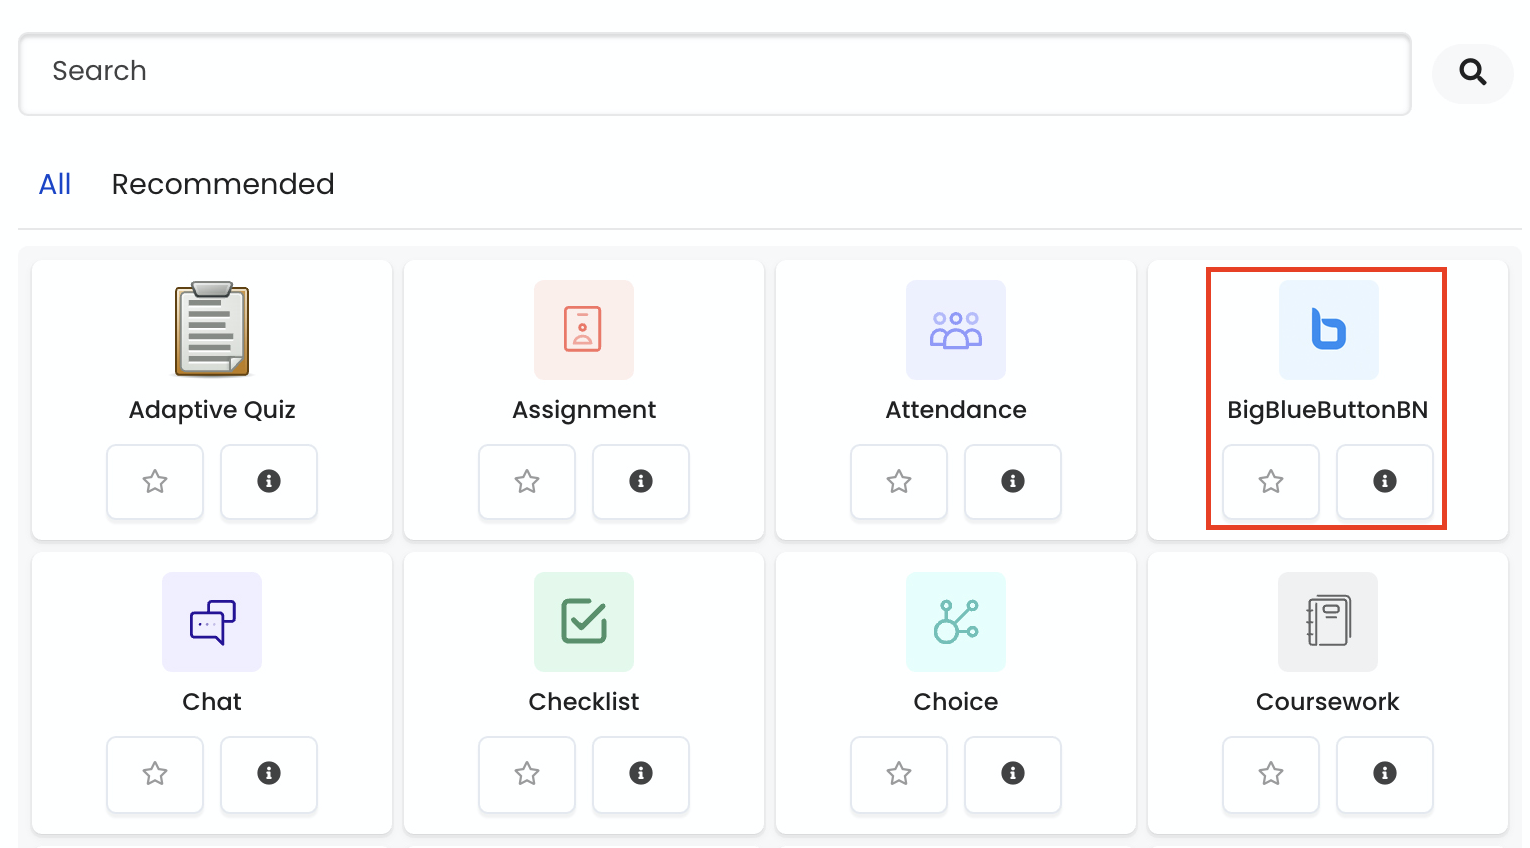
Step 3: Choose the BigBlueButton activity
From the pop-up activity chooser window, locate and select the BigBlueButton activity.
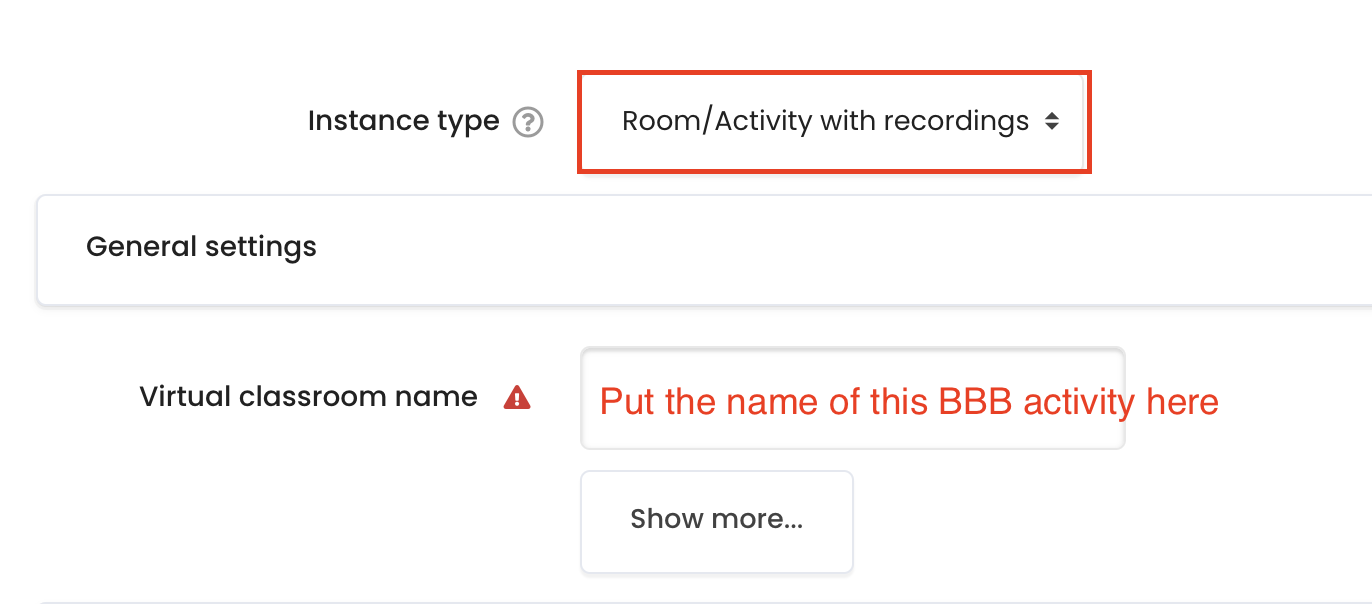
Step 4: Configuring the General Settings
Choose the ‘Room/Activity with recordings’ as a session type and provide a descriptive name for your session.
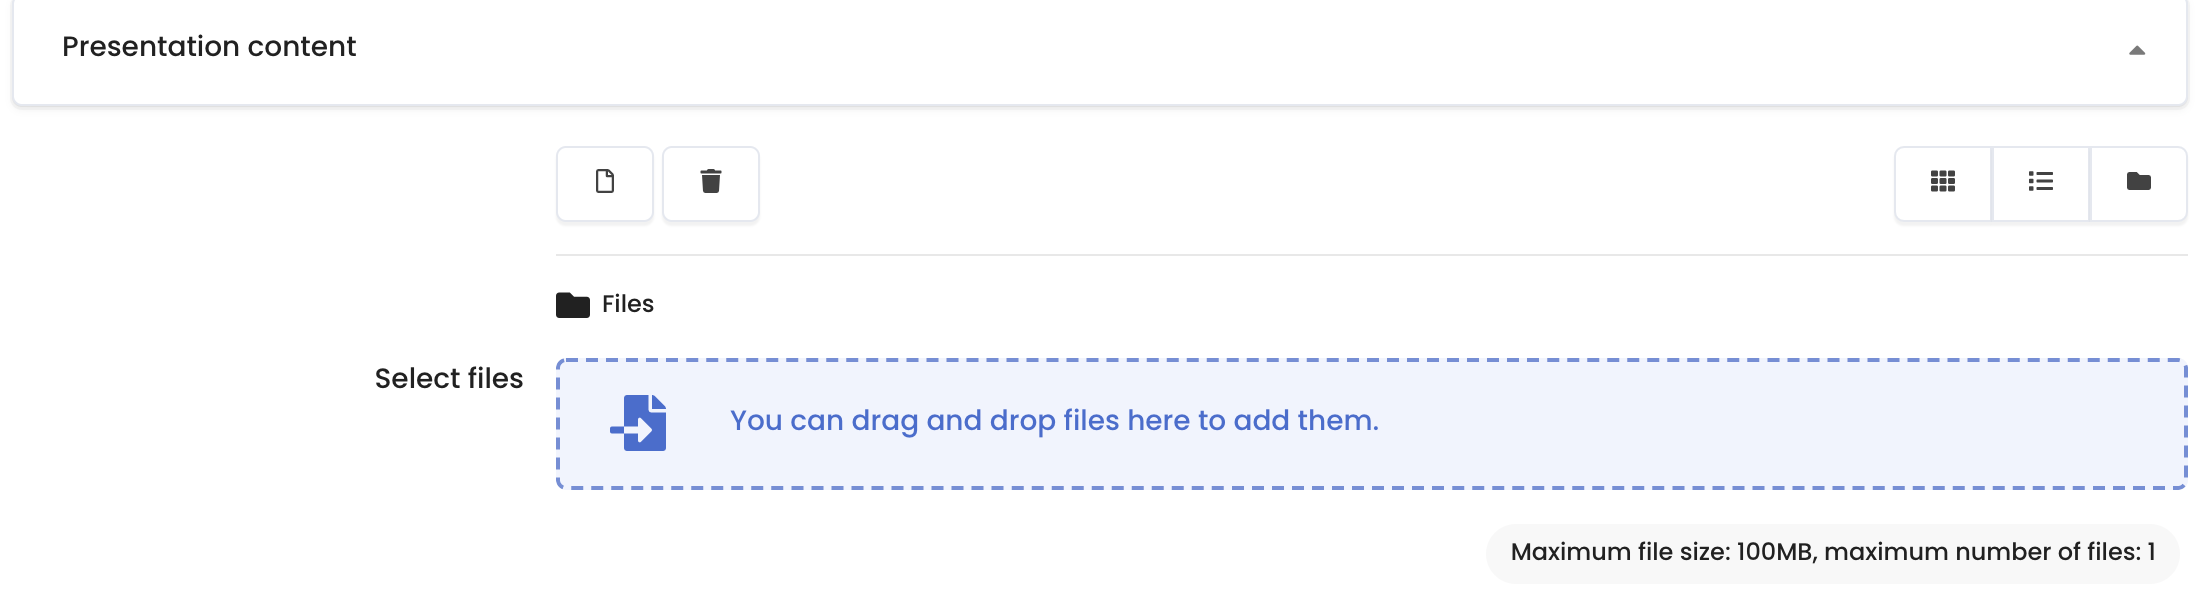
Step 5: Uploading a PowerPoint presentation
If you would like to use presentation slides during your session, simply upload the presentation by dragging-and-dropping it onto the file upload area, or choose the file to upload from your desktop. You can also upload a presentation during the session.
Step 6: Configuring the session schedule
Use these settings to set a schedule for your BBB session. This is the period of time during which students will be allowed to join the session. If you want to deliver a non-interactive session, you do not need to enable these settings.

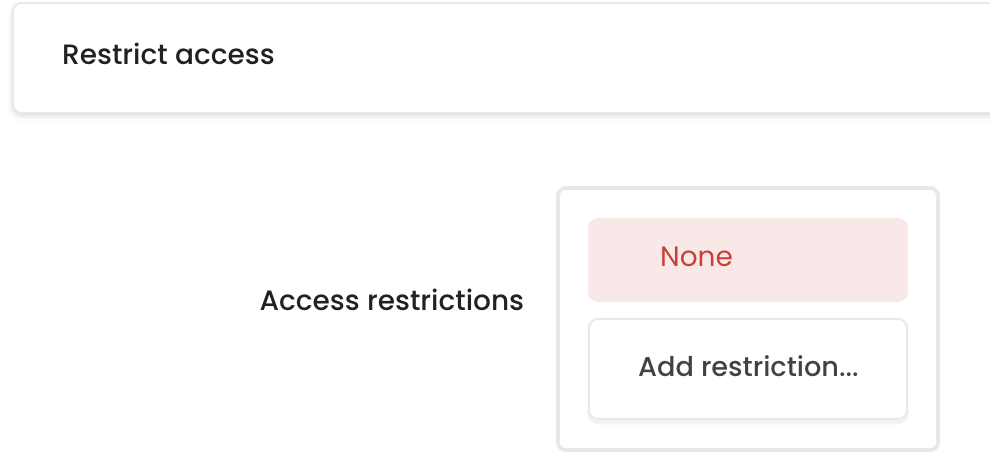
Step 7: Restricting access to your BBB session
Finally, you can restrict access to your BBB session based on a group of students or several groups in a grouping. Simply click ‘Add Restriction’ and select the appropriate group or grouping.
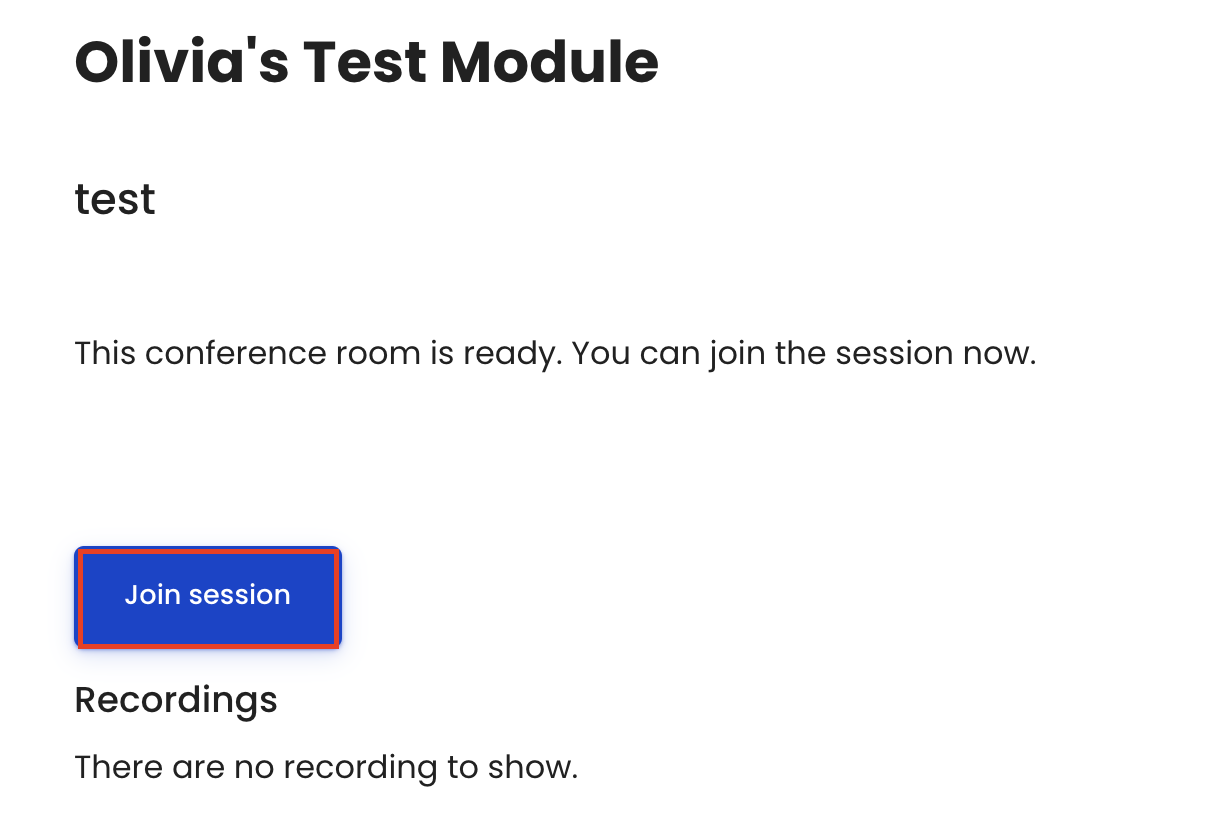
Step 8: Joining a BBB session
After adding a BBB activity, simply click on the BBB link in your module area and then click ‘Join Session’ to start the session.
Step 9: Rejoining a BBB session
If, for some reason, you accidentally leave the session, simply click on the BBB link in your module area again and click ‘Join Session’ again.

Tips:
Apart from restricting the BBB activity using the Restrict Access settings, you can also simply hide/unhide the activity from the module area main page.
![]() Creative Commons License
Creative Commons License
Except for third party materials and unless otherwise stated, content on this site is made available under Creative Commons licenses.