How to use the workshop activity for peer review (teacher view)
An example of the workshop activity (teacher's view)
Overview:
This guide will show you how to use the workshop activity to encourage your students to do peer review for each other's work. The workshop activity is a powerful peer assessment activity. Students add submissions which are then distributed amongst their peers for assessment based on a grading scale specified by the teacher.
What to know:
This user guide aims to provide information about how to use the workshop activity. If you want to know more about how to set it up, please check this user guide. How to add a workshop activity
Table of Contents
Step 1: Setup phase
Once a Workshop activity has been created and saved, it is in the Setup phase. It must be in the Submission phase for students to be able to submit work and then moved to the Assessment phase for them to review each other's submissions. The switch may be automatic or manual.
* Click 'Edit assessment form' to provide detailed grading criteria for your students to use. When finished, click 'Save and close', and all ticks on the Setup phase will be the same colour.
* You are ready to switch to the Submission phase which lets students send in their work. Click the icon or text at the top of Submission phase. This phase will be highlighted.

Step 2: Submission phase
* Students will now be able to submit their work during this time, until any deadline you specified - unless you also allowed late submissions.
* After student submission, click the link 'Allocate submissions' to decide if you want to choose which student assesses whose work (Manual allocation), or if you want Learning Mall Core to choose for you (Random allocation) And do you want students to assess others' work even if they have not submitted anything themselves?
* If, in the Availability section you set the workshop to switch to the submission phase automatically once the submission deadline is over, choose Scheduled allocation.
* You can see how many have submitted and how many still need to submit. Click the icon or text to move to the Assessment phase if you choose to switch phases yourself. The phase will be highlighted. (Remember that you can move back a phase if you need to, for example, if you want to allow a student to resubmit.)

Step 3: Assessment phase
* Students will assess the work of their peers according to the instructions and criteria you gave them.
* You can monitor their progress by looking at the grades underneath the phases screen:
* When you are ready, click the icon or text to move to the Grading evaluation phase. This phase will be highlighted.

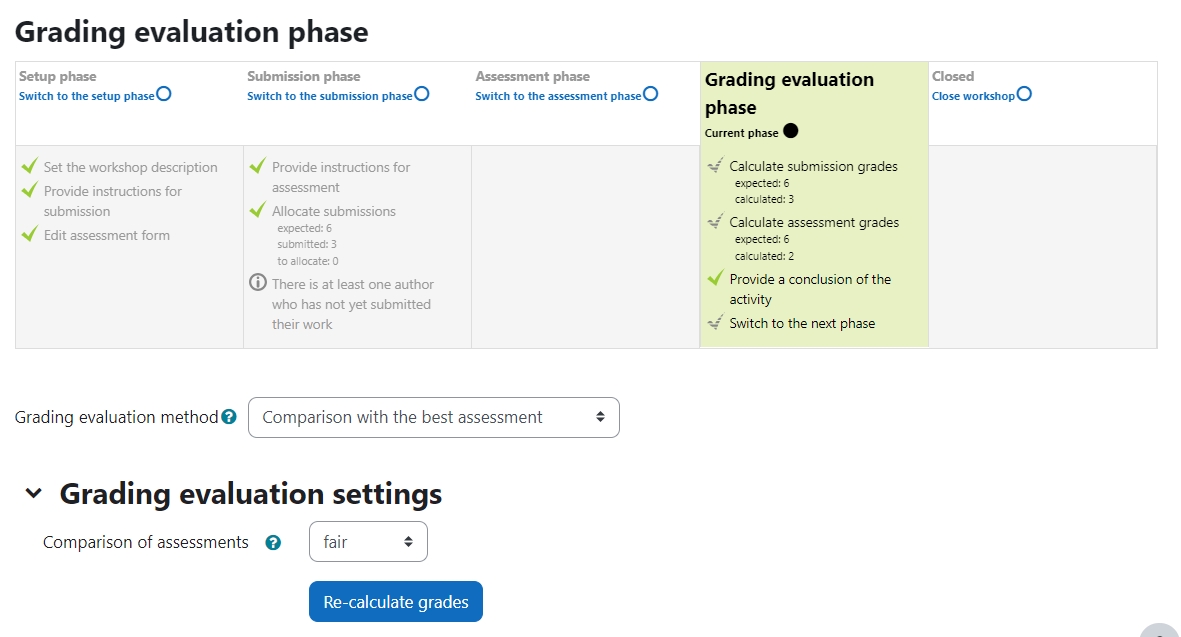
Step 4: Grading evaluation phase
* Here, the workshop activity calculates the final grades for submission and for assessment. The user guide about grading calculationWorkshop-grading calculation strategies gives more details on how the grading works.
* For the grade for assessment, you can decide how strict you want the comparison to be. If you are not sure, leave it as the default 'fair'.
* You can recalculate the grades several times.
* You can change grades here if you need to.
* You can show to other students selected submissions if you wish. Click on a submission in the workshop grades report (image above) and scroll down to 'Feedback for the author'. Tick the box to publish this submission. Other students will see it once the workshop is closed.
Step 5: Close the workshop
When you are satisfied with the final grading, click the icon or text to close the workshop. The Closed phase will be highlighted and students will be able to see their grades, any published submissions and a conclusion if you added one.
Tips:
If you are looking for a user guide for your students, please check this article: How to user workshop (for students)