1 - How to set attendance status
Overview:
This guide will show you how to set attendance status.
What to know:
It is recommended by the "Policy on Student Attendance and Engagement" for teachers to use appropriate way to record student attendance. Learning mall core has provided the attendance activity, where attendance can be easily recorded by students themselves in the module area with fully considered access control and reviewed at any time any place. The system also automatically generates reports for both teachers and students, highlights students whose attendance are below university expectation, as well as sends warning emails.
We provide several specific user guides about the use of attendance. This guide focuses on attendance status settings. If you are new to the attendance function, please check the other attendance guidances for more details. We have also prepared a guide for you to share with your students about How to take attendance on the Learning Mall Core.
Table of Contents
Step 1: Access to the attendance activity
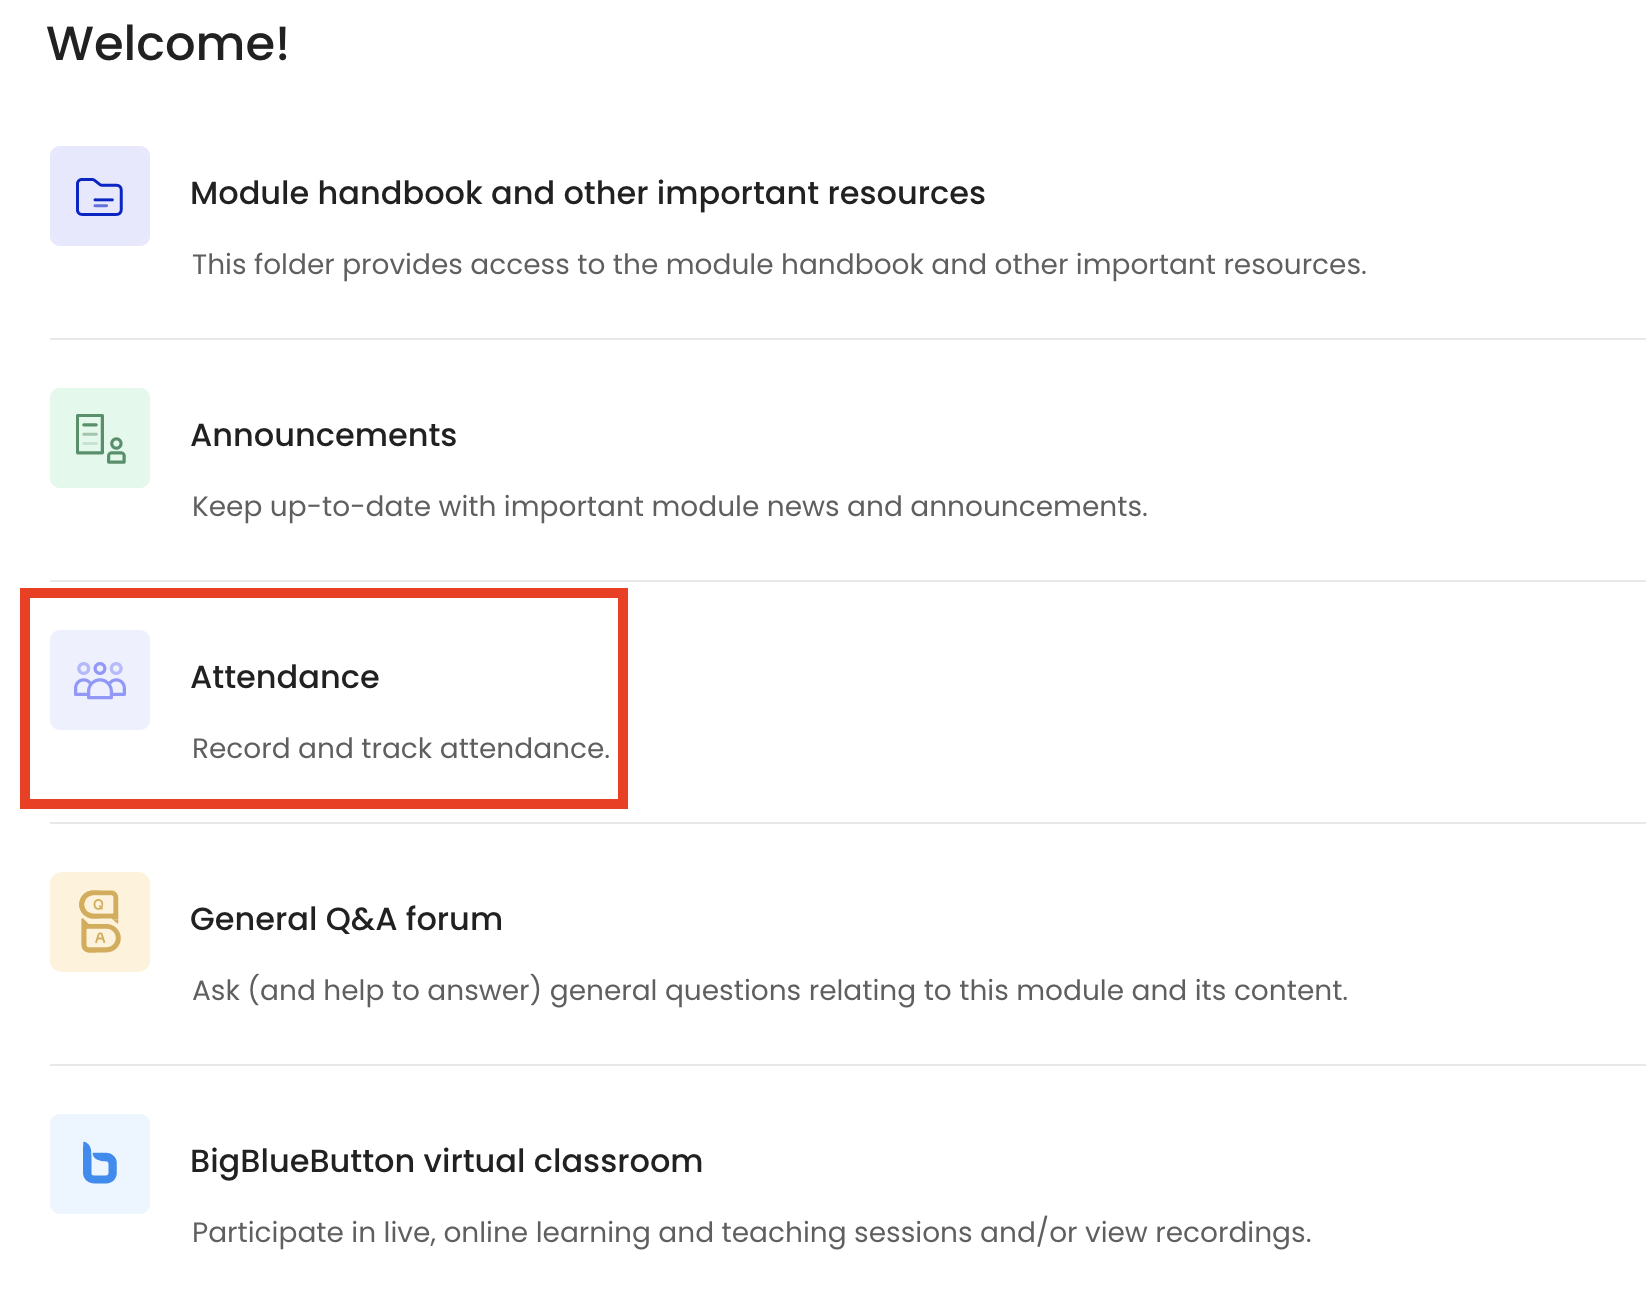
Access to the learning mall core and access to your module page.
Click on the attendance link.
Step 2: Access to the status set page
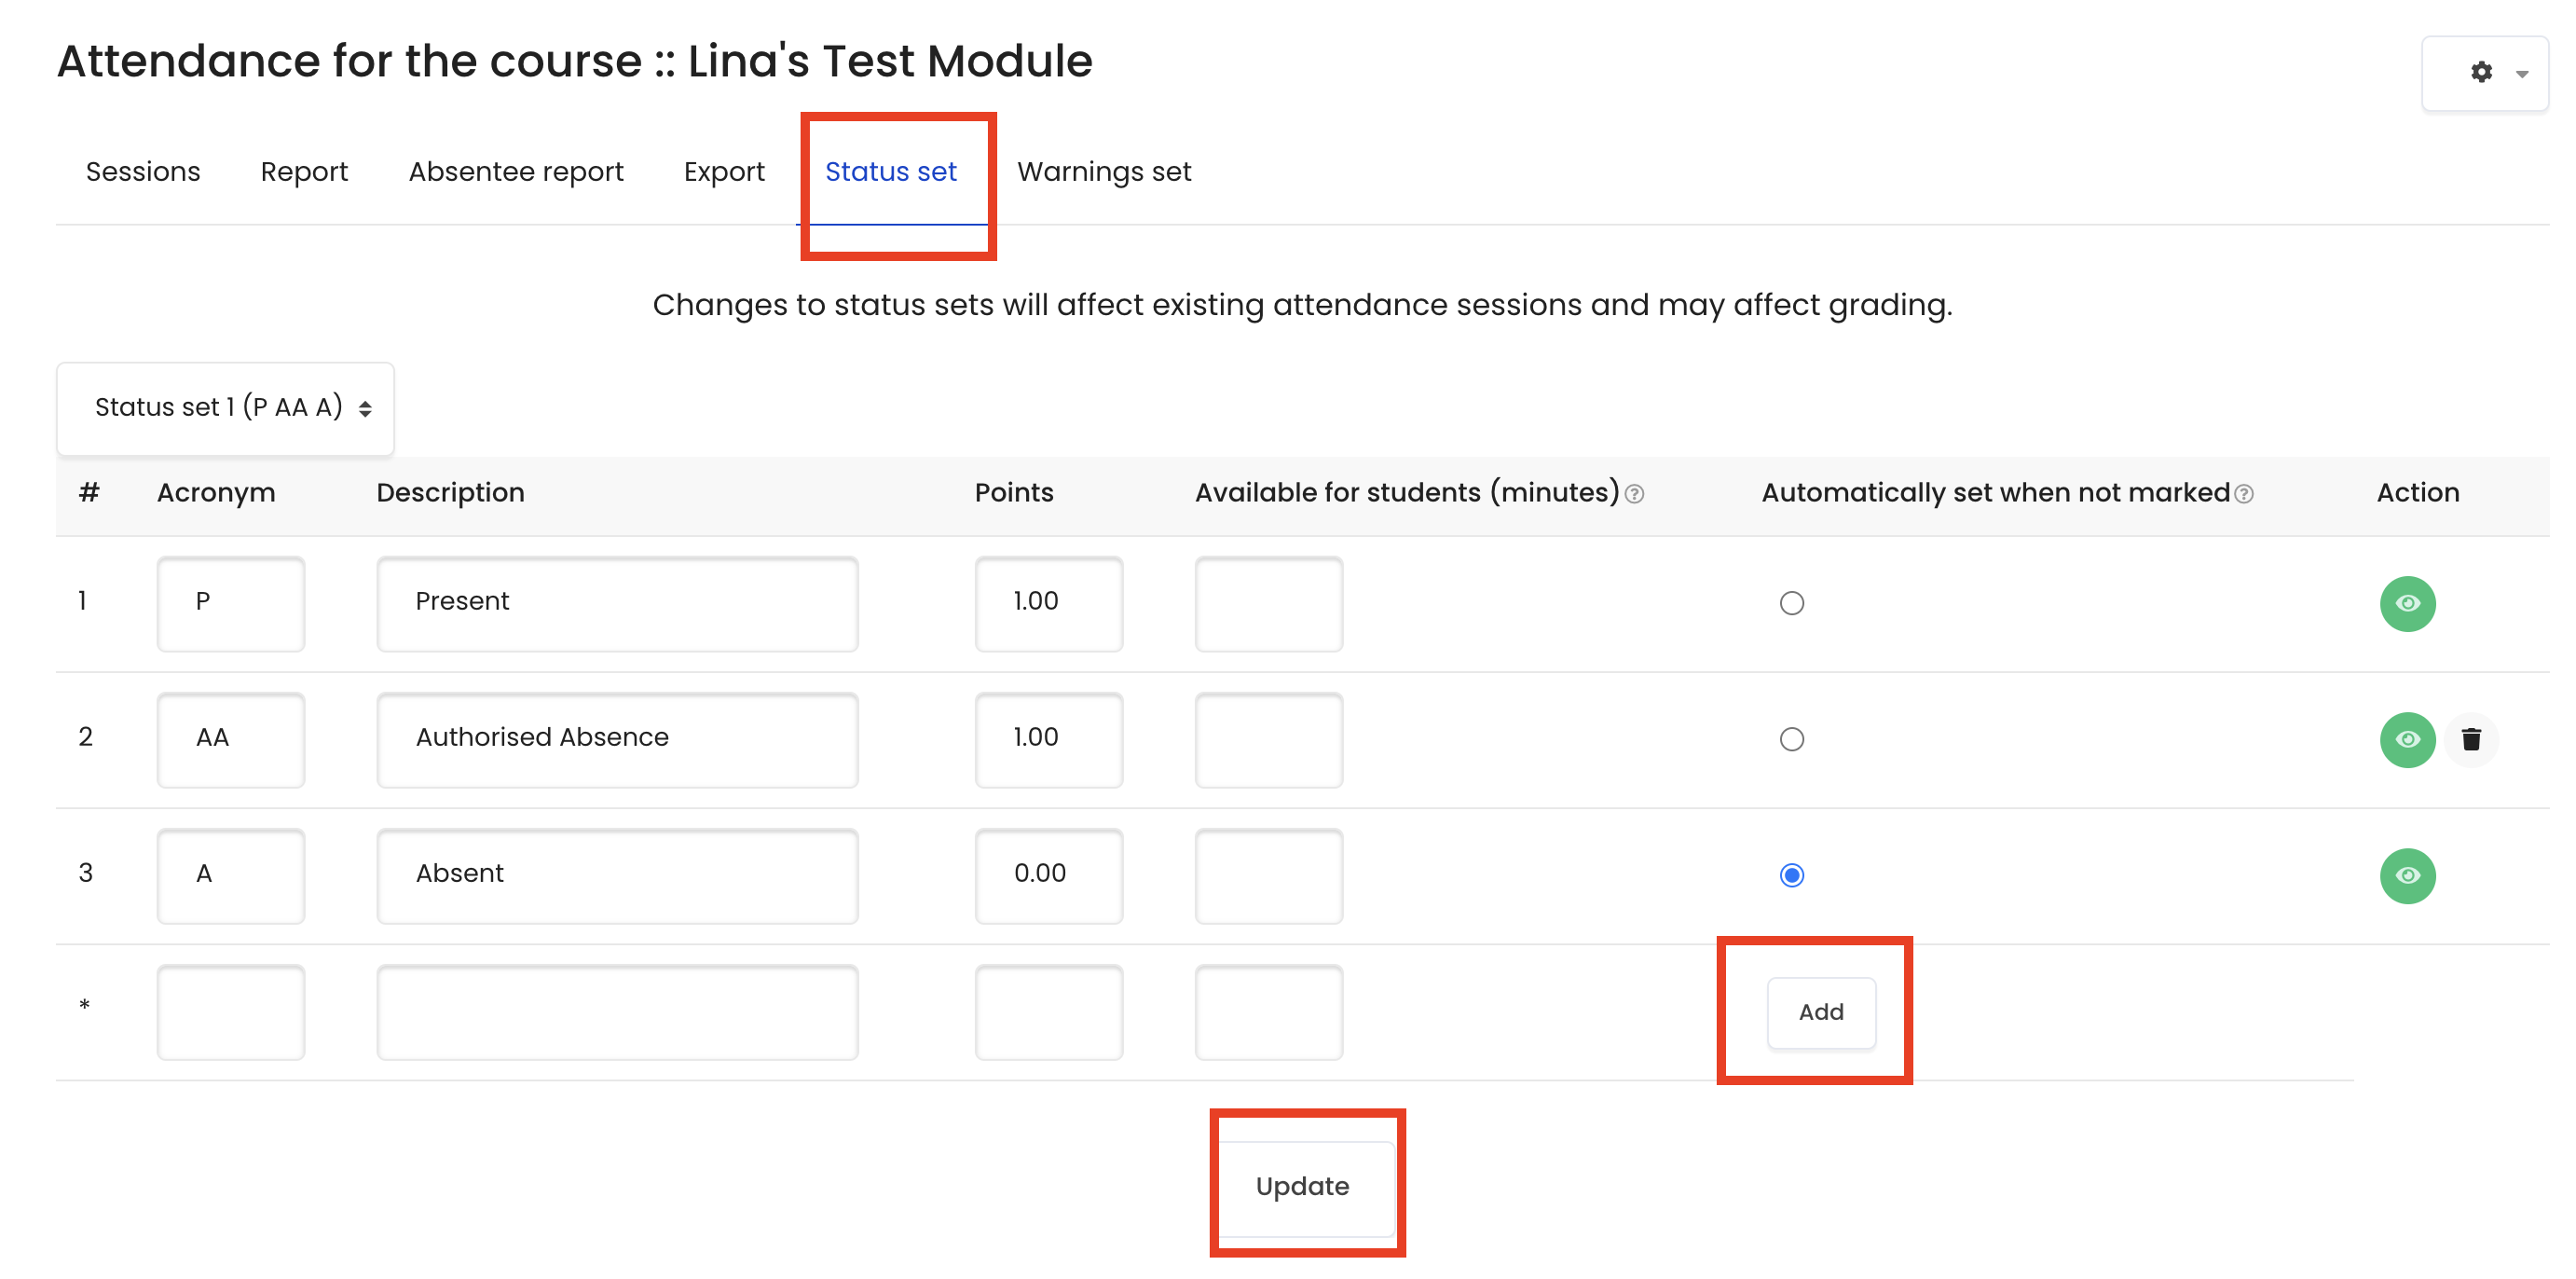
Click the "Status set" tab page, the system provides three default status. If they cannot meet your needs, you can click "Add" to add another status for your module. Please do not delete any existing status unless you are 100% sure about the consequences of doing it. You can change the automatic set when not marked. The default is absent. If you are not sure about this part, please don't hesitate to contact the learning mall support team first.
Step 3: Set grading options for each status
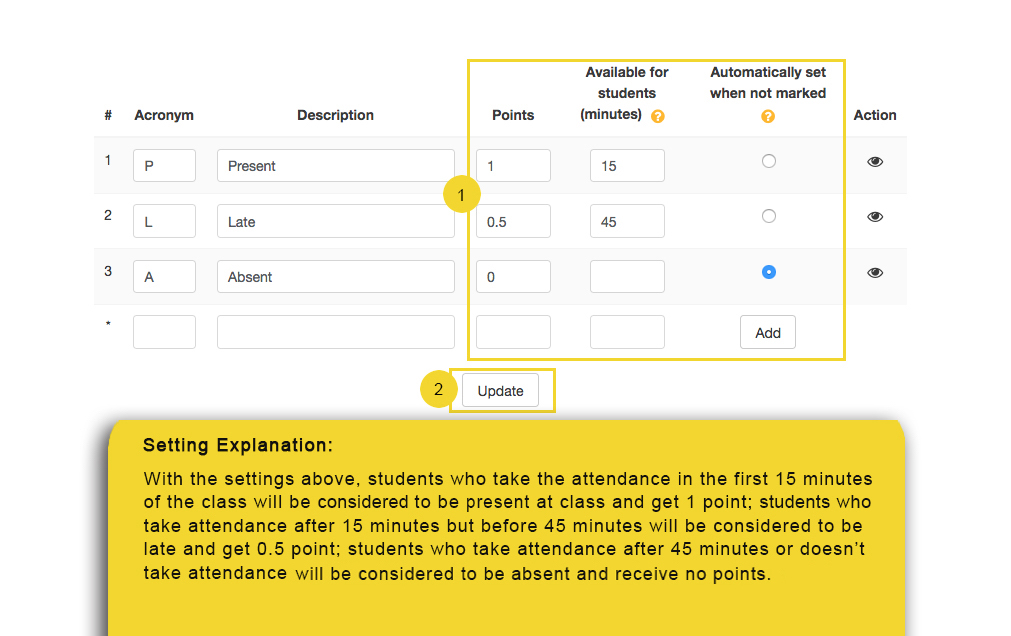
1. Set the values for each status category, so that all the status can work properly.
Points
— the score students will get for each status category.
Available for students (minutes)
— the minutes after the sessions that the status is available. If you leave it blank, it will always be available; if you set 0 minutes, the status will be hidden to students.
Automatically set when not marked
— if the students didn’t take attendance, the status will be the one you selected here.
Action
— if you want to disable some category, click the eye icon.
2. After finishing, remember to click “Update” to save the settings.