How to add an AI-agent using the URL activity
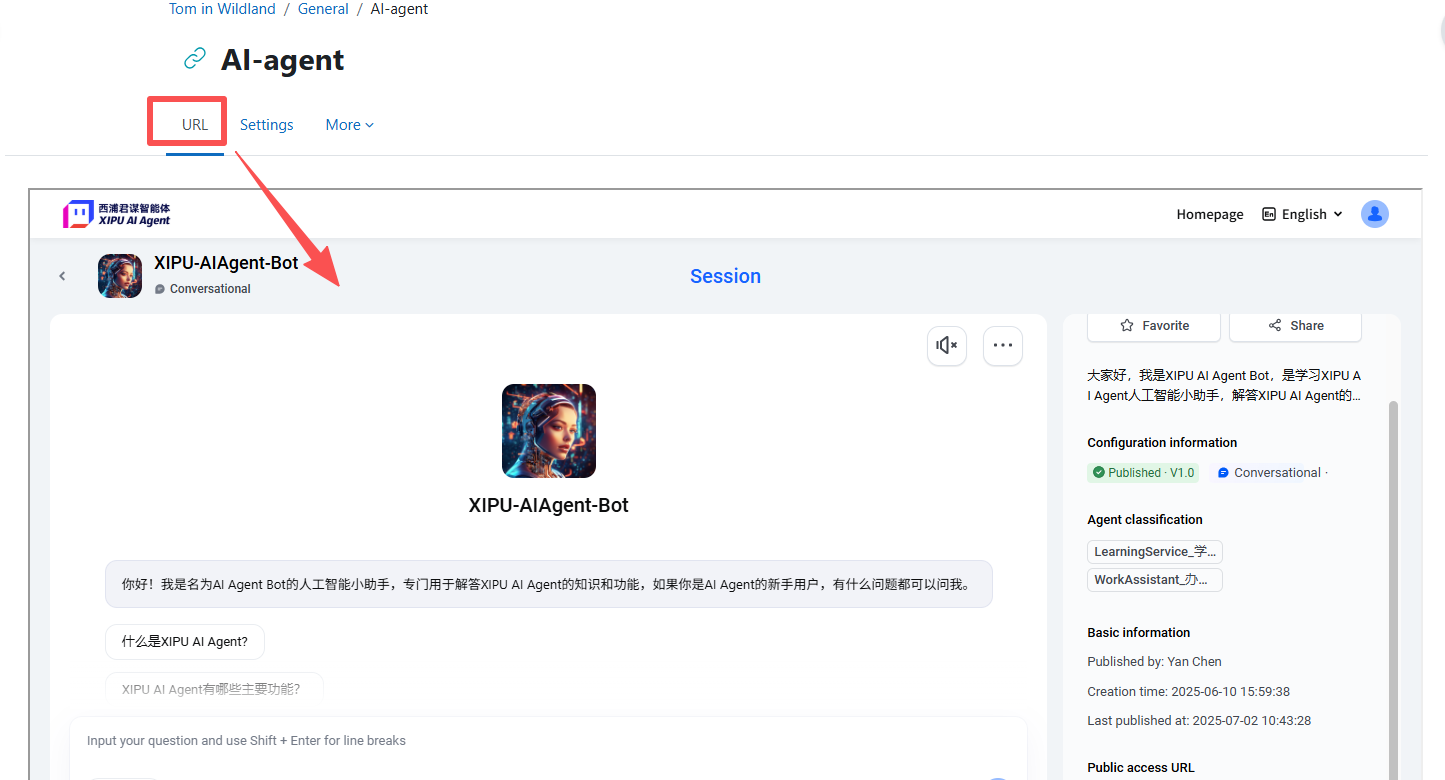
An example of AI agent embed in a module
Overview:
This guide will show you how to use the URL activity to link an AI agent (or an external webpage). It is a simple way for students to access your AI agent within module area.
What to know:
The AI agent is built up in the AI-agent platform. Before embedding the AI agent into your module, it must first be approved and published. Once published, it will be easily accessible in the Agent Center. Otherwise, students may encounter issues with the AI agent being deactivated or inaccessible.
Table of Contents
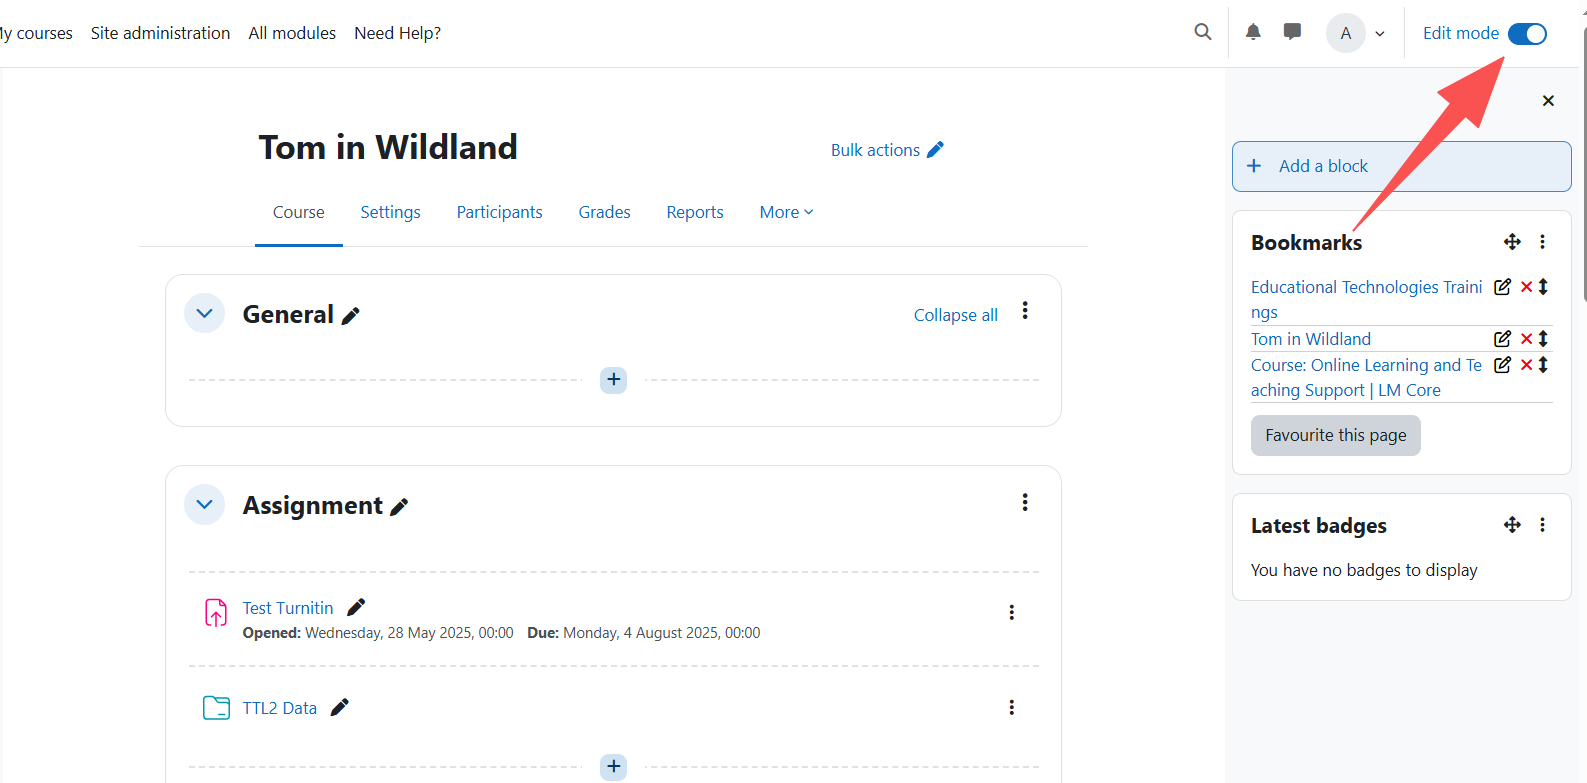
Step 1: Turn editing on
Turn editing on in your module at the top right.
Step 2: Add a URL activity
Click add an activity or resource and select URL.

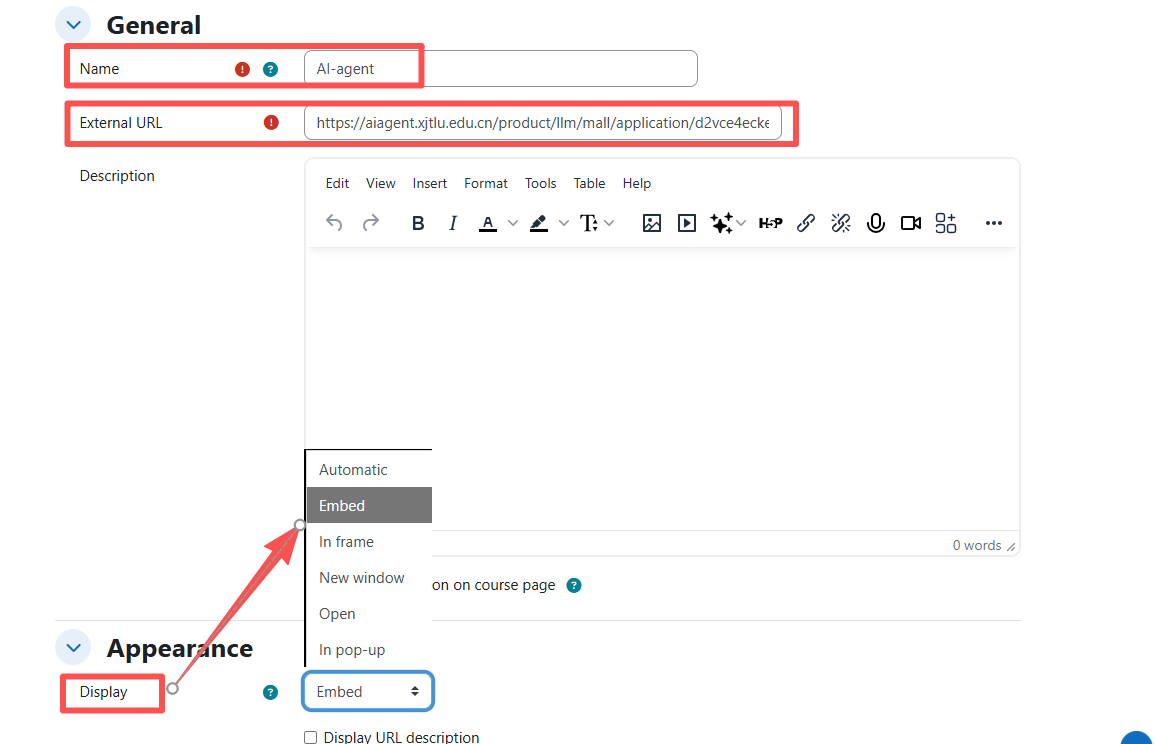
Step 3: Edit the URL
In the settings page, enter a name (e.g., “AI-agent Chat”).
In the External URL box, paste the link to your AI Agent. Under Appearance, select how you want it to open (e.g., Open in a new window or Embed). Scroll down to the bottom and save the edit.
Step 4: Display the AI agent
Once click the name of the URL, here is how the AI agent will be displayed in your module area.
Best Practice Example:
Use this option if your AI agent is hosted externally (e.g., on the AI agent platform). This method keeps your course simple while ensuring secure access to the AI tool.
Next steps:
Now that you have embedded the AI agent via the URL activity, you may be interested in the following related articles: