STACK question type

An example of STACK question type
Overview:
This guide will show you how to create a STACK question type.
What to know:
The features of STACK question type are listed below.
- It supports random variables into the questions. (As can be seen from the example above, one student sees the question as the first picture, while another student sees the question as the second picture. It is this question uses random variables.)
- It supports variables defined by other expressions.
- It supports variables with pre-defined values.
- It supports answer tolerance and the use of units.
Table of Contents
- Step 1: Access the Quiz activity where you want to create the question
- Step 2: Edit quiz
- Step 3: Add a new question
- Step 4: Choose a question type
- Step 5: Give a question name
- Step 6: Set up variables
- Step 7: Write the question text
- Step 8: Set up the full mark and general feedback (optional)
- Step 9: 'Input: ans1' section
- Step 10: 'Potential response tree' section
- Step 11: Add more nodes (optional)
- Step 12: Save the question
Step 1: Access the Quiz activity where you want to create the question
In your module area/course, click the link of the Quiz activity where you want to create a question.

Note: If an appropriate Quiz activity doesn’t exist in your module area/course, please see Add a quiz for details of how to create one.
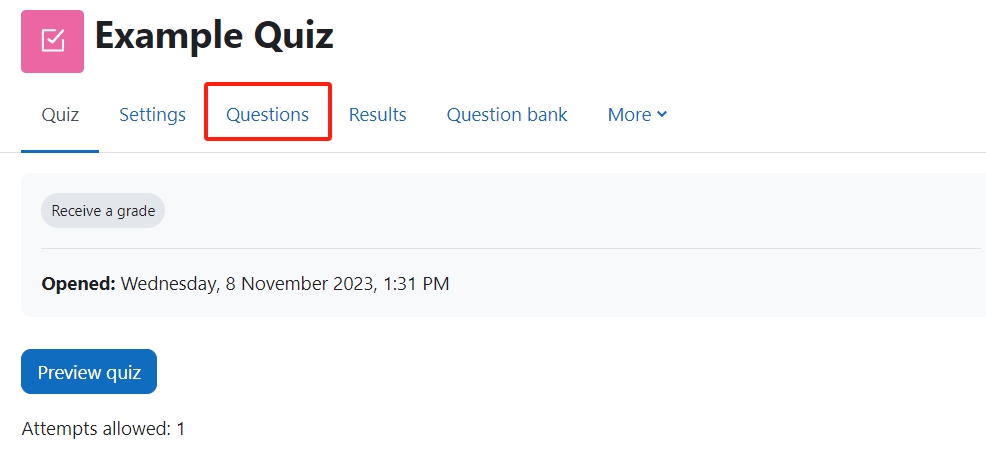
Step 2: Open the 'Questions' tab.
- Open the 'Questions' tab.
Step 3: Add a new question
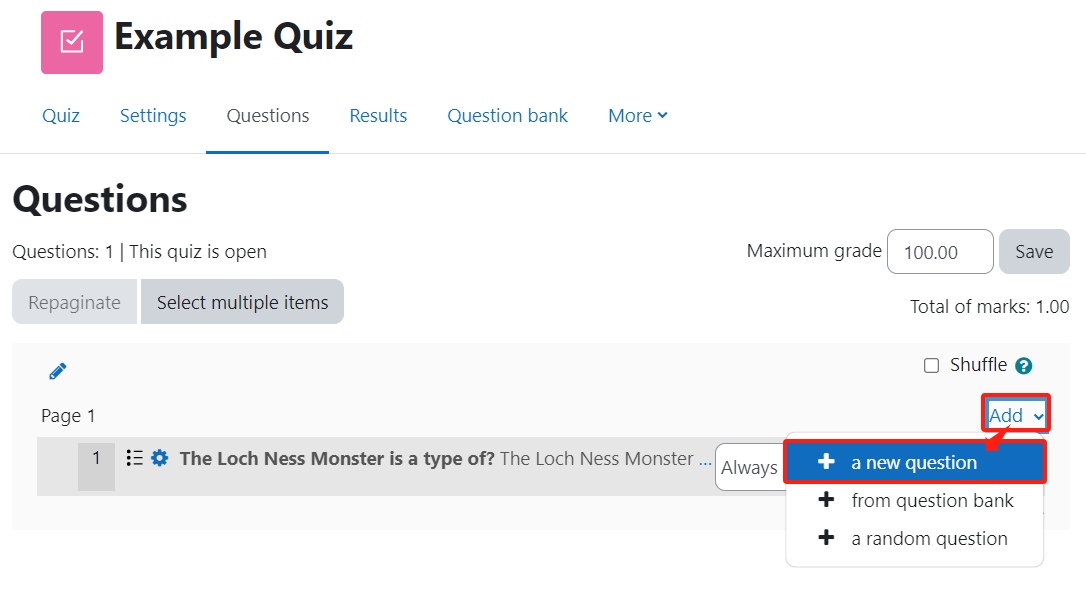
- On the following page, click the ’Add’ link.
- Click the ’a new question’ link in the dropdown menu.
Step 4: Choose a question type
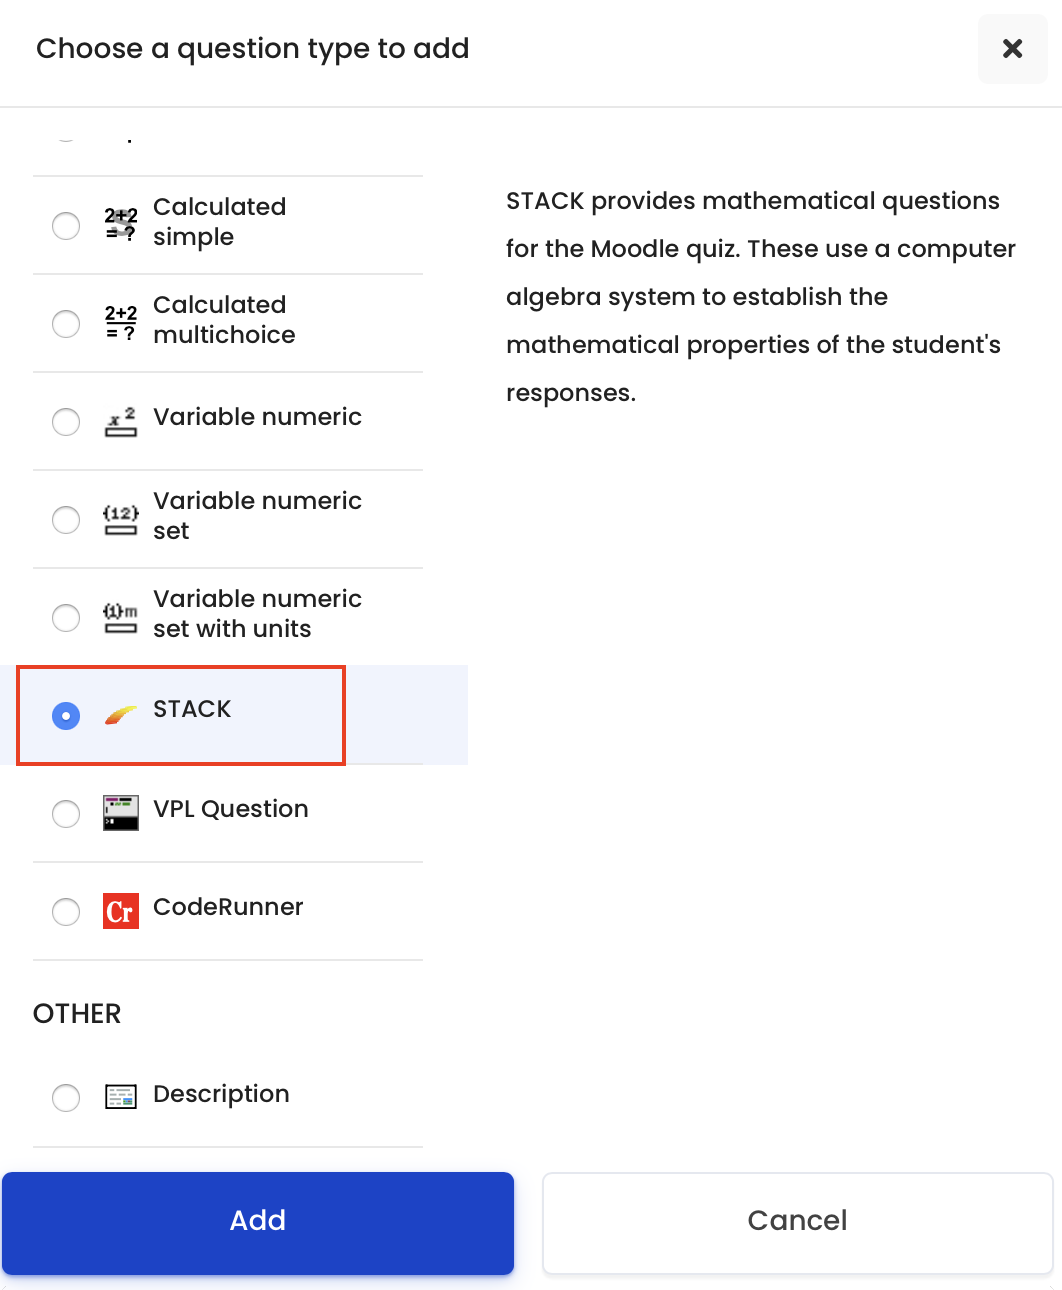
- Locate and select the STACK question type from the pop-up window.
- Click the ’Add’ button.
Step 5: Give a question name
Give a question name in the ’Question name’ setting.

Step 6: Set up variables
Give a question name in the ’Question variables’ setting.
Hints:
- Random variables can be defined by rand(n). Then the random values will be generated from 0 to n. If you want the random values to start from 1, then write rand(n)+1.
- It also supports the variables to be defined by other variables.

Step 7: Write the question text
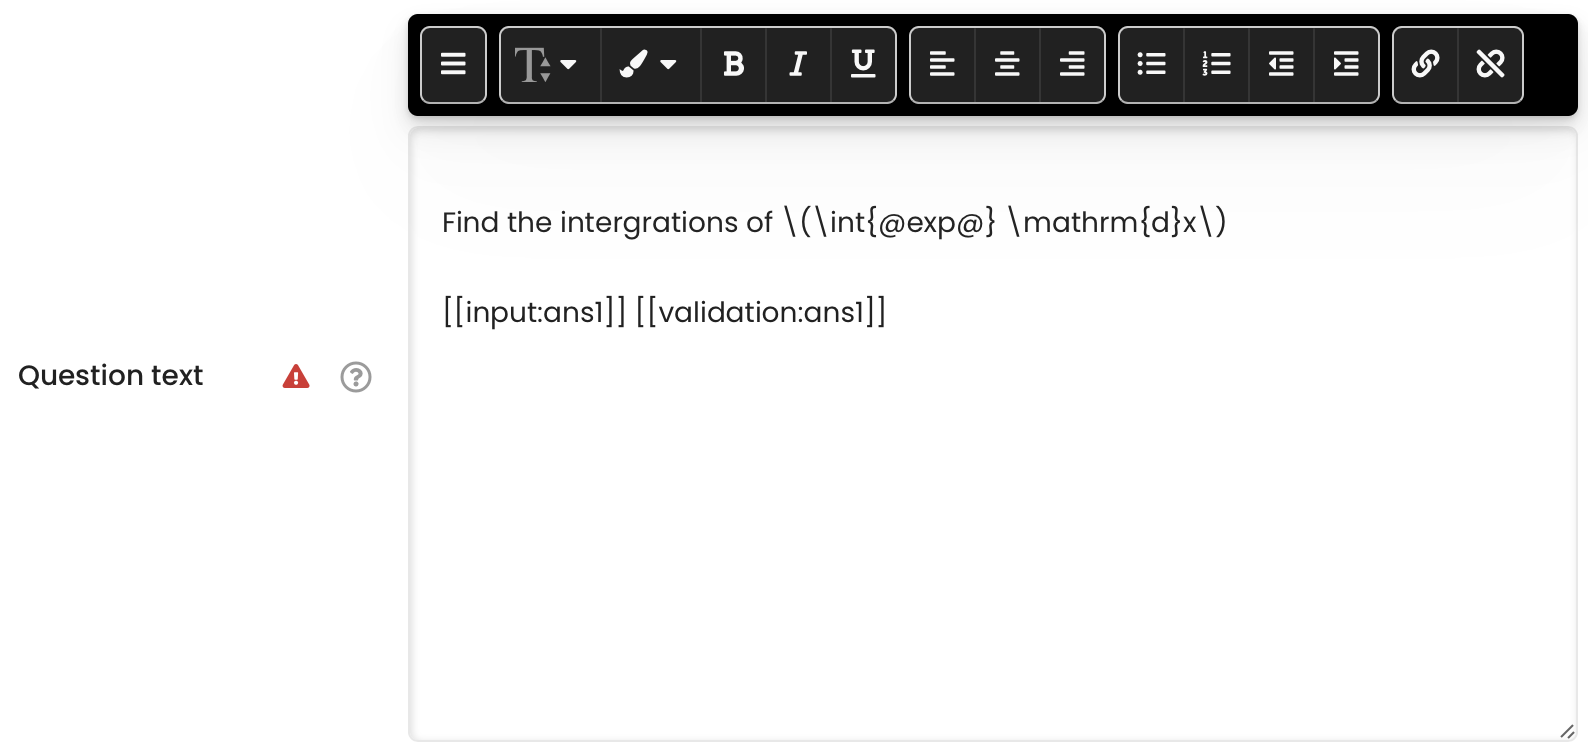
Type in the question in the ’Question text’ box, such as the example in the screenshot below.
The special Mathematical formulas and symbols can be written in Latex/Tex. You either edit the formula in Latex editors or click the icon on the top left of the text box and click the icon highlighted icons in the screenshot to edit the Latex formula.
Hint:
- The random variables, such as variable exp, need to be covered with ’@’ and ’@’ so that the system knows it is a variable.
- The whole formula is written by Latex.
- '[[input:ans1]] [[validation:ans1]]' is a default text in this area. Please do not delete it. It means the input correct answer is named as 'ans1'.
Step 8: Set up the full mark and general feedback (optional)
If you do not need to change the full mark and give general feedback, you can skip this step.
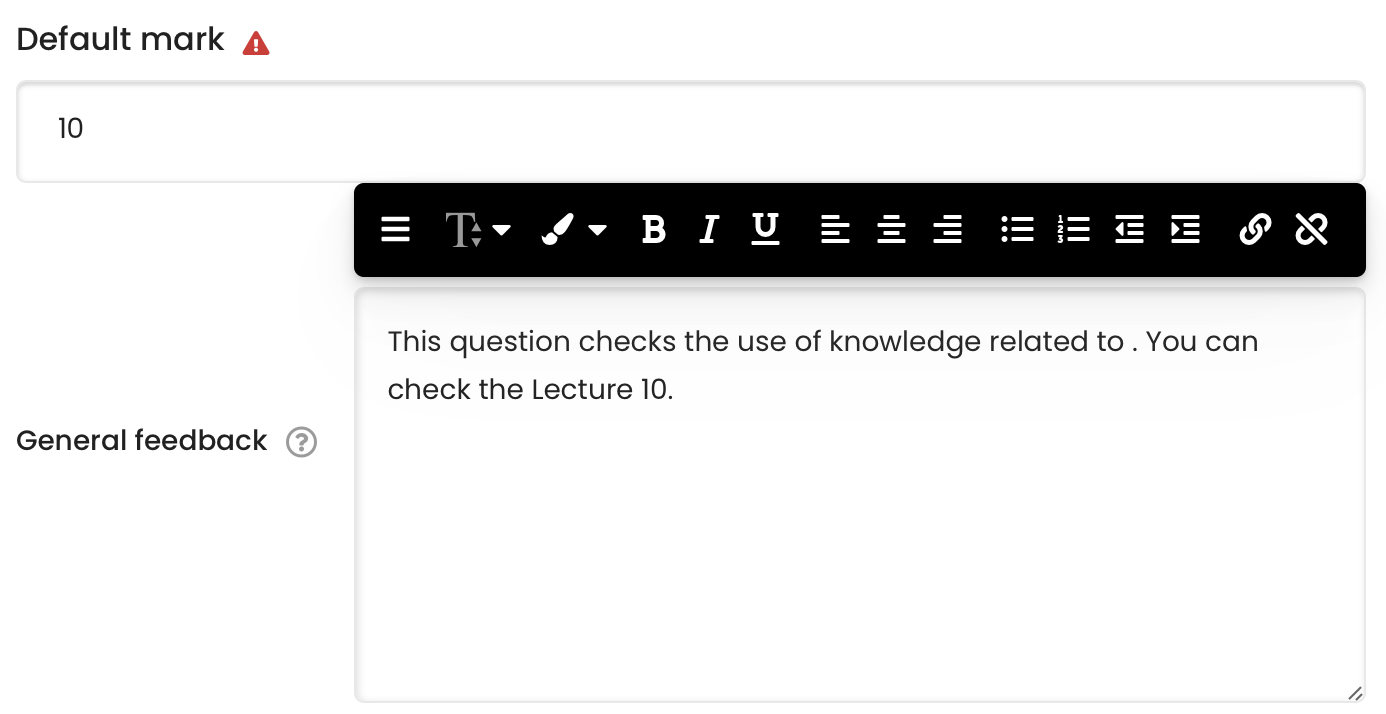
- Under the ’Default mark’, you can change the full mark of this question from 1 mark to another mark.
- Under the ’General feedback’, you can add feedback that every student will see.
Step 9: 'Input: ans1' section
The section 'input:ans1' defines the input answer.
This question type supports plenty of input types in 'input type'.
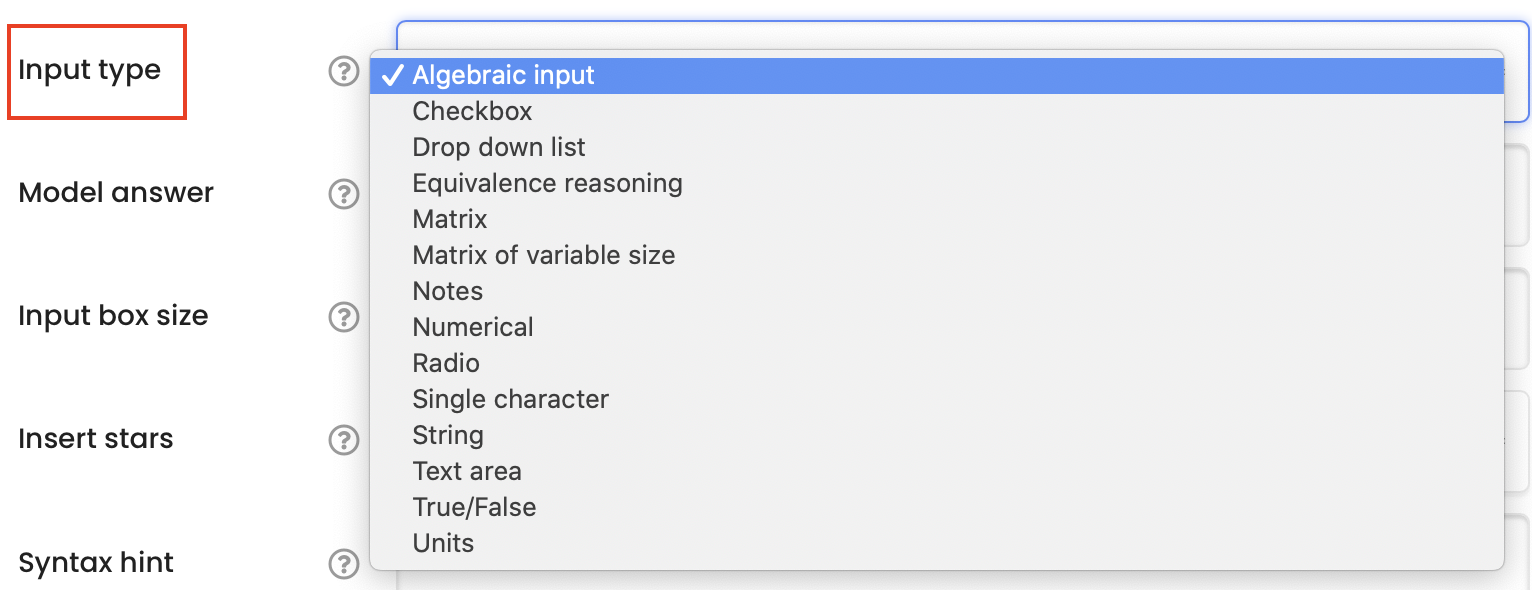
Then, define the correct answer in 'model answer'. You can write down the correct answer here. If the correct answer is complex, you can use the correct answer by a variable, such as 'ta', as shown below. Then define the variable 'ta' in the 'Question variables' setting in Step 6.

Step 10: 'Potential response tree' section
STACK question type allows teachers to define a potential response tree to check partially correct answers and give marks and feedbacks accordingly automatically.
By default, there is only one node in the response tree. It is to define whether the student input answer is right or not.
- In 'SAns' (student answer) setting, please define the student answer by writing down 'ans1'. This is the default student input, as described in Step 7 (Hint 3).
- In 'TAns' (teacher answer) setting, please define the correct answer. It is the same with the answer defined in 'model answer' in Step 9.
- Then, please define the score. The green area is to define the score of the correct answer. So the 'score' is '1' and the penalty is '0'. Feedback can also be given in the feedback area below.
- Then, the red area is to define the score of the wrong answer. The 'score' can be '0', etc.

Step 11: Add more nodes (optional)
1. You can click the 'Add another node' to expand the answer tree. After clicking the button, one more node will appear.
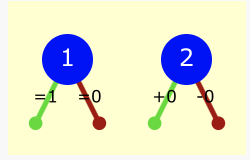
2. Link the nodes together. If the student answer is not fully correct (checked by Node 1), then more checking can be done to give scores to the partially correct answer by Node 2. To do it, please set the 'Next' setting to 'Node 2' in the red area. Then the two nodes are linked.

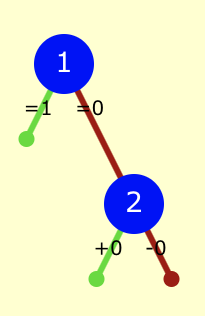
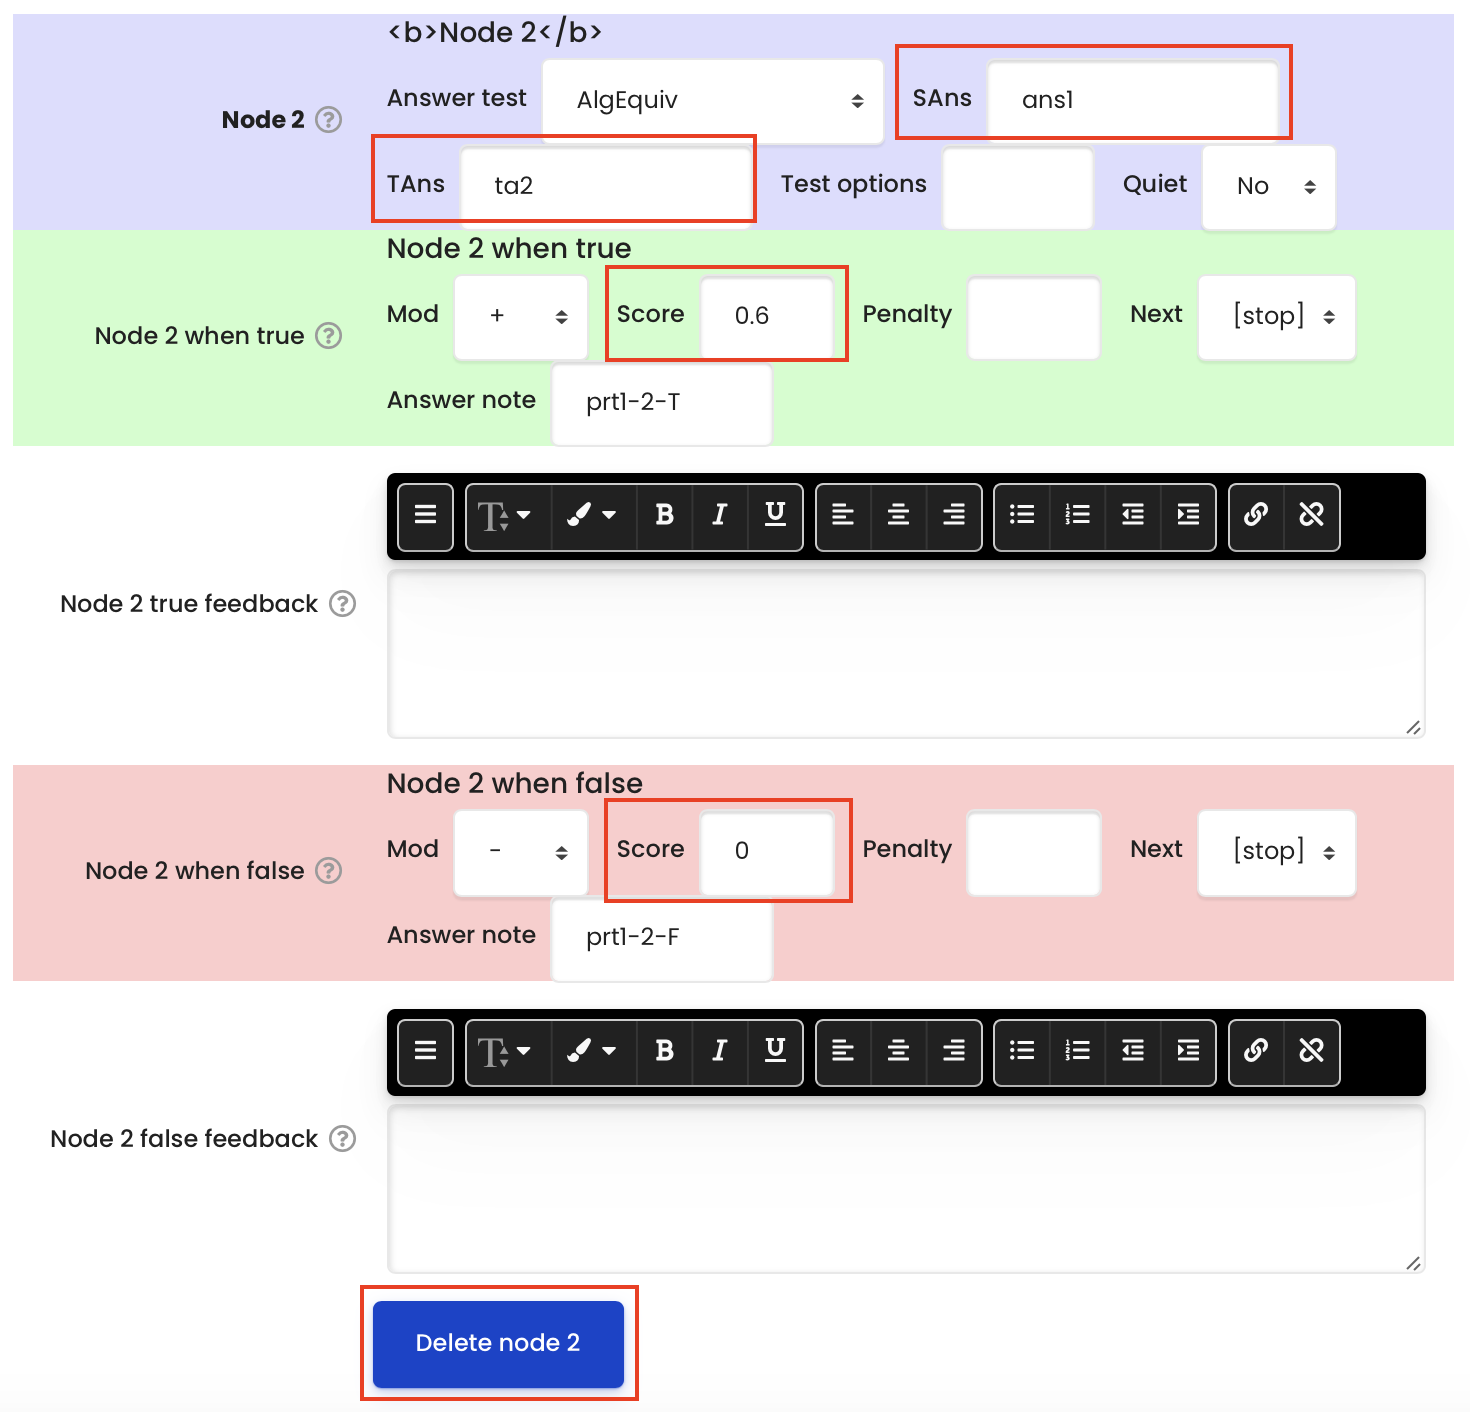
3. In Node 2:
1) 'SAns' need to be 'ans1', means the student input.
2) 'TAns' is a predefined partially correct answer. If this answer is complex, it can be defined in 'Question variables' in Step 6.
3) Define the score of the partially correct answer in the green area, and the score of the wrong answer in the red area.
Step 12: Save the question
Click ’save changes and continue editing’ or ’save changes’ button to save the question.

Tips:
The random variables, such as variable a and b, need to be covered with ’[[ ]]’, the whole formula needs to be covered with ’$$’ before and after, so that the system knows it is a random variable.