Using Organizer Instead of Schedular
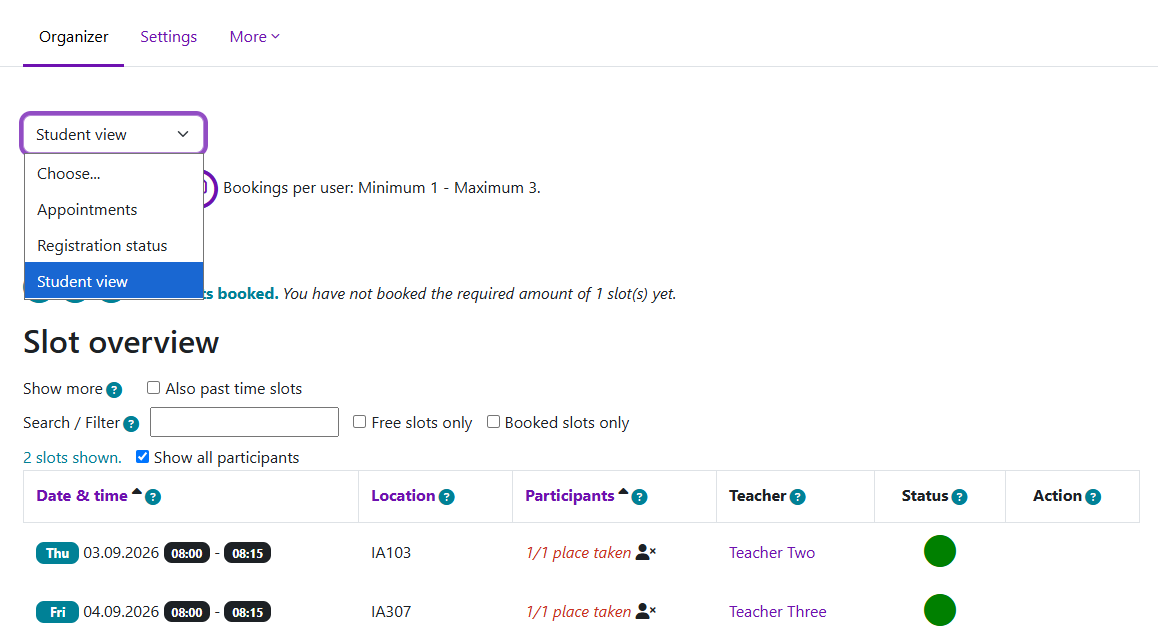
An example of different views showing slots and registered students
Overview:
The Organizer activity allows you to create appointment time slots in LM Core and let students choose a suitable time. If you previously used Scheduler for office hours, tutorials, presentations or project meetings, you can use Organizer for the main appointment-booking workflow.
Organizer can be used for both individual and group appointments.
Table of Contents
Step 1: Add an Organizer
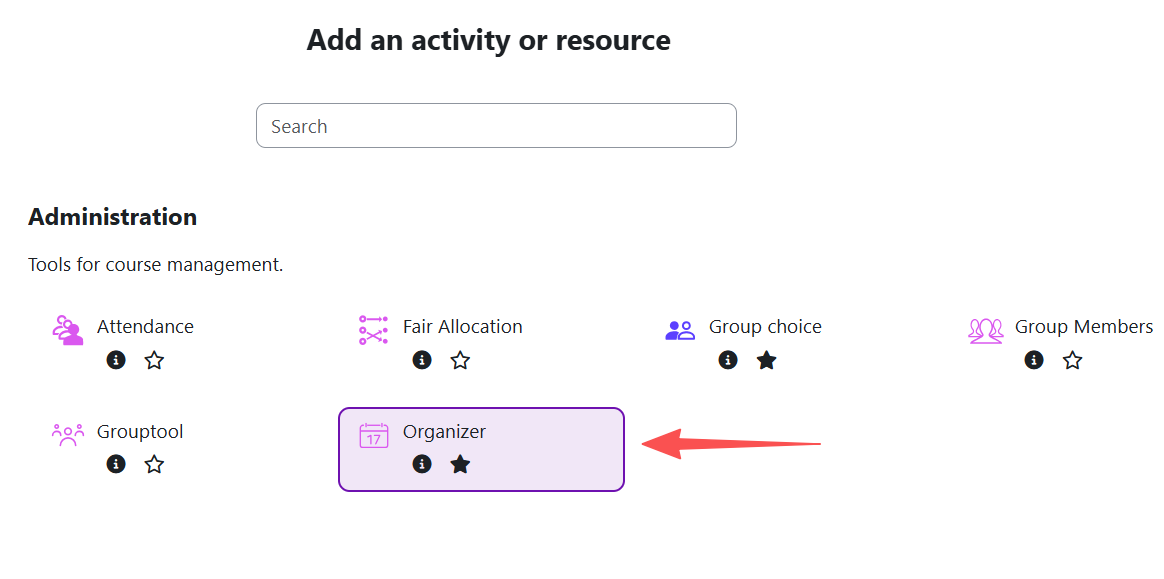
Turn editing on in your course and select: Add an activity or resource → Organizer
Give the Organizer a clear name, for example:
- Tutorial Booking
- Project Meeting Appointments
- Office Hours
You can also add a short description to explain what students are booking.
Step 2: Set the booking rules
Under Availability, set when students can start and stop making bookings.
Then check:
- Bookings per user – for a simple one-appointment setup, set the minimum and maximum to 1.
- Group appointments – use No group appointments for individual bookings. Choose a group option only if students need to book as groups.
Save the settings when you are ready.
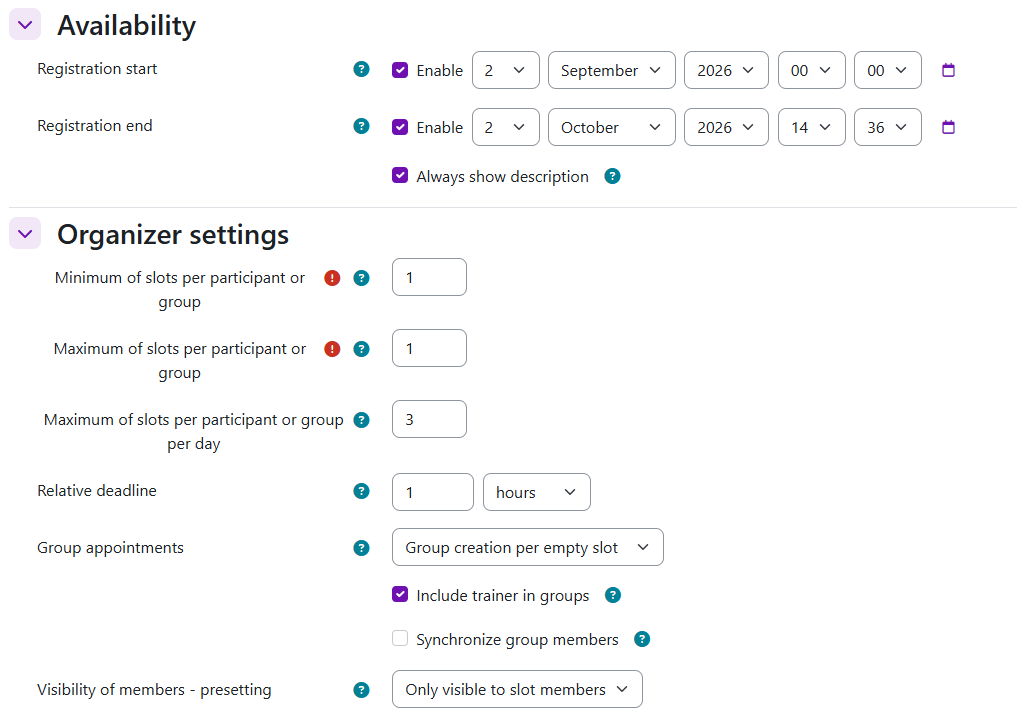
Tip: Maximum bookings and maximum participants are different.
Maximum bookings controls how many appointments a student can book. Maximum participants controls how many people can join one time slot.
Step 3: Create your appointment slots
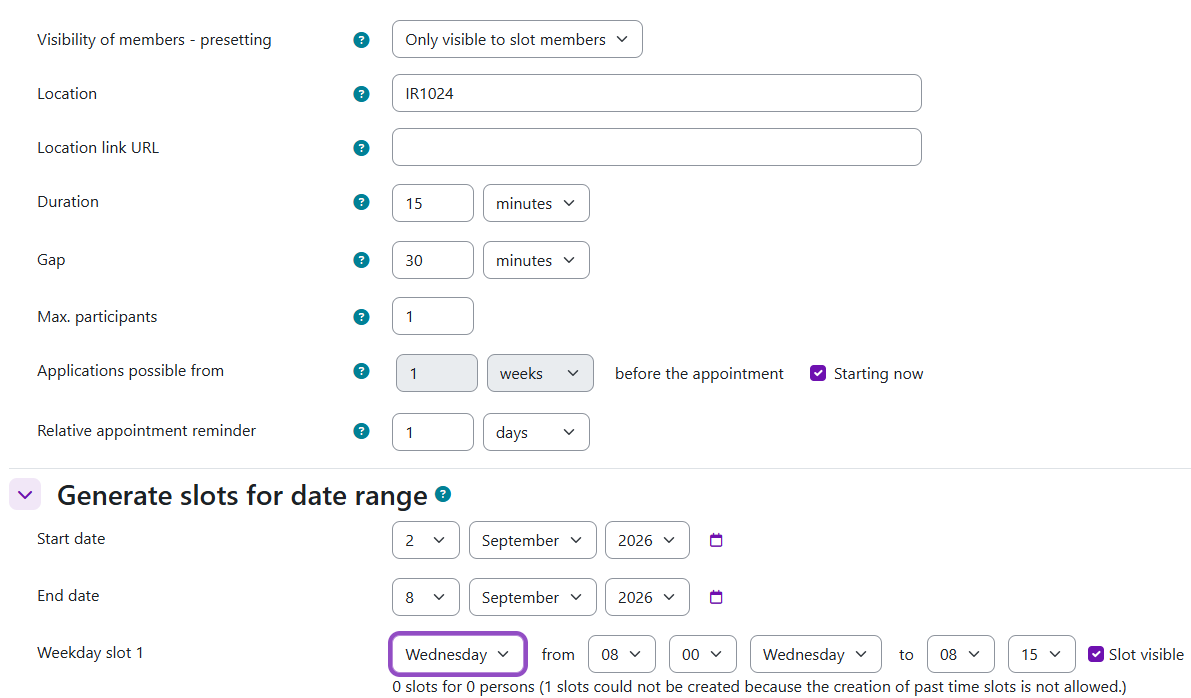
After creating the Organizer, add the time slots that students can choose from. Set the key information for your appointments, such as:
- date and time
- teacher
- duration
- maximum number of participants
- location, etc.
For a one-to-one meeting, set the maximum number of participants to 1. You can create several slots for a date range rather than creating every appointment separately.
Step 4: Check what students will see
Before releasing the Organizer, check the Student view. Students will see the available appointment slots and can register for an available time. Check that:
- the correct slots are available
- the dates and times are correct
- the location is clear
- the booking period is open at the right time
Step 5: Manage the bookings
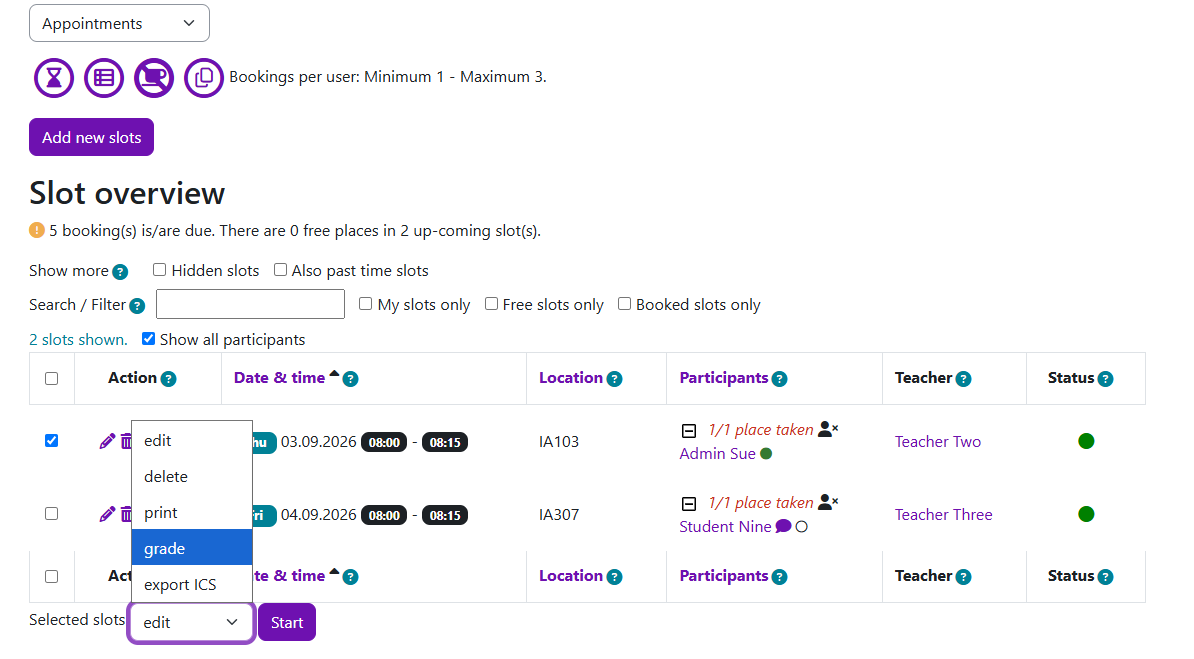
Open the Organizer and stay in the Appointments view. In the Slot overview, you can:
- see booked students under Participants;
- edit individual slots using the icons under Action;
- select one or more slots and use the Selected slots menu to manage them.
To check which students have or have not made a booking, select Registration Status from the view dropdown.
Tips: Organizer replaces the main appointment-booking workflow in Scheduler, but two Scheduler features are not currently available:
- Organizer does not use the same one-click “Check” workflow as Scheduler. Attendance is recorded through the Evaluate function.
- Students cannot upload files directly when booking an appointment.
Next steps:
Now that you have finished creating an Organizer activity, you may be interested in the following related articles:
Using Organizer as a replacement for the Reservation activity