How to let your students choose their own groups
An example of students choose their own group
Overview:
This guide will show you how to set up the group choice activity and allow your students to choose their own group for group activities.
What to know:
In order to use the group choice, please create empty groups or grouping with empty groups first. You can check these user guides for how to create empty groups:
Table of Contents
- Step 1: Create empty groups or grouping with empty groups
- Step 2: Turn on editing mode in your module area/course
- Step 3: Click ’Add an activity or resource ’ link
- Step 4: Choose the Group choice activity
- Step 5: Add name and description
- Step 6: Miscellaneous settings
- Step 7: Select the available groups for select
- Step 8: Restric answering to this time period
- Step 9: How does it work?
- Step 10: How to download the group list?
Step 1: Create empty groups or grouping with empty groups
You can check these user guides for how to create empty groups:
Step 2: Turn on editing mode in your module area/course
Click the ’Edit mode’ button displayed near the upper right of the module area/course.

Step 3: Click ’Add an activity or resource ’ link
- When editing mode is turned on, navigate to the section where you want to add the group choice activity.
- Next, click the ’Add an activity or resource’ button displayed at the bottom of the section.

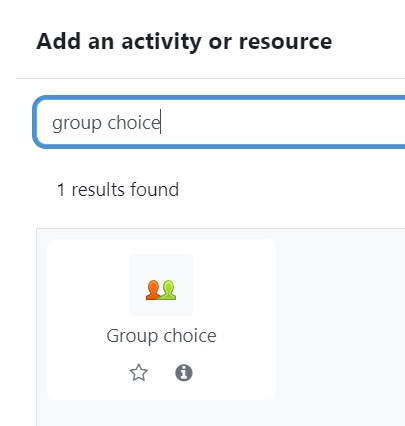
Step 4: Choose the Group choice activity
Search "group choice" in the pop up activities and resources search box and select the "Group Choice" activity by clicking the name.
Step 5: Add name and description
Input the name and detailed instructions in the description area for your students to better understand how you want them to choose their own group. e.g. there are 5 groups, each group can only have 10 group members, please finish selecting your group by [date and time].

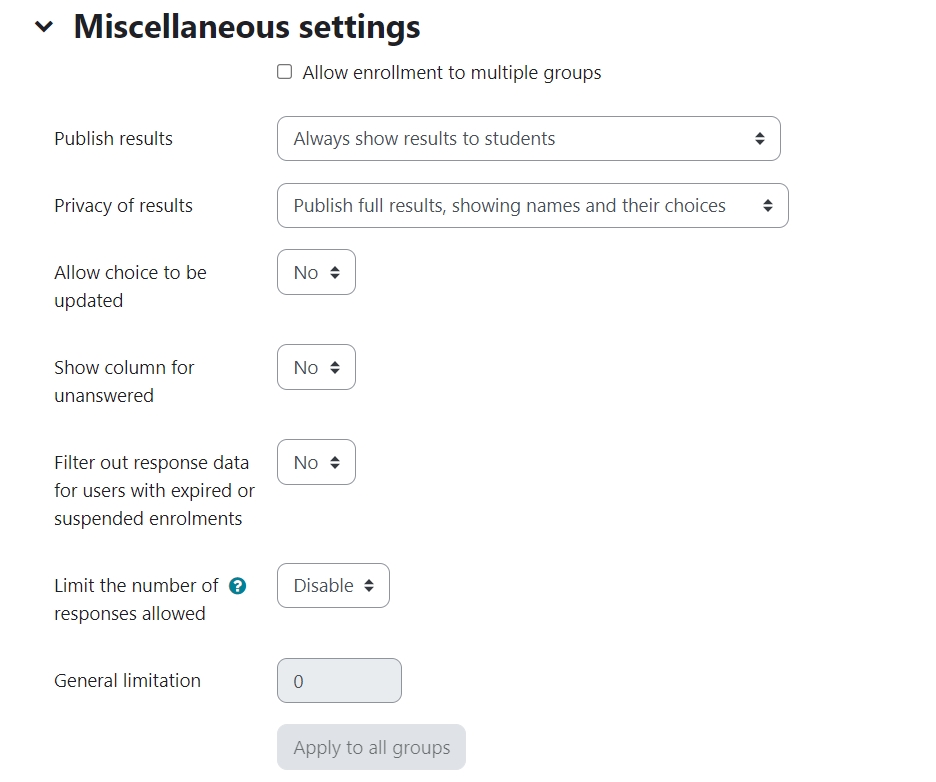
Step 6: Miscellaneous settings
Please go through all the settings to make sure you are happy with the options.
"Allow enrollment to multiple groups": decide if the students can choose only one group or several. By default is disabled, which means students can only select one group. You can enable this option to allow multiple groups.
"Publish results":
If you don't want students to know who is in the groups, select "Do not publish results to students". If you only want them to see after they choose, select "Show results to students only after they answer".
"Privacy of results": Please select the option from the dropdown list to decide if to show full results or partial.
"Allow choice to be updated": If you allow your students to change their choice, please change this to "Yes". By default is "No".
"Show column for unanswered": If you want to see who is not answered yet, please change this to "Yes". By default is "No".
"Limit the number of responses allowed": If you want to set number limit, please change this to "Enable". By default is "Disable".
Once you've enabled the setting, you will be able to set the number in the "General limitation".
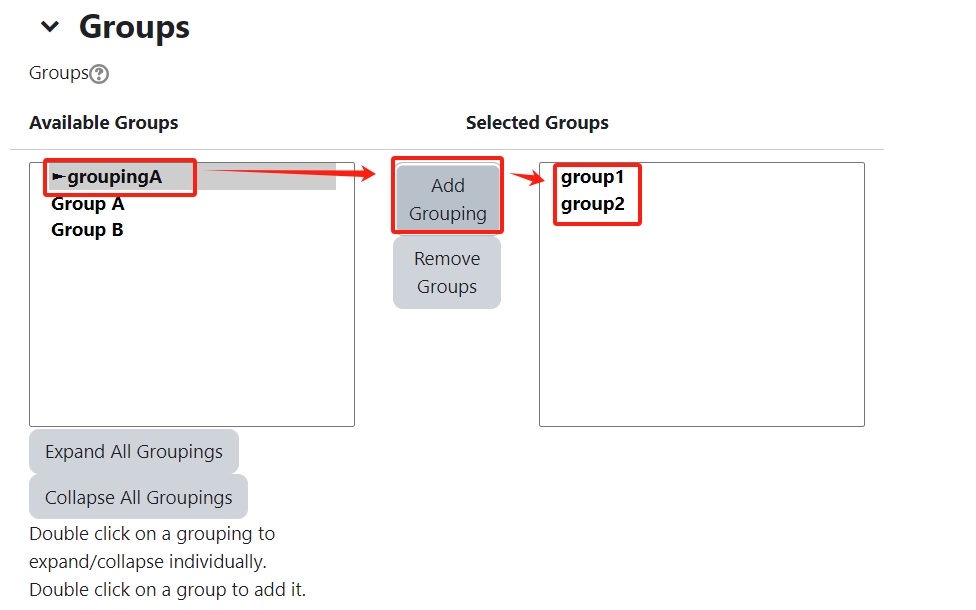
Step 7: Select the available groups for select
Choose the groups you wish the students to select from by clicking them in Available groups and moving them over to Selected groups. Several may be selected and added at once. If you've created grouping, you can select the grouping and click add grouping, all the groups belong to that grouping will be added.

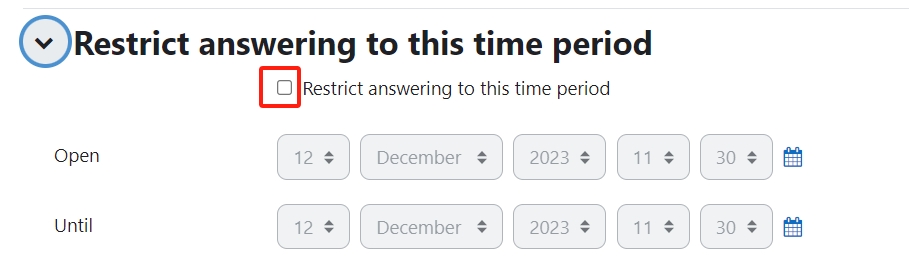
Step 8: Restrict answering to this time period
If you want to limit students' answering time, please enable the "Restrict answering to this time period" option first, and then you can set the date and time for open and until.
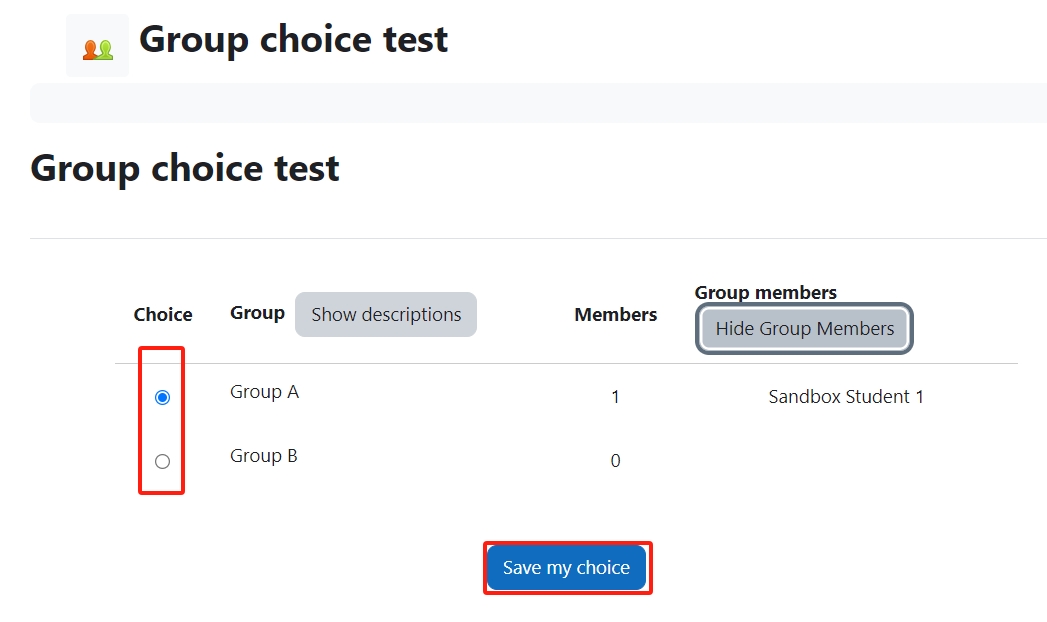
Step 9: How does it work?
When students click on the Group choice activity, they can select which group(s) they wish to join.
If allowed, they can toggle a Show/Hide link to see who else is in the groups:
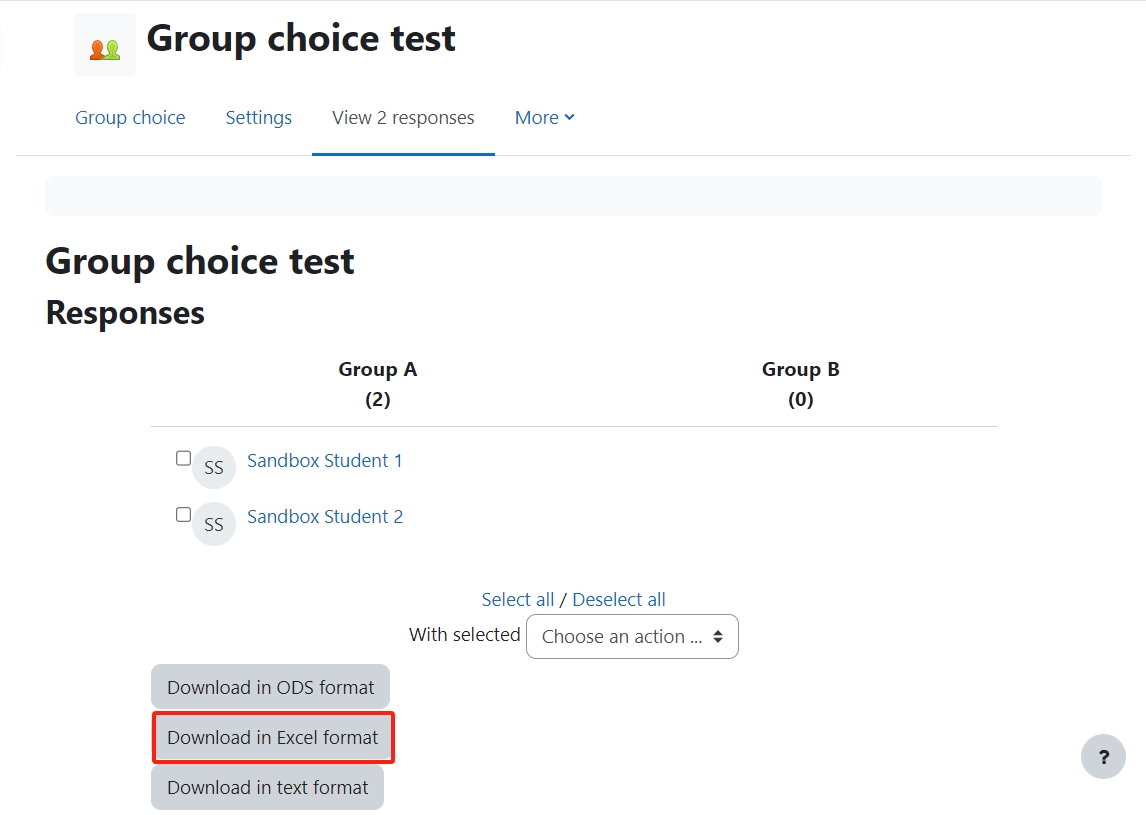
Step 10: How to download the group list?
As teacher, you can see a link named "view xx responses" after students saved their choices. Click on the link and you can access to the view all responses list.
At the bottom of the page, you can select the format you want to download the groups.

Tips:
You can always add or remove groups from the settings. But it is better not to change the groups after students start to save their choices. Your changes to the groups will confuse the students about their saved choices.
Next steps:
Now that you have finished creating a group choice activity, you may be interested in the following related articles: