5 - How to upload attendance recordings
Overview:
This guide will show you how to upload attendance recordings.
What to know:
It is recommended by the "Policy on Student Attendance and Engagement" for teachers to use appropriate way to record student attendance. Learning mall has provided the attendance activity, where attendance can be easily recorded by students themselves in the module area with fully considered access control and reviewed at any time any place. The system also automatically generates reports for both teachers and students, highlights students whose attendance are below university expectation, as well as sends warning emails.
We provide several specific user guides about the use of attendance. This guide focuses on how to upload attendance recordings. If you are new to the attendance function, please check the other attendance guidances for more details. We have also prepared a guide for you to share with your students about How to take attendance on the Learning Mall.
Table of Contents
Step 1: Access to the attendance activity
Access to the learning mall core and access to your module page.
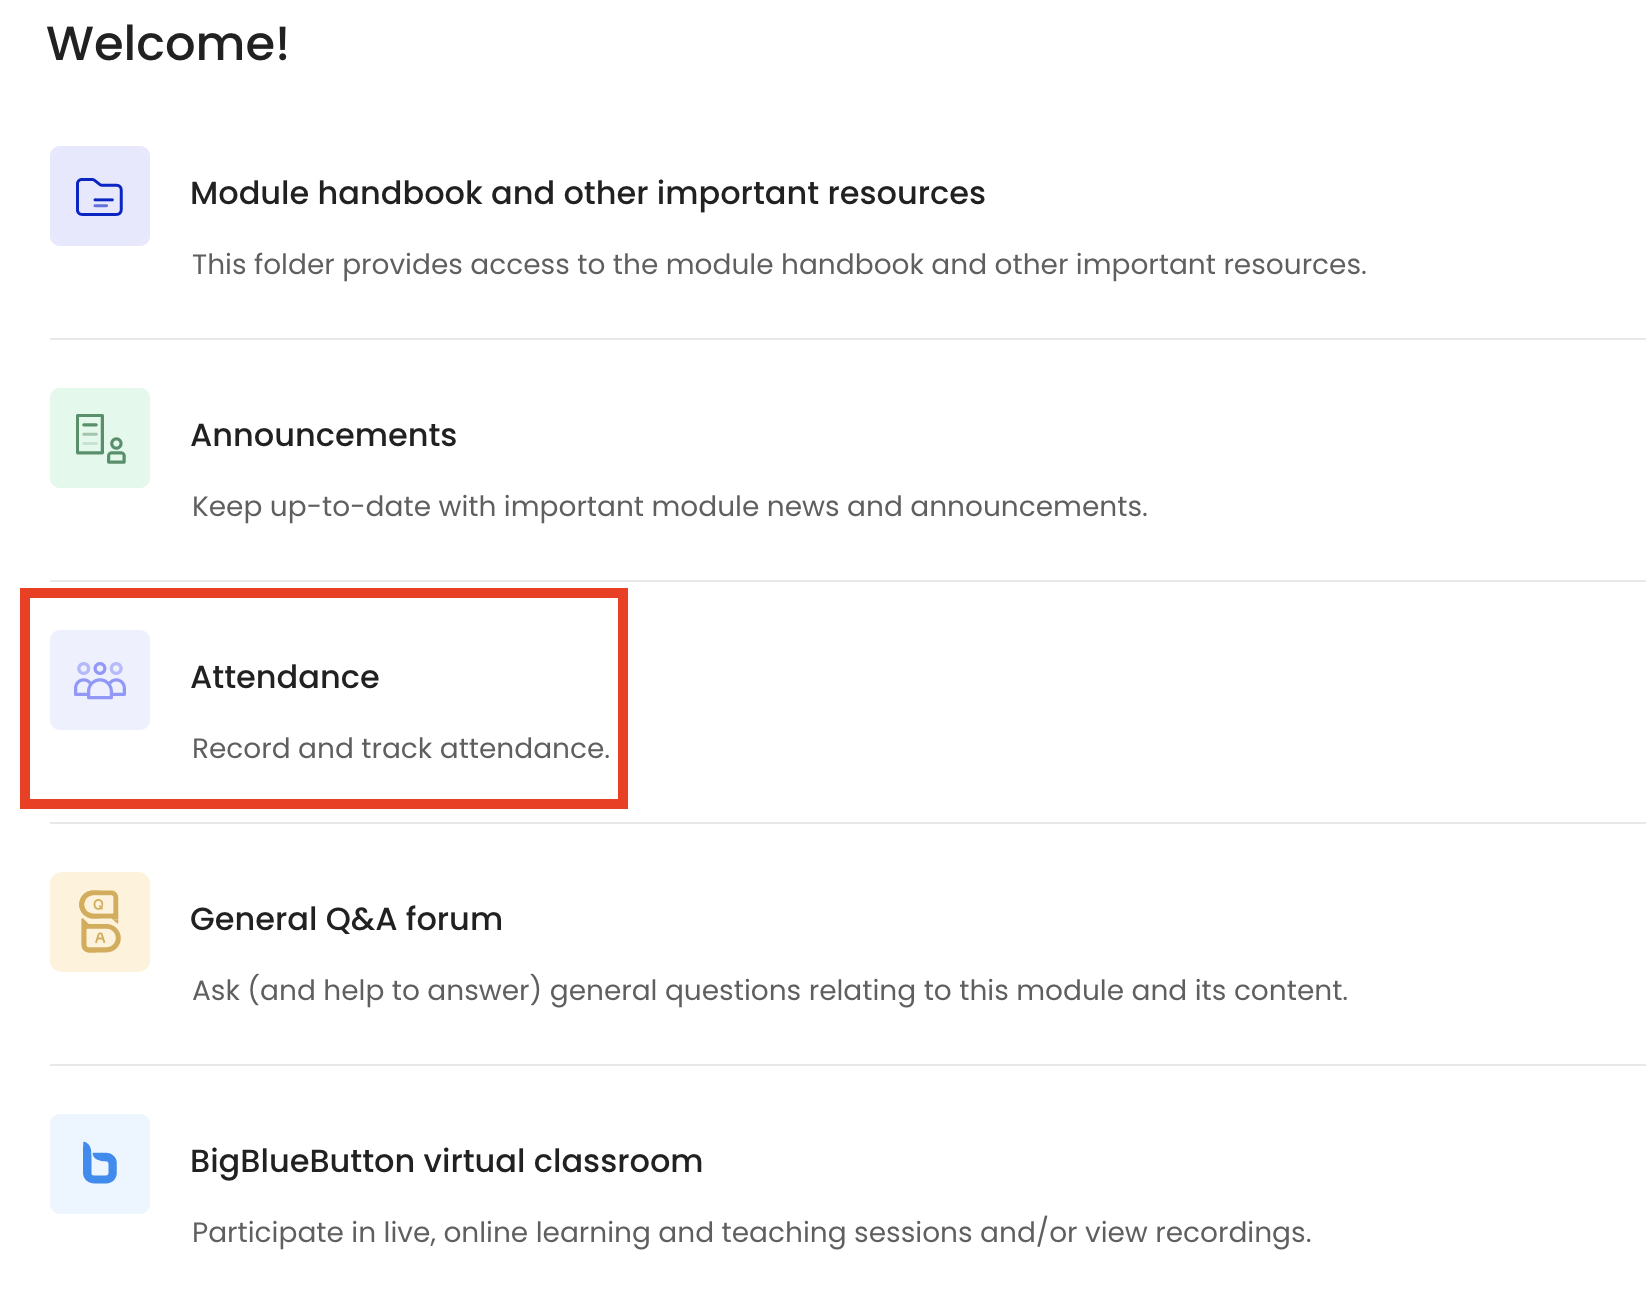
Click on the attendance link.
Step 2: Find the session you want to edit attendance recordings
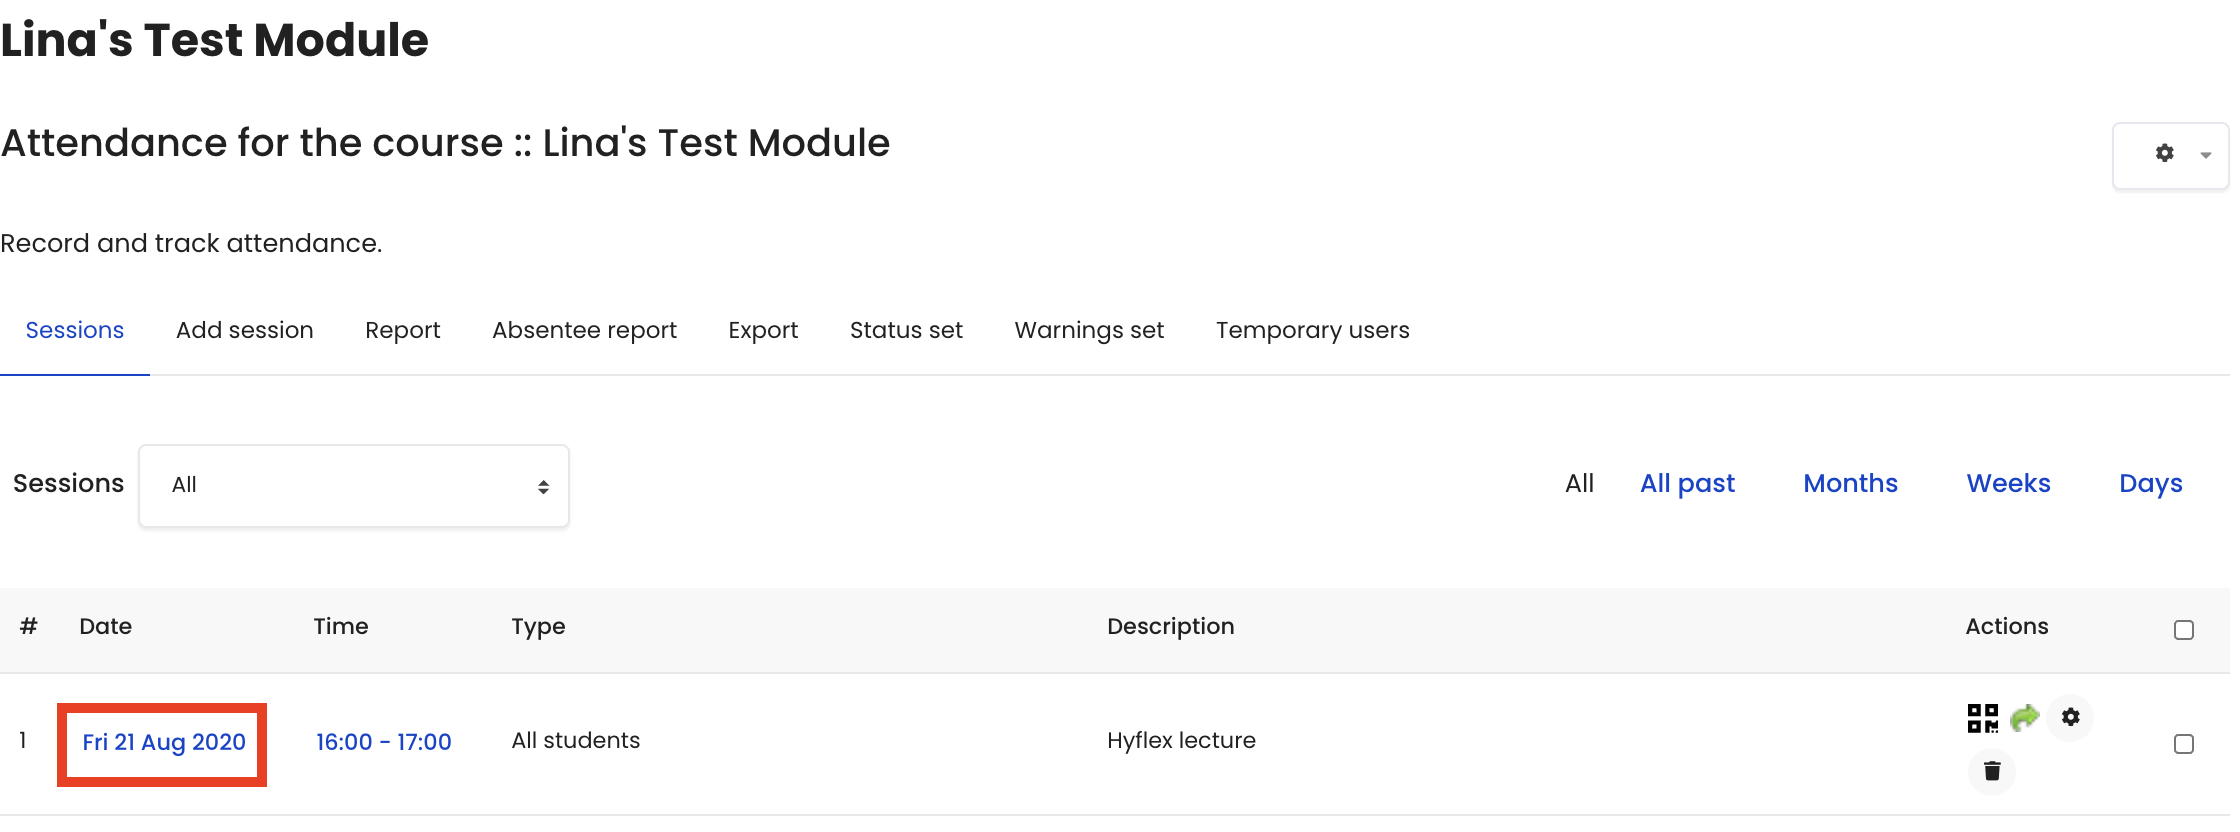
On the attendance page, by default, the page will show the current week’s sessions. If you are looking for previous sessions, please click the "All" tab to view all the attendance sessions. As the screenshot shows, click on the date link of the selected session.
Step 3: Upload attendance by csv
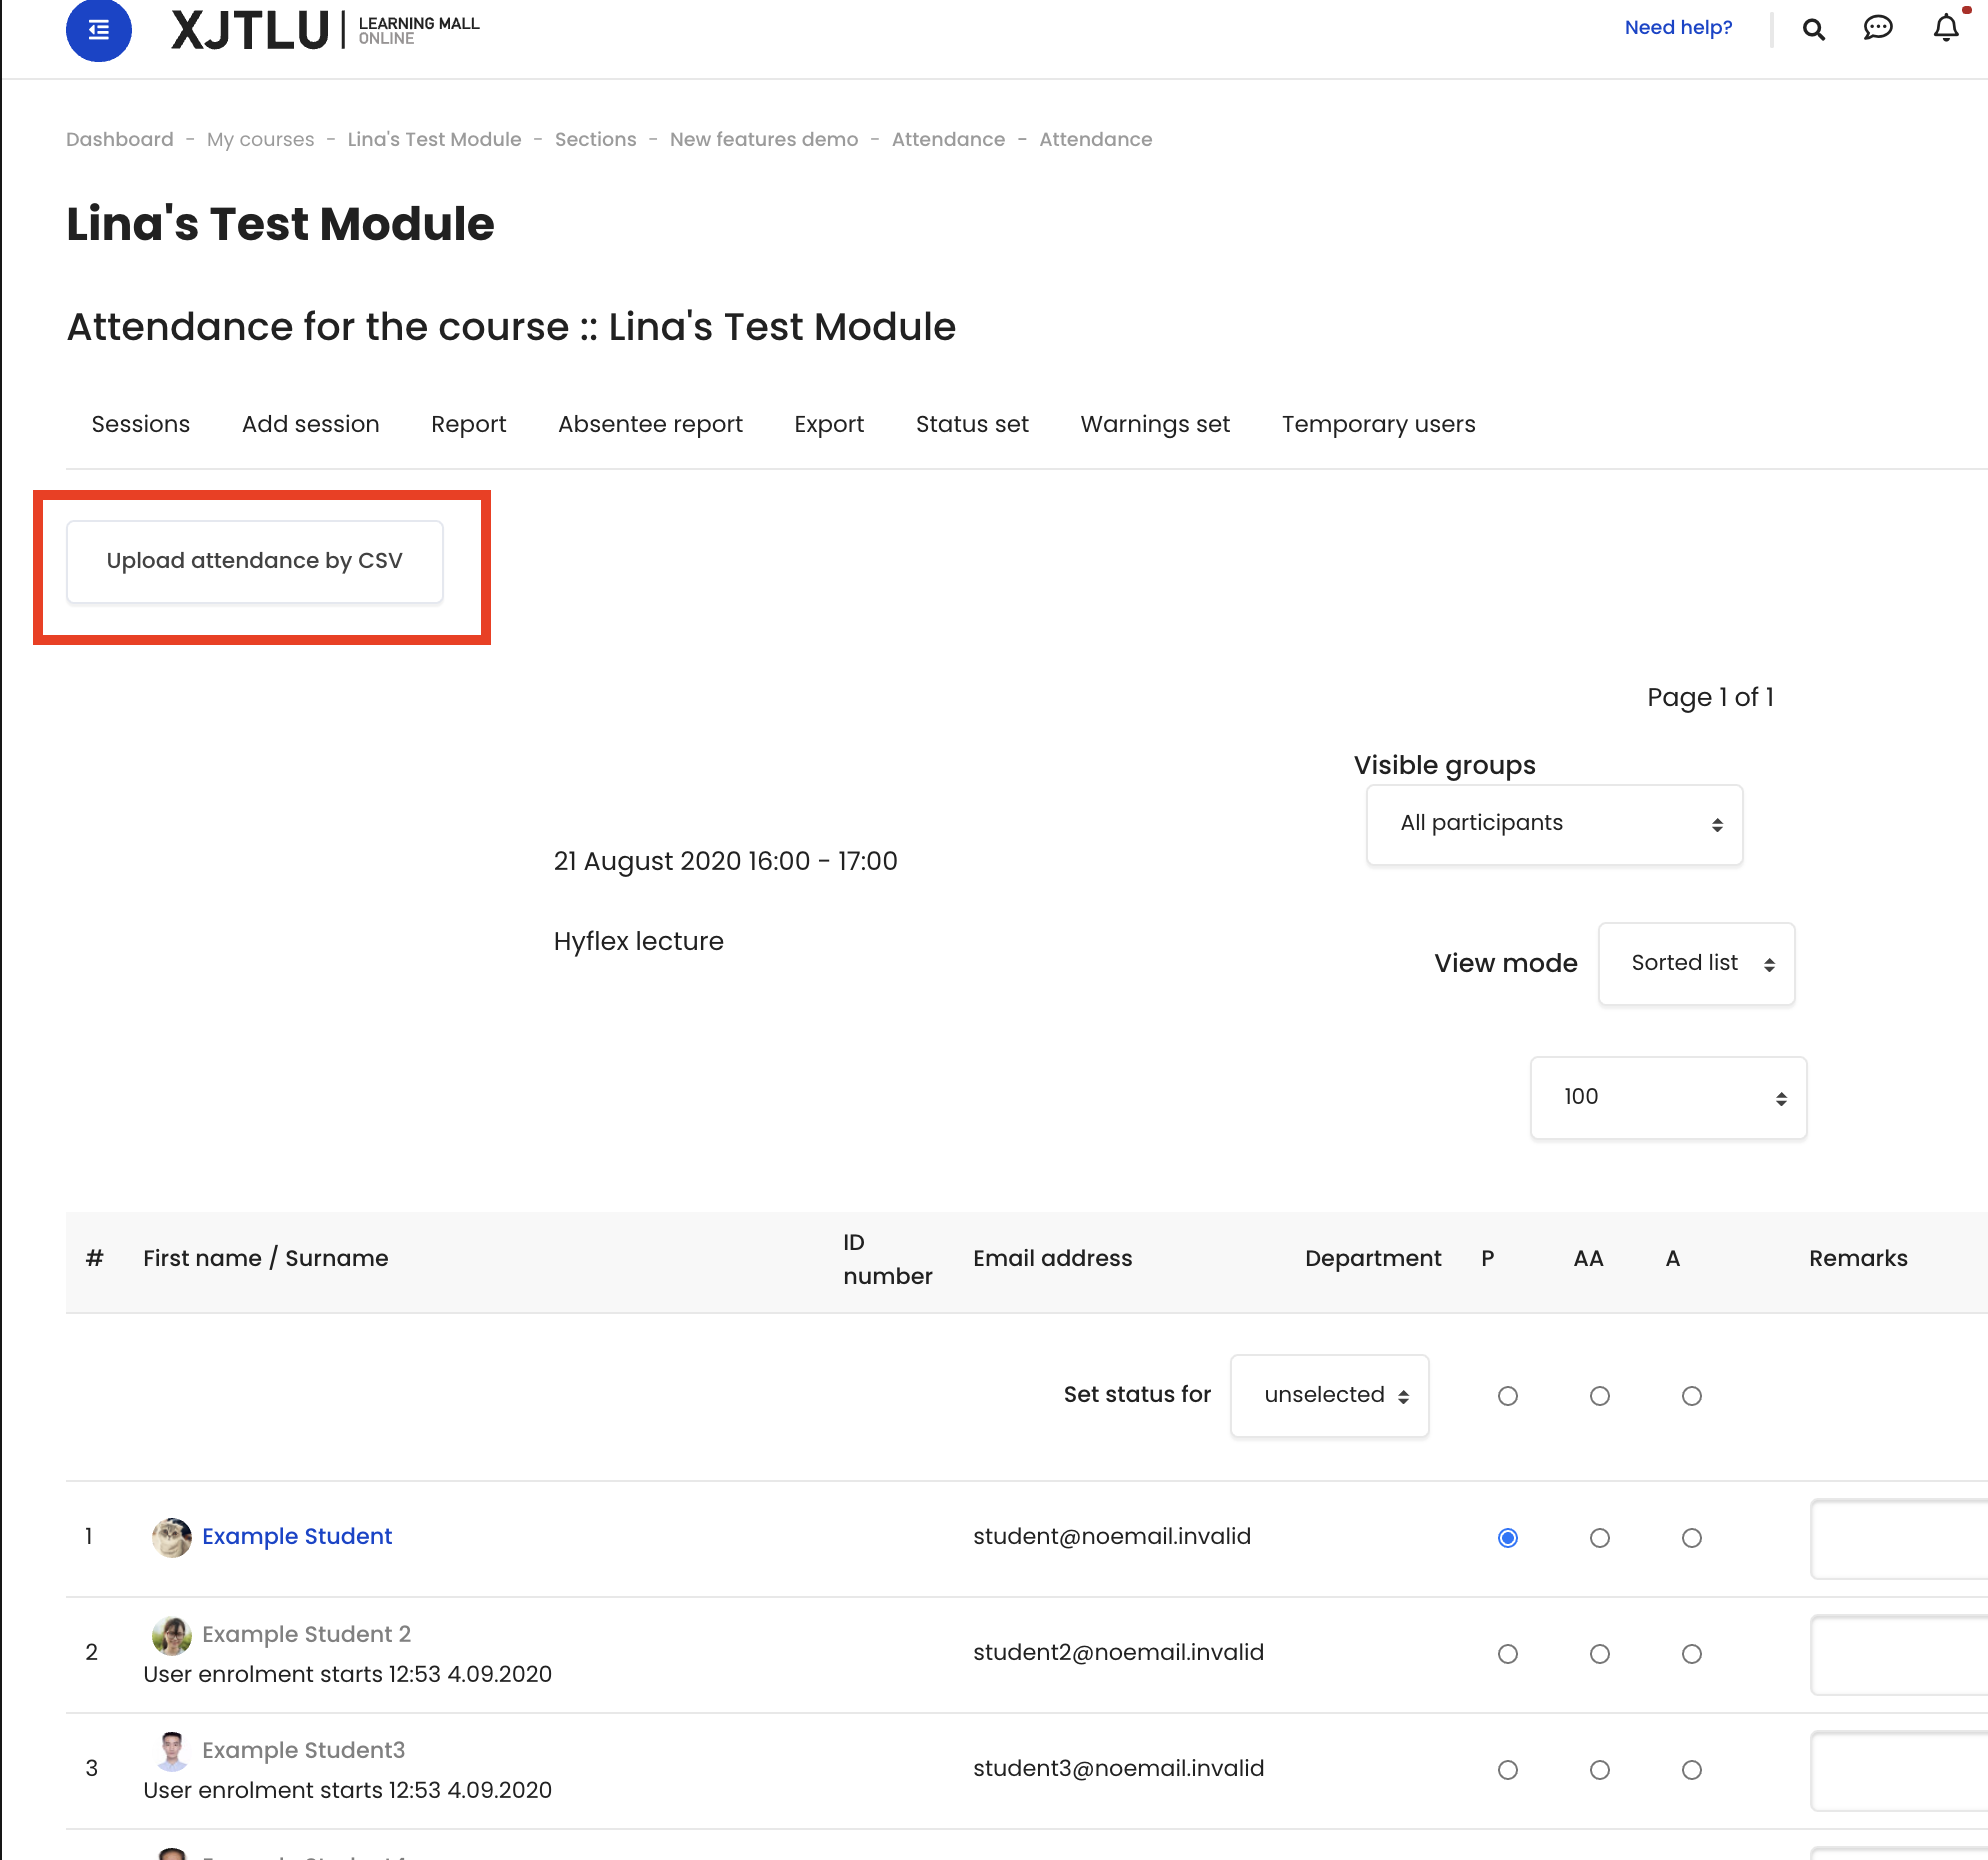
Click the "Upload attendance by csv" button.
Step 4: Create the csv file
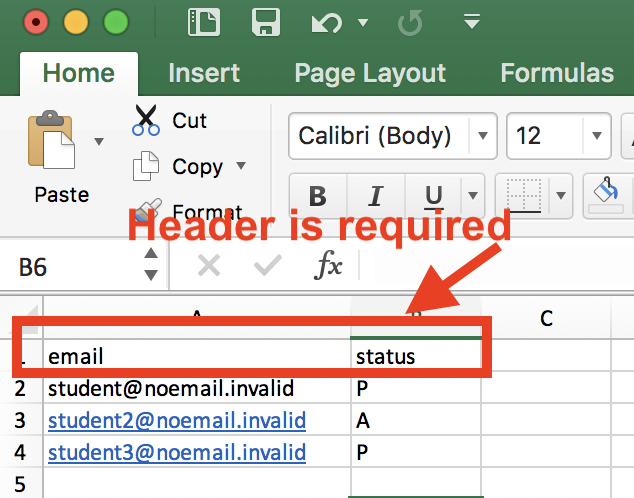
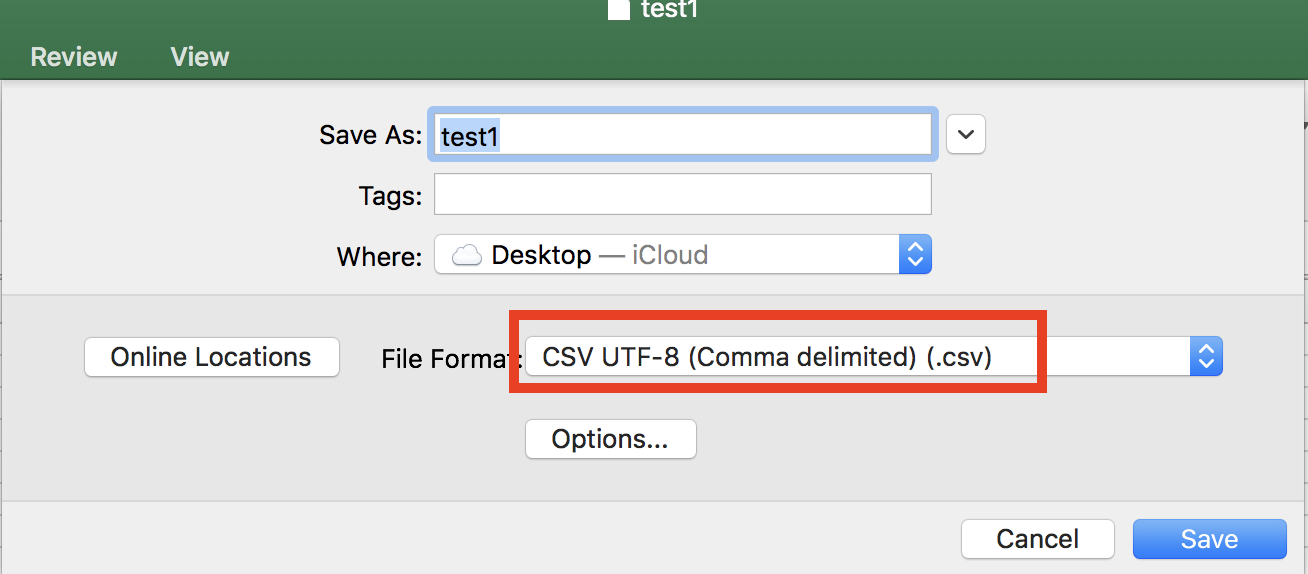
Create a new excel file, add the header row: email, status. As the screenshot shows, input the student’s email in the "email" column and input the attendance status in the "status" column.
A: Absent, AA: Authorised Absence, P: Present. Save the excel file as .csv file.
Step 5: Back to the Attendance upload page and upload the csv file
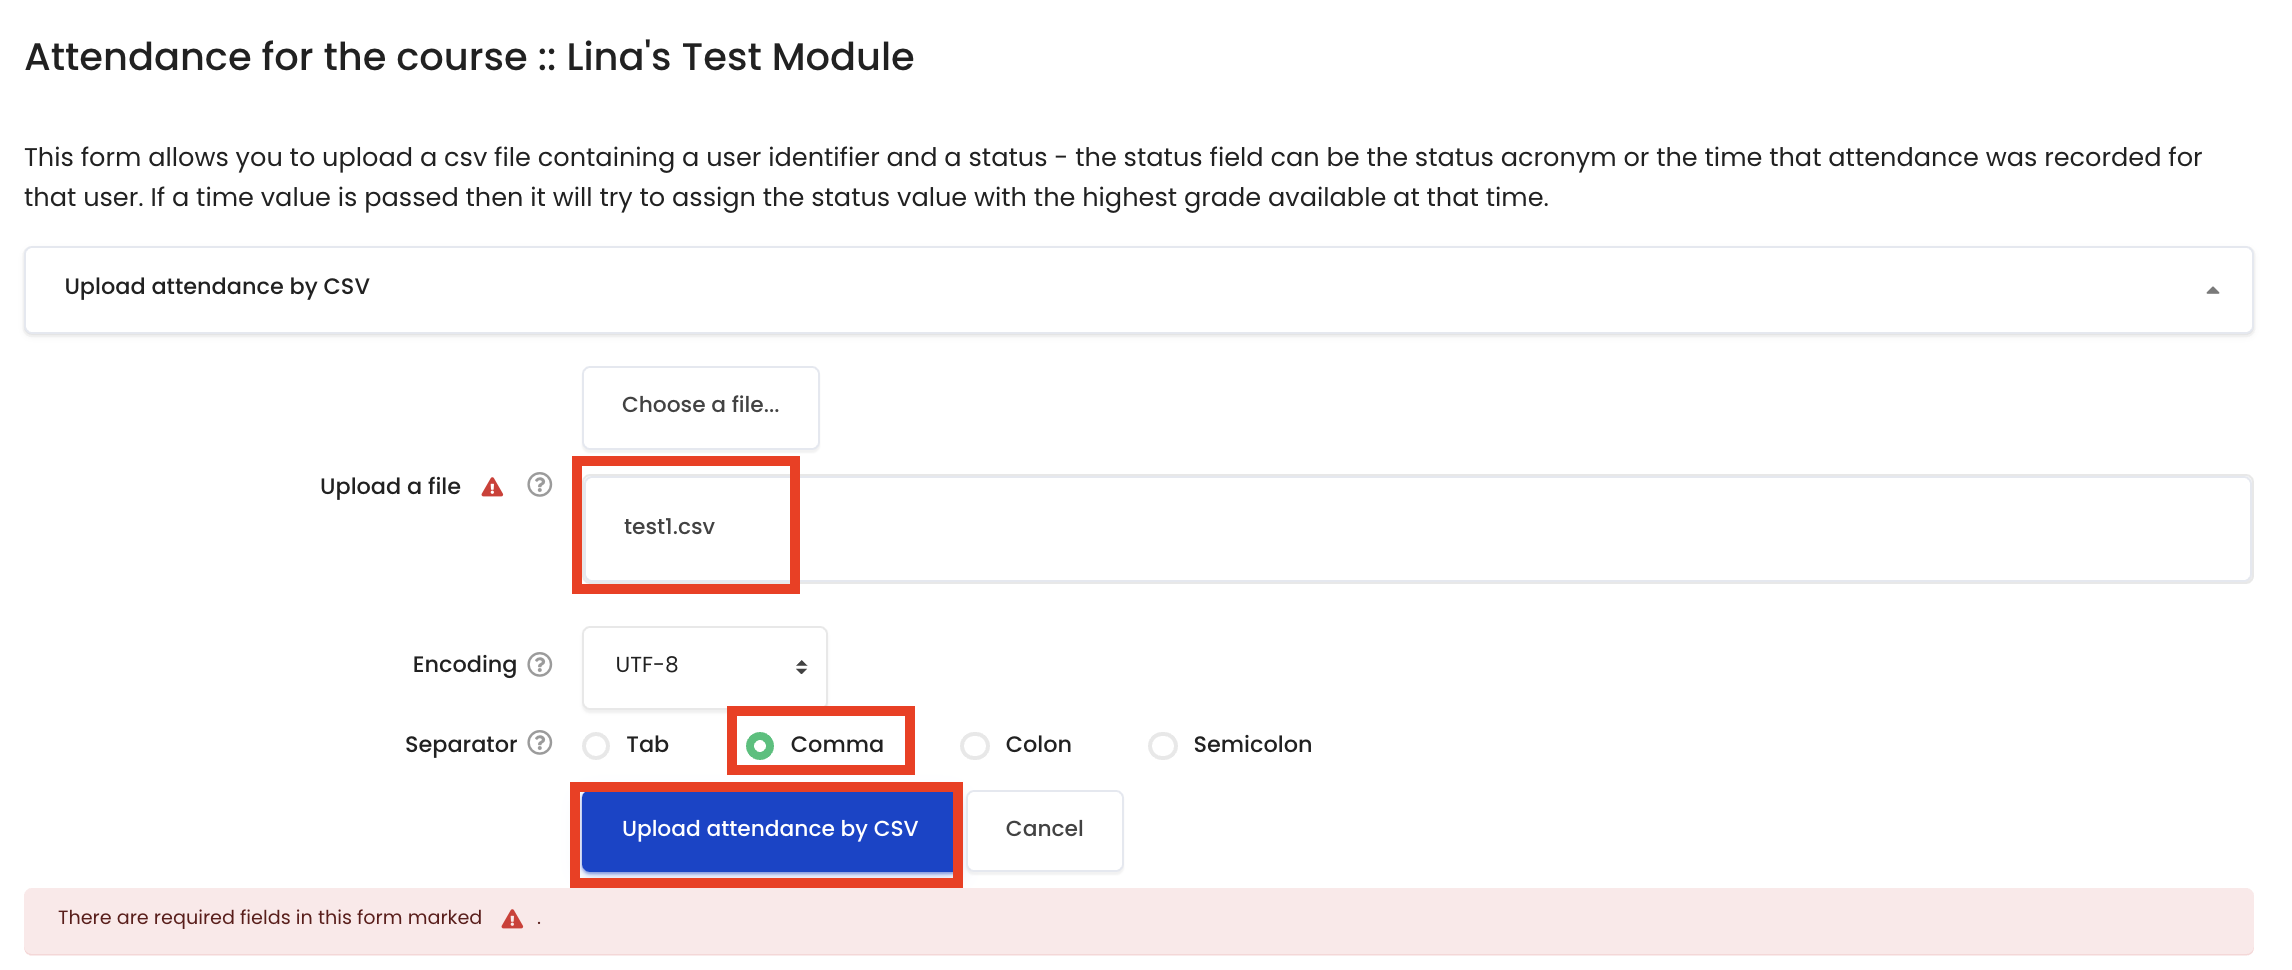
Drag and drop the CSV file onto the upload file box, keep the default settings and click "upload attendance by CSV" blue button.
Step 6: Map the fields and upload
Make sure the "External user field" is mapping with "email", "Moodle user field" is "Email address", "Scan time" is "not set", "Status field" is "status", and then click "Upload attendance by CSV".

Tips:
Please make sure to follow the steps and use the same CSV format. We are working on the function that you can export the attendance report and use the same format to upload back, the current function only support this CSV format.