Marking PDF Submissions Online
An example of online annotation marking of PDF submissions
Overview:
This guide will show you how to mark your PDF submissions within the Learning Mall Core.
What to know:
The ability to mark PDF submissions within the Assignment activity environment provide the user with greater flexibility, and choice when marking student submissions.
Make sure 'Annotate PDF' is enabled in the Feedback types area of assignment settings.
Table of Contents
- Step 1: Assignment activity
- Step 2: View submission
- Step 3: The submission page
- Step 5: PDF submission screen
- Step 5: Annotation tools
- Step 6: Adding a text field
- Step 7: Add to quicklist
- Step 8: Using the quicklist
- Step 9: Delete a comment
- Step 10: Change the background color for the text field
- Step 11: Using the drawing tools
- Step 12: Using the Stamp Icons
- Step 13: Moving or deleting annotations
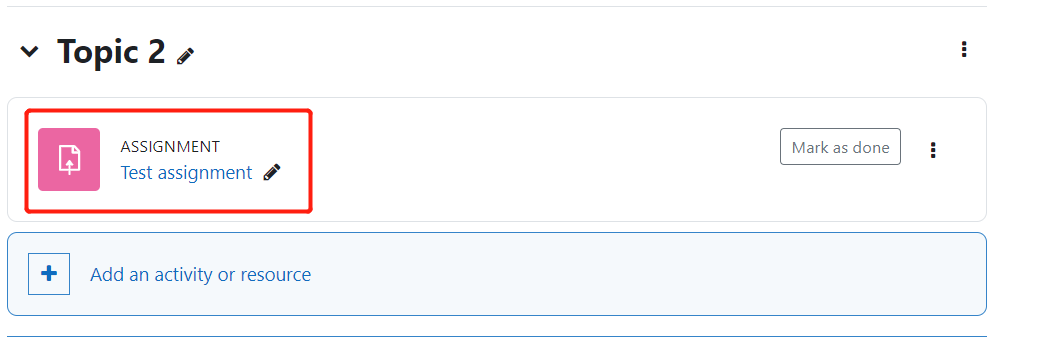
Go to your Assignment activity on your module page
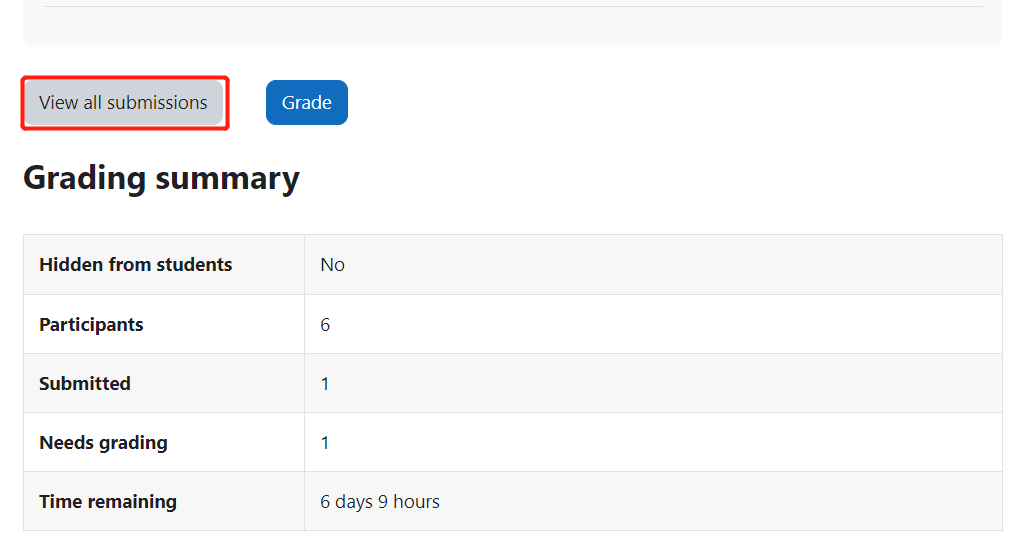
Click on the 'View all submissions' button
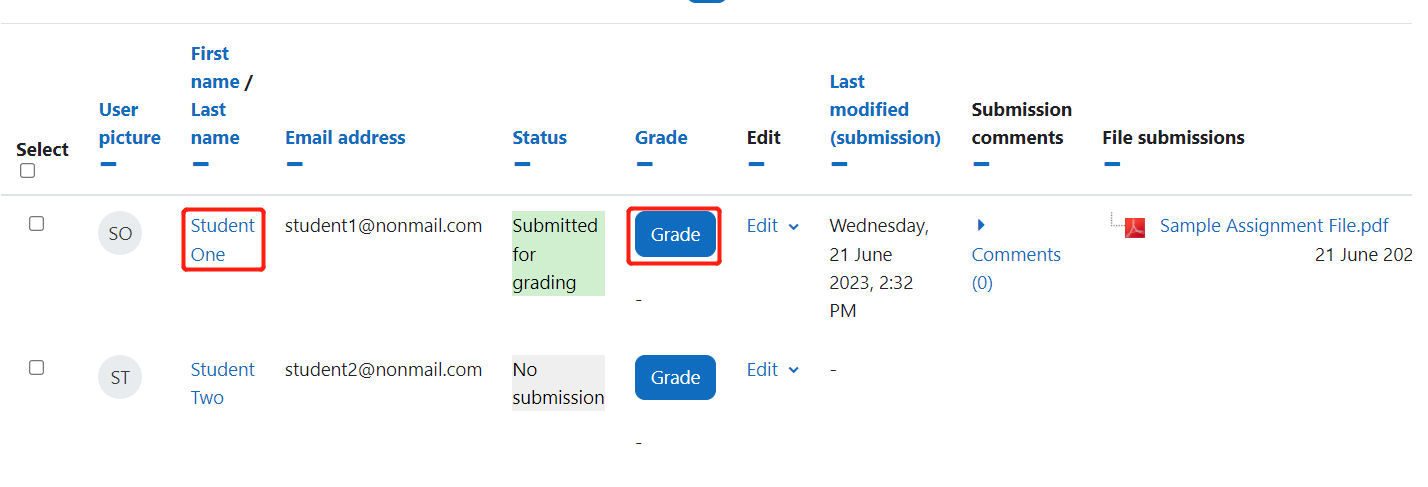
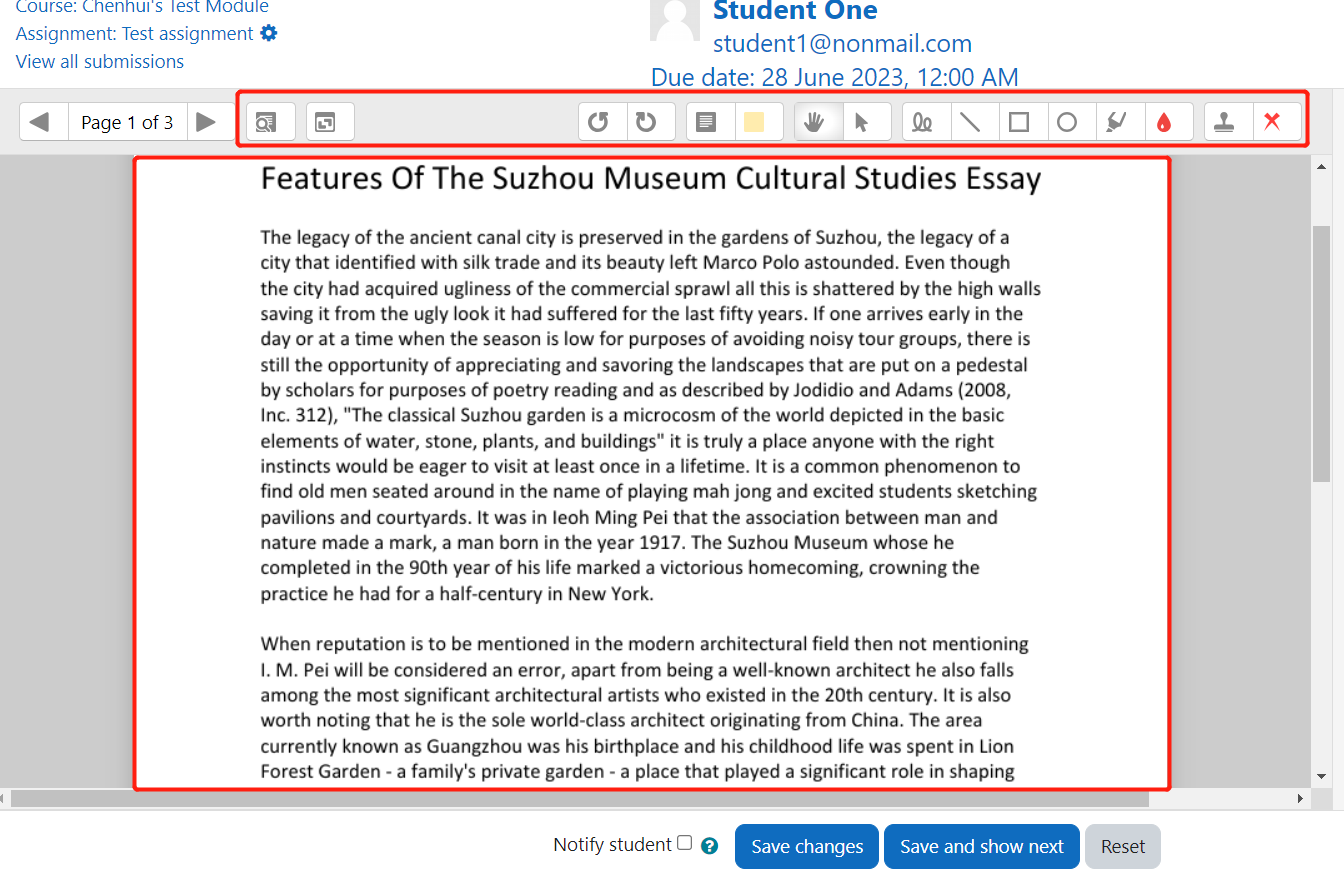
Here, you can see the list of students in the assignment and their submissions. Please find a assignment you want to see and mark. For example, you want to mark the assignment of 'Student One' Please click the 'Grade' button in the 'Grade' column.
Step 5: PDF submission screen
You will now have been taken to the screen where you can see the submission as a PDF with annotation tools stationed at the top of the screen
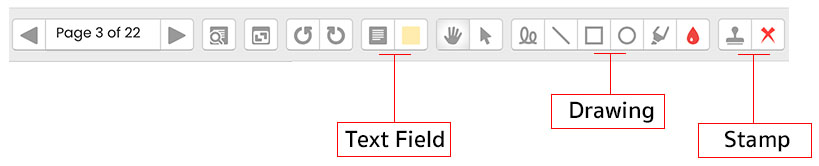
Step 5: Annotation tools
In the tool bar that sits above the PDF submission. there are a variety of icons, which can be placed in three different categories, text field, drawing and stamp functions.
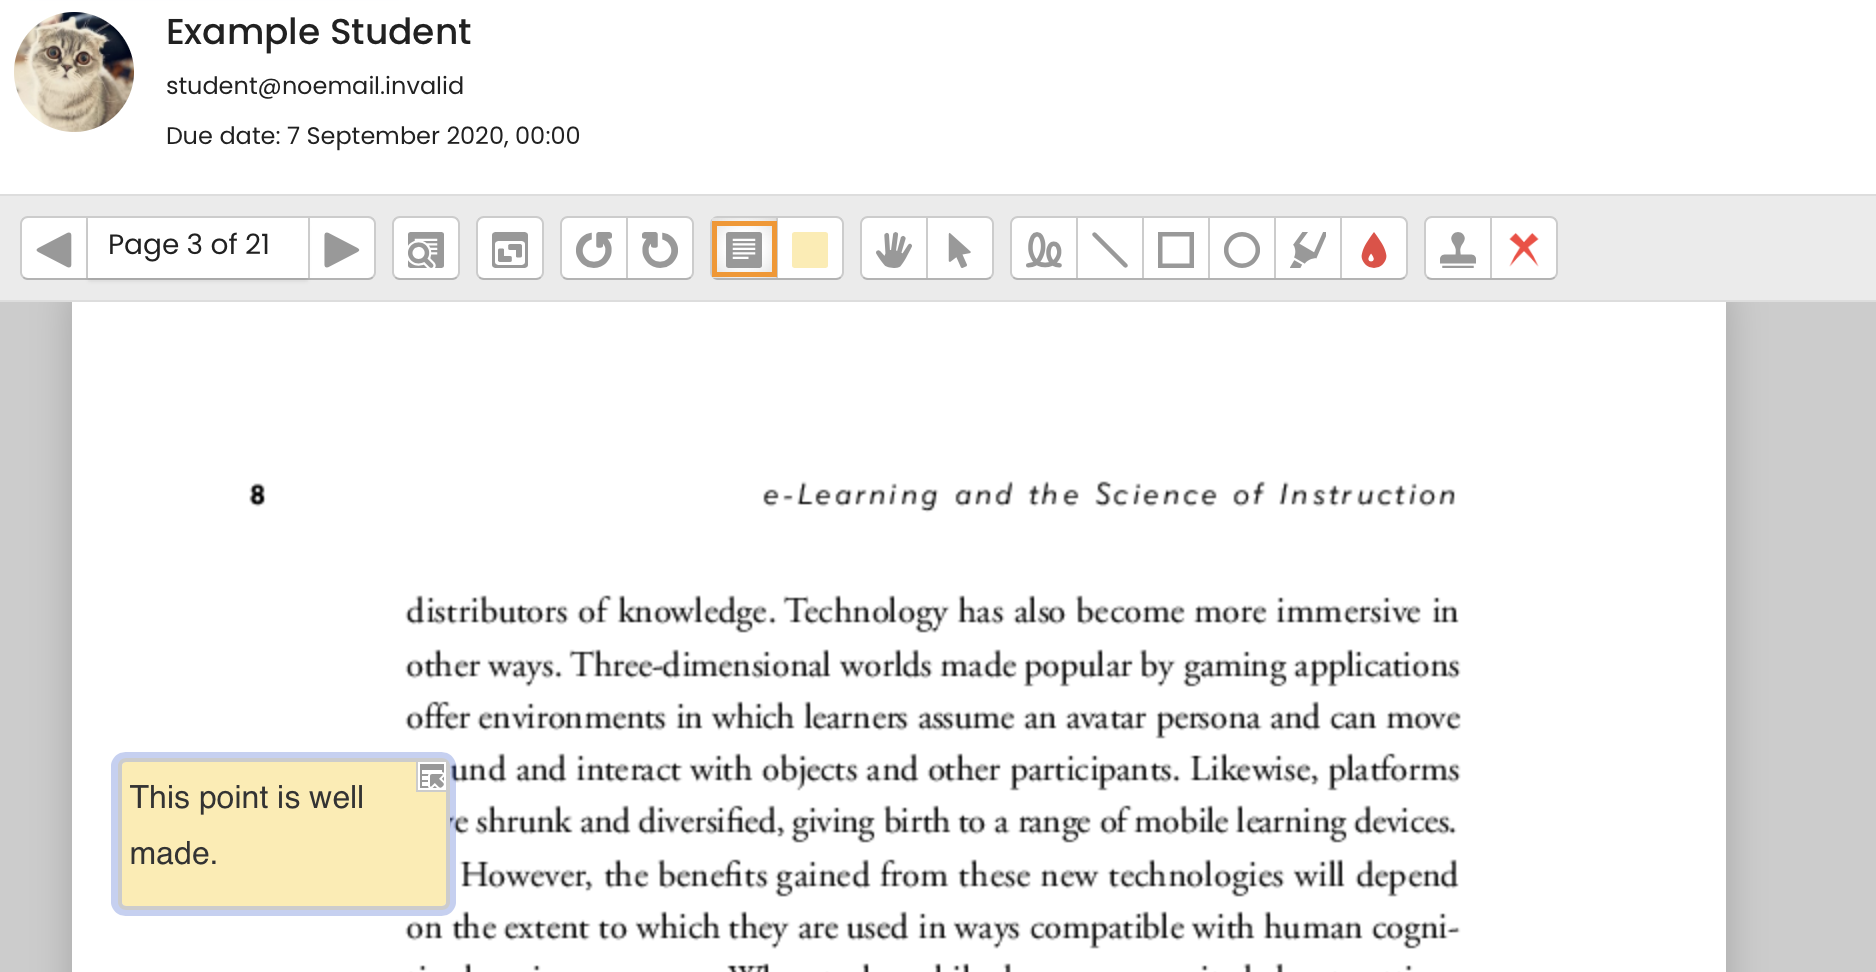
Step 6: Adding a text field
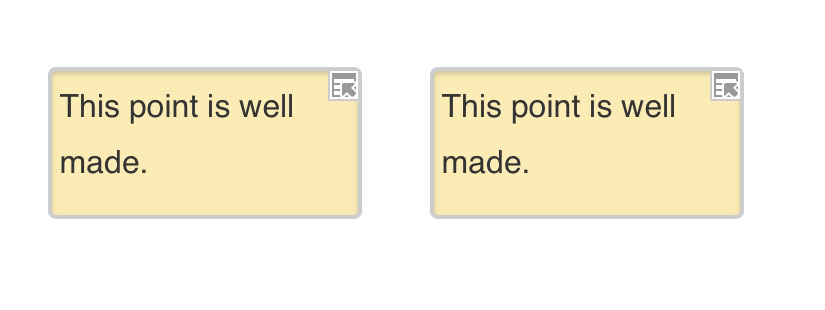
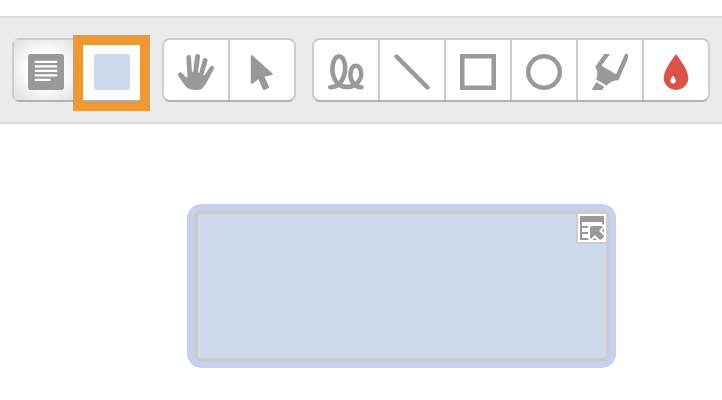
Click the first icon in the left is the text field icon group. After clicking the icon, the cursor changes to a cross. Then you can press the left button of the mouse and drag the mouse at the same time. Then you will see a coloured text filed when you move your mouse. Then you can release the left button of the mouse. There is a text field in the page. Then you can write down comments in the text field.
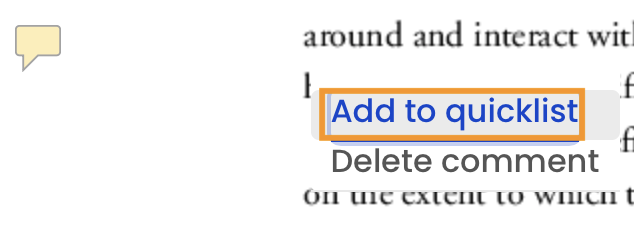
Step 7: Add to quicklist
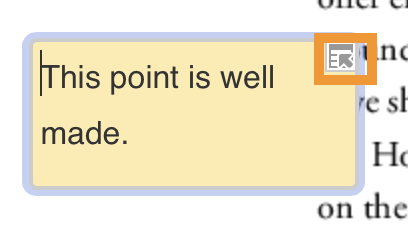
1. You can also delete the text field or add the comments to a quick list so that you can reuse it. On the right top corner of the text field, there is a small icon. Please click the icon.
2. A dropdown menu will appear beside the icon.
3. Click the option 'Add to quicklist'.
Step 8: Using the quicklist
1. to use the quicklist click the small icon on the top right corner of the text field again. The text you write is stored at the bottom of the menu. You can also click the small cross on the right of the sentence to delete it if you so choose.
2. So in the text box, you introduce an empty text field, you can click the sentence in the quick list to put it into the text field without typing words.

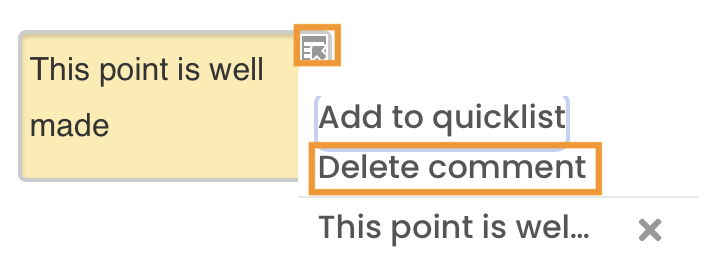
Step 9: Delete a comment
Please click the top right icon of the text field. Then click the "delete comment" option. The text field is deleted.
Step 10: Change the background color for the text field
1. Click on the menu item next the text field icon and the the dropdown menu will display a list of colors.
2. choose a color and this will be reflect in the text field.

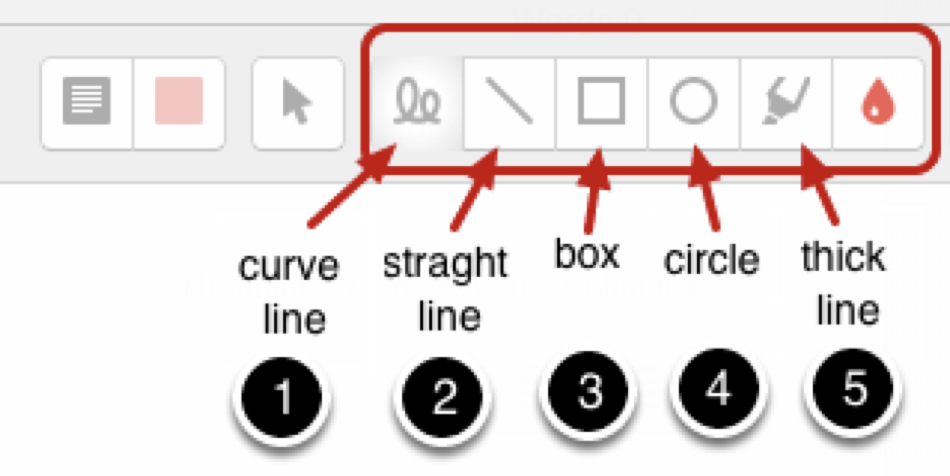
Step 11: Using the drawing tools
1. You can draw lines and shapes on the page with the drawing function.
2. You can utilize the drawing tool functionality to annotate over the PDF assignment. The following is examples demonstrate what the different icons can do.
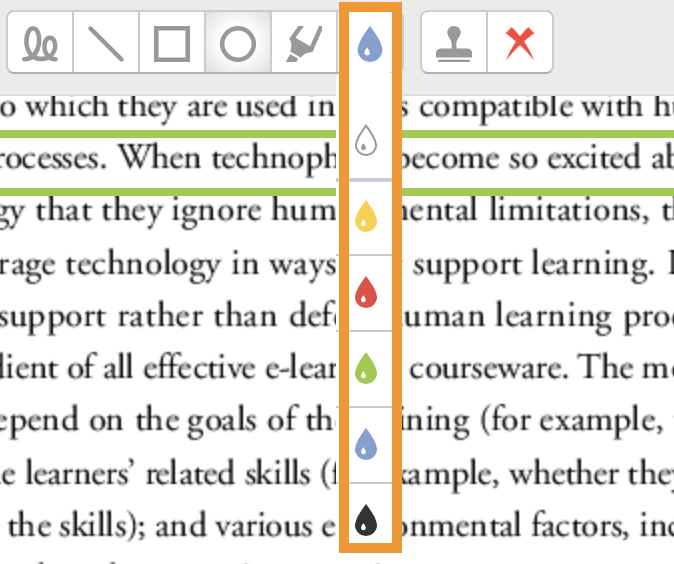
3. You can change colour of the annotation by clicking the dropdown menu for the colour tool icon . Then a drop down menu appears.
Step 12: Using the Stamp Icons
1. First, go to the stamp icon location then click the icon on the right to choose a stamp. After you click it, a drop down menu appears. There are a variety of stamps to choose from. You can choose a stamp by clicking it.
2. Then you can assign the stamp on the page by left clicking the mouse.
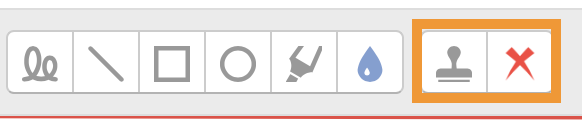


Step 13: Moving or deleting annotations
- To move or delete annotation firstly click on the arrow icon.
- Then click on the item you'd like to move or delete, you'll see the 'trash can' symbol appear in the corner if you want to delete an item, or just simply left click on the item and move accordingly.

