Advanced Grading Method: Checklist
An example of Checklist marking in Assignment activity
Overview:
This guide shows you how to create a Checklist marking criteria for Assignment activity.
What to know:
The Checklist feature affords a teacher the ability to provide grades and feedback in an alternative manner to simple grading, provide
Table of Contents
- Step 1: Turn on editing mode in your module area/course
- Step 2: Click ’Add an activity or resource ’
- Step 3: Choose the Assignment activity
- Step 4: Provide a name for your activity
- Step 5: The checklist function
- Step 6: Selecting the grading form
- Step 7: Naming your checklist
- Step 8: Defining your checklist
- Step 9: Saving the checklist
- Step 10: Use the Checklist marking criteria
Step 1: Turn on editing mode in your module area/course
Click the ’Turn editing on’ button displayed near the upper right of the module area/course.

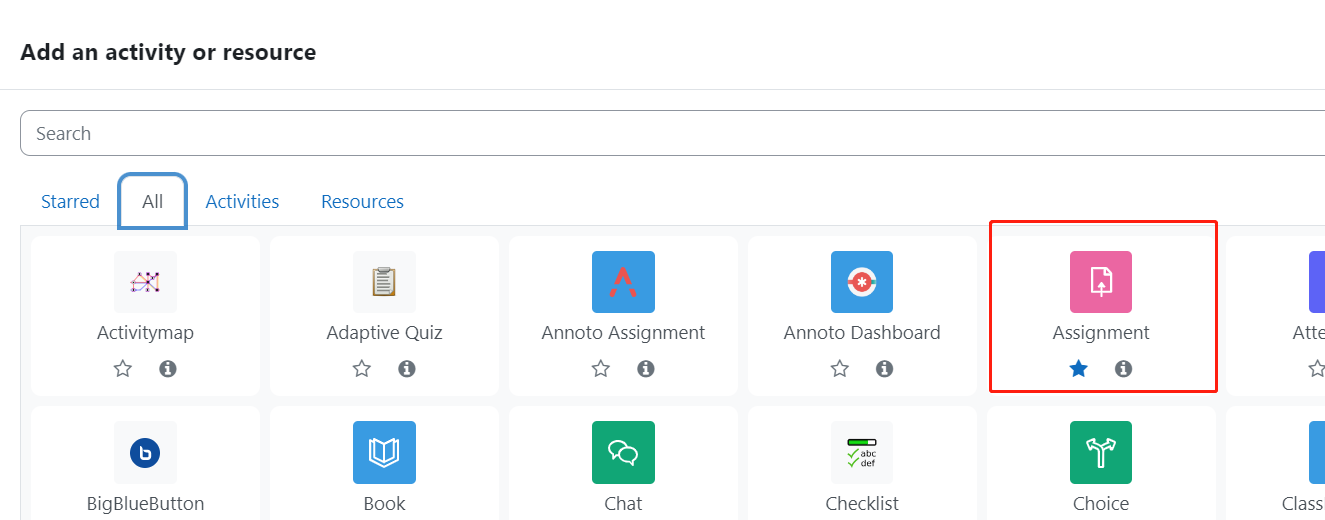
Step 2: Click ’Add an activity or resource ’
- When editing mode is turned on, navigate to the section where you want to add the assignment activity.
- Next, click the ’Add an activity or resource’ button displayed at the bottom of the section.

Step 3: Choose the Assignment activity
From the pop-up activity chooser window, locate and select The Assignment activity, then click the ’Add’ button.
Step 4: Provide a name for your activity
Now you come to the assignment creation page.
- Please complete 'assignment name' and 'description'.
- Then click 'save and return to module' at the bottom of the page to save the settings

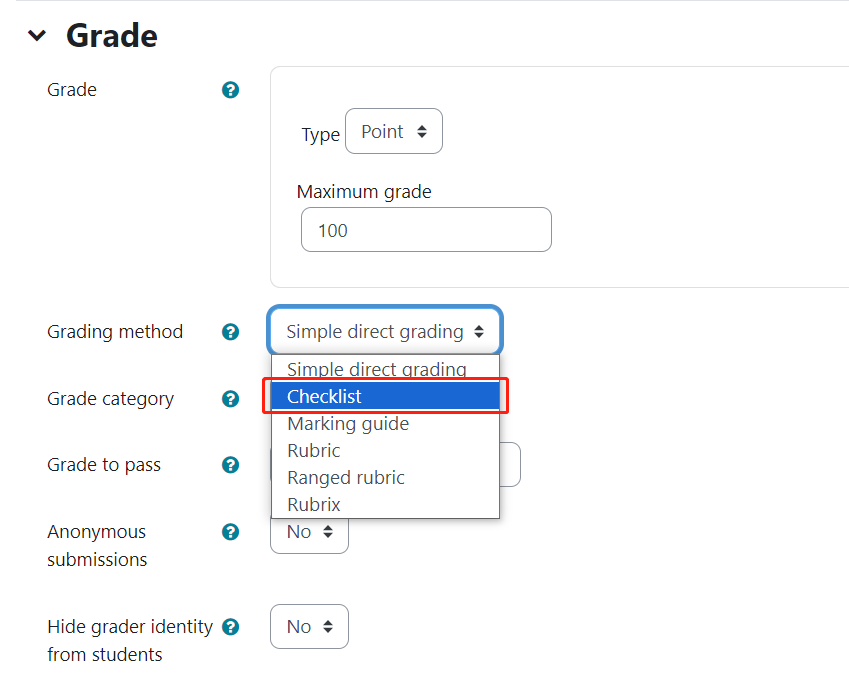
Step 5: The checklist function
You’ll now go to the settings area within this area scroll down to the ‘Grade’ section, then from the ‘Grading Method’ drop-down menu please choose Checklist, then 'Save changes'.

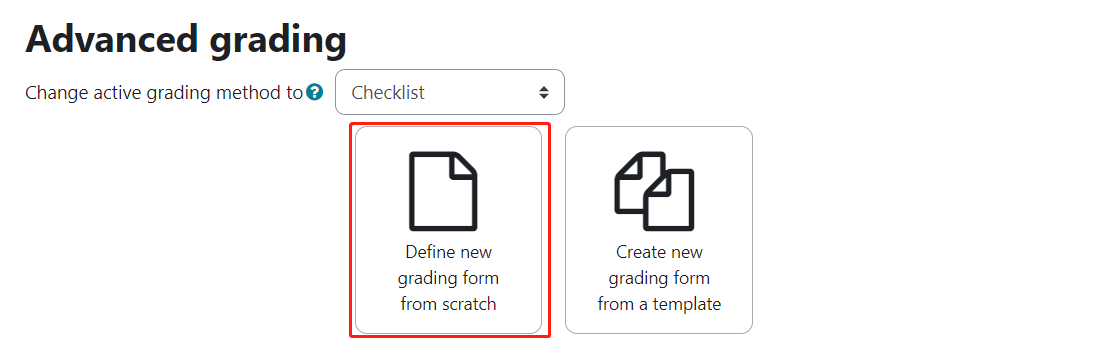
Step 6: Selecting the grading form
Now you are taken to a screen where you can choose the grading method either by using a template or creating a grading from scratch. Alternatively, you have the option of even changing the grading method.
Step 7: Naming your checklist
You will have to name your checklist, much in the same manner as you named the Assignment activity initially.

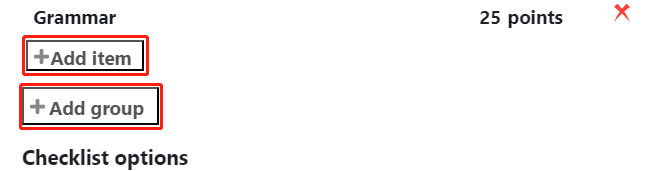
Step 8: Defining your checklist
- Provide a name for the checklist group
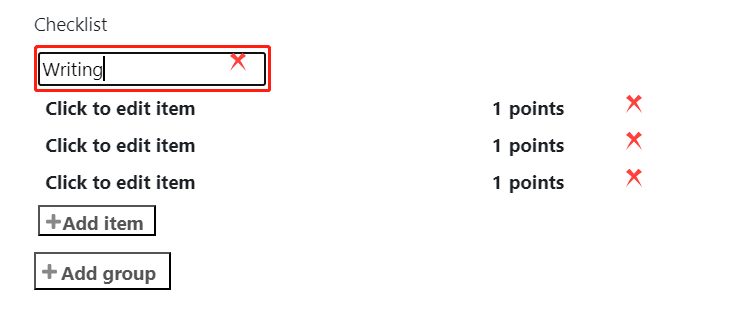
- Provide the criteria item

- Provide the score associated with each item

-
If required create another criteria item or another group.
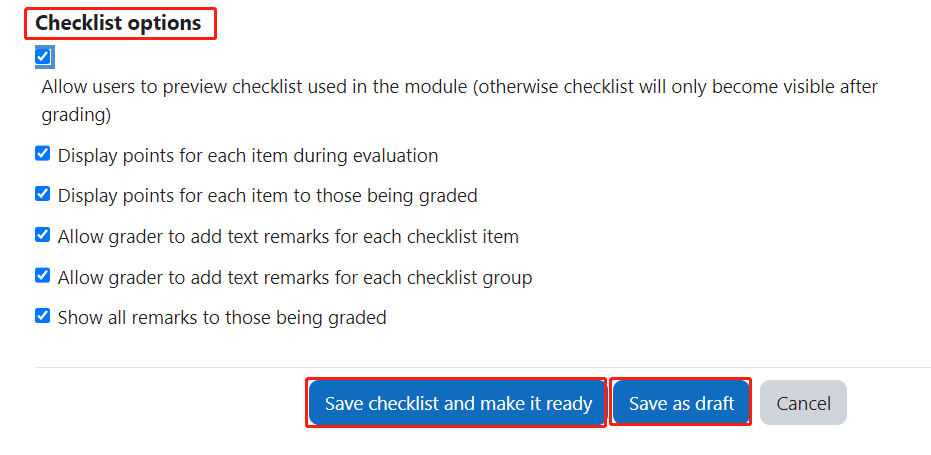
Step 9: Saving the checklist
Once you have completed your checklist go down to the 'Checklist options' decide which ones are applicable for your needs then save the checklist as a draft or make it ready for use.
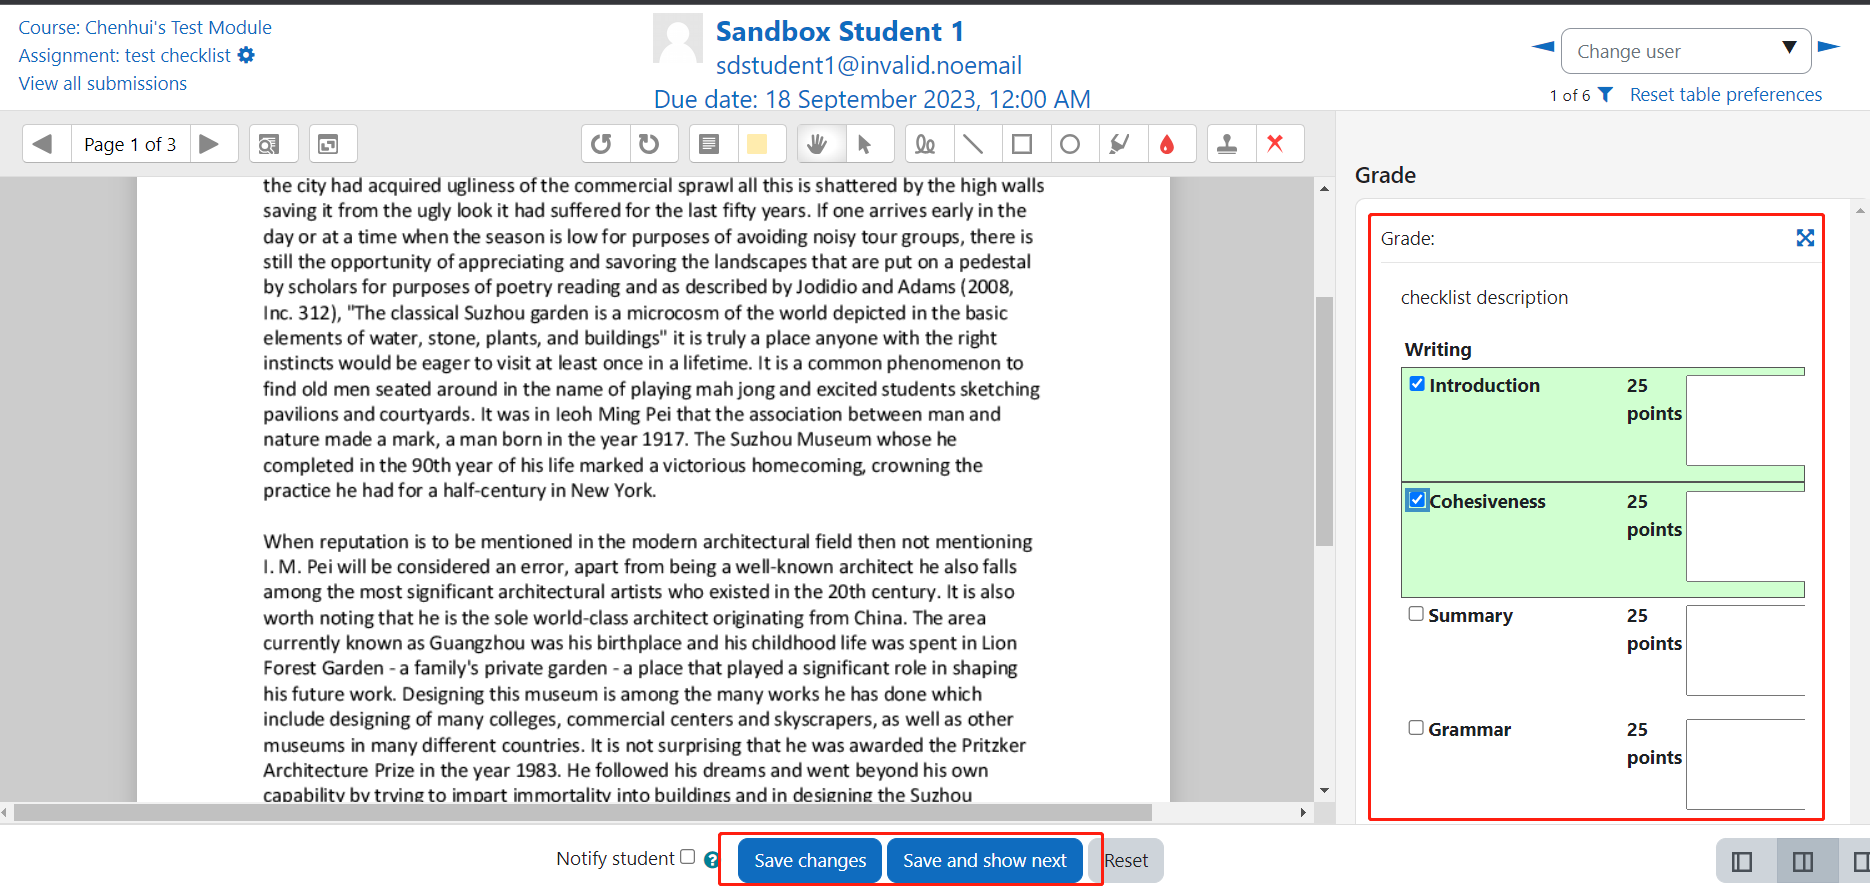
Step 10: Use the Checklist marking criteria
Then you will be able to view the Checklist marking criteria when you are marking student submissions.
You can click the criteria items and add feedback comments. Then click 'Save changes' or 'Save and show next' buttons.
Next steps:
Now that you have finished creating a Checklist, you may be interested in the following related articles:
Advanced Grading Method: Rubric Advanced Grading Method: Marking Guide
![]() Creative Commons License
Creative Commons License
Except for third party materials and unless otherwise stated, content on this site is made available under Creative Commons licenses.