Allocate Multiple Students to a Grader at Once - Assignment

An example of allocating multiple students to a grader at once
Overview:
This guide will show you how to allocate markers to specific submissions. This could be used to ensure that subject specialists are assigned to mark questions about their specialism.
What to know:
You will have to enable the "Marking Allocation" first in the setting area of Assignment. This can be set up if more than one marker is needed for an assignment.
Table of Contents
- Step 1: Turn on editing mode in your module area/course
- Step 2: Go to the Grade section
- Step 3: Save settings
- Step 4: View/grade all submissions
- Step 5: Select all or some of the submissions
- Step 6: Set allocated marker
- Step 7: Select markers from the module
- Step 8: Save changes
- Step 9: View markers
- Step 10: Filter markers
Step 1: Turn on editing mode in your module area/course
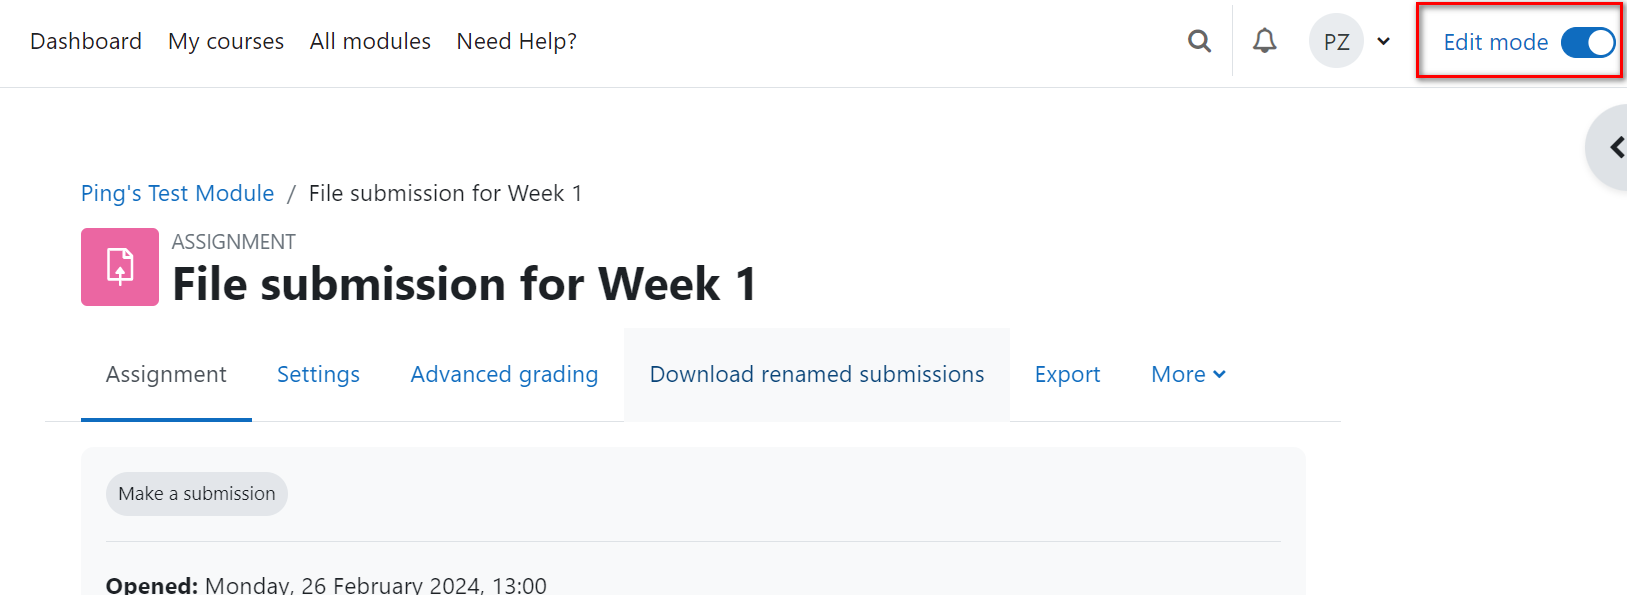
Click the ’Turn editing on’ button displayed near the upper right of the module area/course.

Step 2: Go to the Grade section
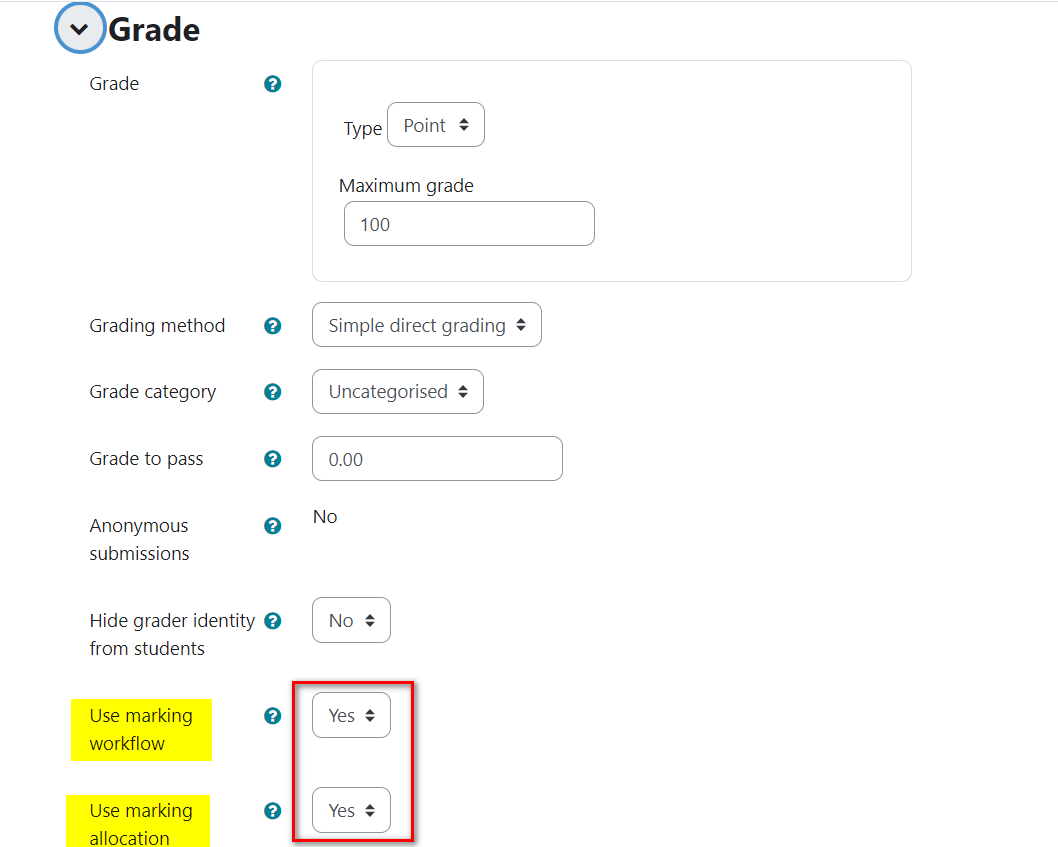
Go down to the 'Grade' section on the assignment settings page (if grade settings are not displayed click on the arrow symbol to the left to display).
1. Set Use marking workflow to yes.
2. Set Use marking allocation to yes.

Step 3: Save settings
When you are happy with the settings, click Save and display to return to the activity.

Step 4: View/grade all submissions
In the course in which you have set up the Assignment, click on the link to the activity then click to View/grade all submissions.

Step 5: Select all or some of the submissions
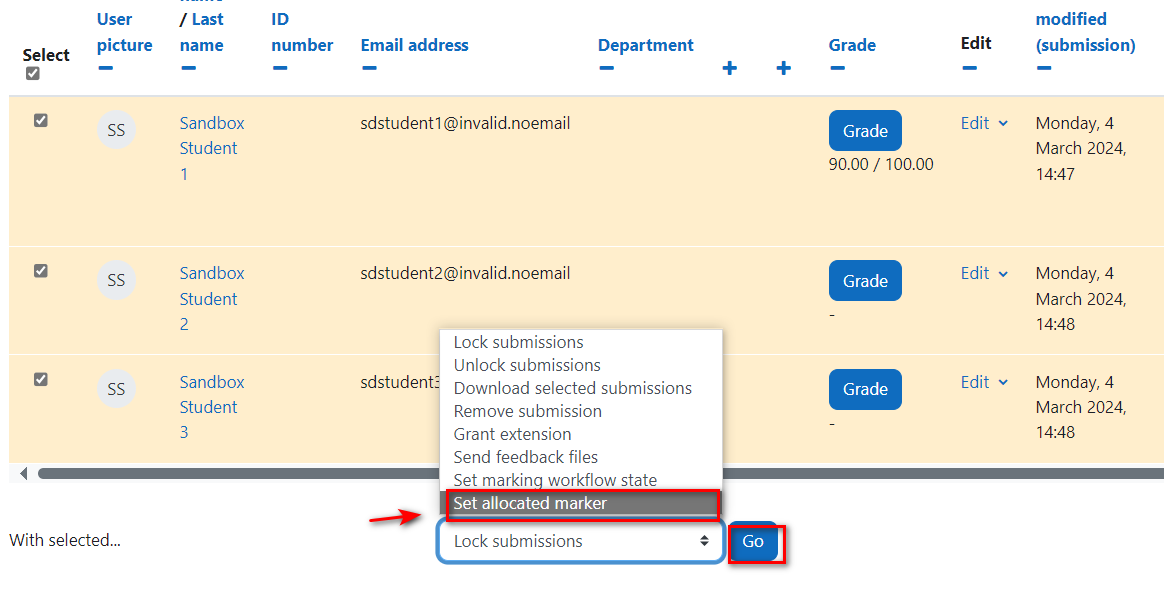
In the Grading table, under the Select column (first column at left), select each student to allocate to a grader.

Step 6: Set allocated marker
In the drop-down box under the list of submissions, select Set allocated marker and click Go and OK.


Step 7: Select markers from the module
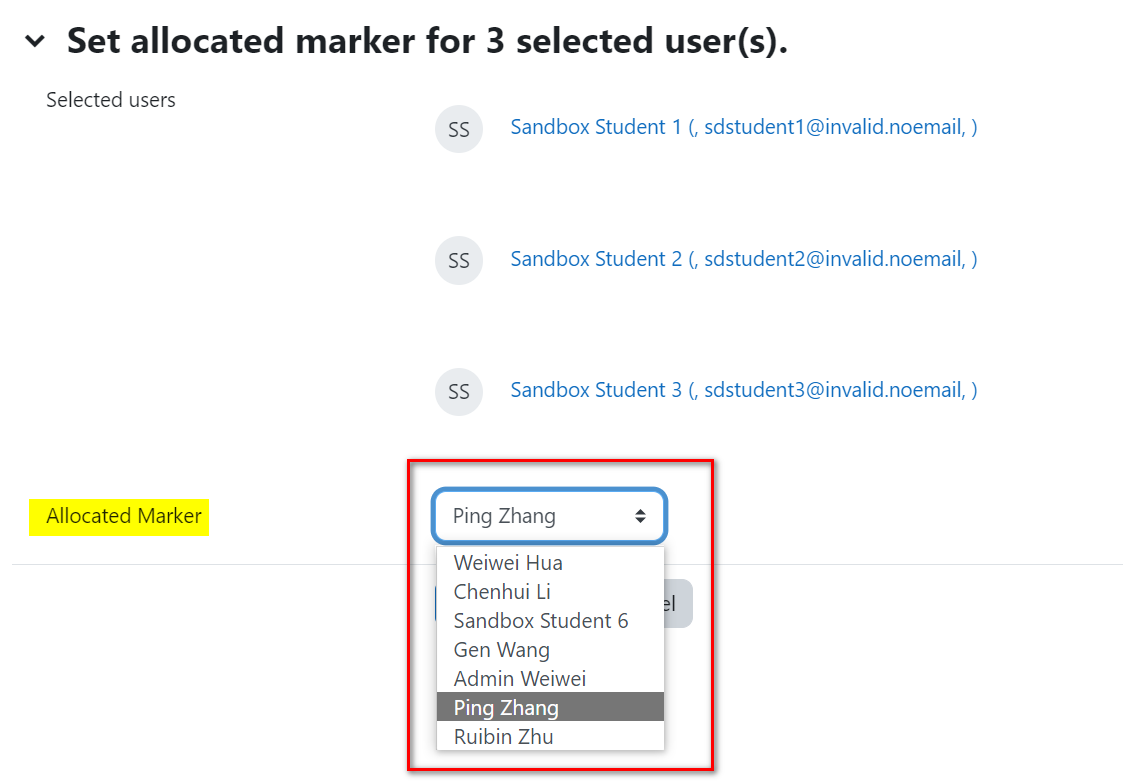
On the next screen, select the Allocated marker from the drop-down list.

Step 8: Save changes
Click Save changes.

Step 9: View markers
The name of the allocated marker is now shown in the grading screen. When the markers access the Assignment they will only see the submissions which are allocated to them.

Step 10: Filter markers
To show your marking allocations, go down to the bottom of the submission list and use the ‘Marker filter’ where you can select your names from the drop-down list.

Tips:
Only module leader can allocate markers in the course. When enabled and set up, markers can enter grades only for their designated students.